RSS Feed

May, 2014

  1. Elderflower champagne and cordial

    May 31, 2014 by sarah

    Late May into mid-June, depending on the weather that year, is elderflower time. And that is a very important time for me because it means it is time to make my own home brewed alcoholic beverage that is elderflower champagne. To me it marks the start of summer as they only flower when there has been enough sunshine. I have just finished the last bottle of last years brew and the date on it was July as last spring was awful. It is a delight to see the hedges filled with frilly lace caps of the elderflower heads and I start planning how many litres of the stuff I will make and if I have enough sugar and the lemons… The best time to pick the flowers is late morning on a dry, sunny day. You need a few hours of sun on the flowers to bring out the aroma but not too much otherwise they turn musky, almost a cat-pee smell, and I can’t image that is nice to drink. The best flowers are the ones that are still creamy coloured and not all the individual flowers have opened on the head; avoid the bright white or slightly brown heads as these are past their best. It is best to collect the flowers with scissors into a basket so that any insects drop off the flowers on the way home with your precious load. Use the flowers as soon as you have picked them. Remember not to pick all of the flowers as you want to be able to return in the autumn for the fruits!

    DSCN1500

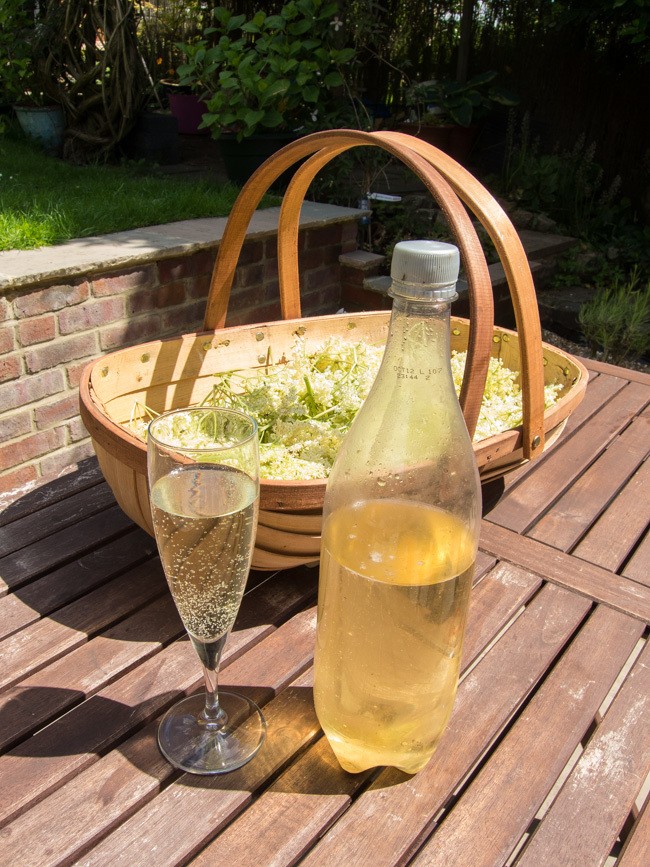
    Last of last years champagne with the flowers picked for this year’s brew!


    A few care warnings about this brew. I have no idea how alcoholic it is. In fact, it seems to vary from batch to batch as to its leg wobbliness effects. It is very much like cider in its effects; its doesn’t taste alcoholic and goes down easy and you don’t realise it has any effect until you stand up! Also, and this is VERY important, the brew is highly explosive, especially for the first few weeks as the pressure builds up. For this reason I reuse plastic pop bottle because if they do go bang you don’t get shards of glass everywhere and with a screw cap you can gently release the pressure as necessary. For the first couple of weeks I keep the bottles in the kitchen and feel the bottles daily for the tenseness of the plastic and I tend to release the pressure daily for a week then every second day for another couple of weeks until noticing that they are not completely taught when ready to be released. They perhaps get one more release before being stored somewhere cool and dark.

    I also make several litres of elderflower cordial which is a wonderfully fragrant ingredient for flavouring ice creams, panna cottas, other creamy desserts such as cheesecakes and the perfect pairing with gooseberries (which annoyingly come a few weeks later so the cordial is a great way to store the flavour until the gooseberries are ready for their turn). I also love the cordial diluted down with ice cold sparkling water; a refreshing summer spritzer. I have seen recipes for deep-fried elderflowers or fritters and I am dying to try them, if only I get long enough off work to pick some more flowers!

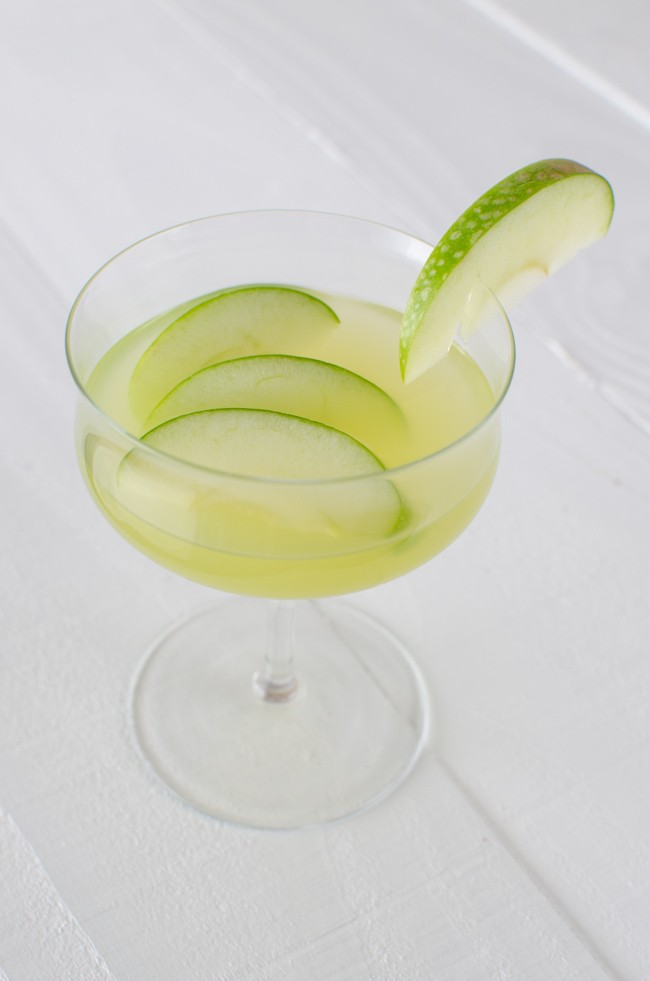
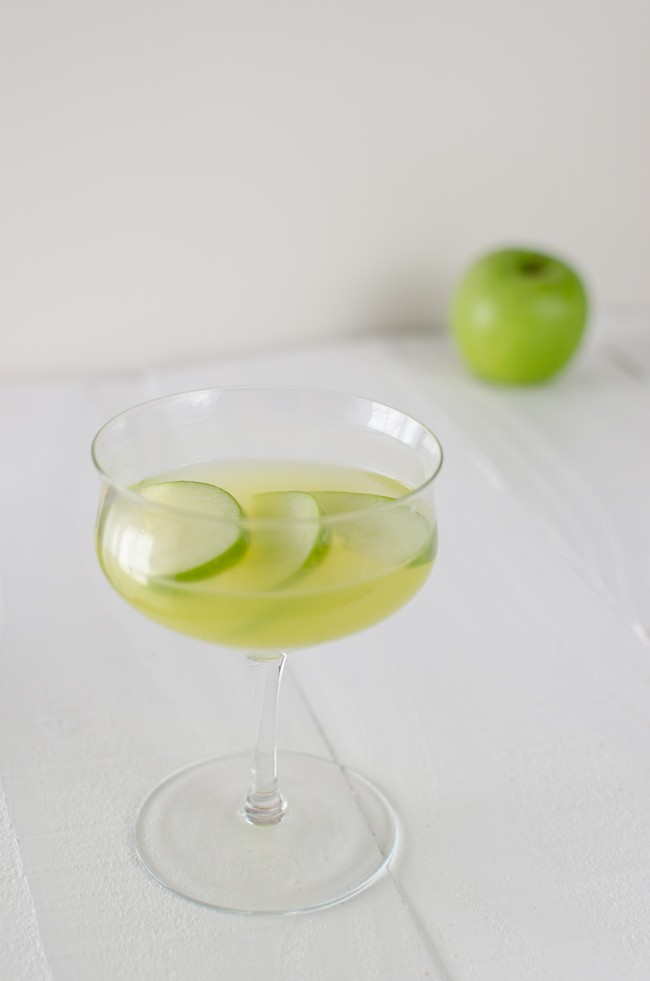
    This year I have also made a variation on the champagne theme as my parents brought me a huge bag of rhubarb from Scotland. So there are also 3 bottles of rhubarb champagne to try in a few weeks. It is a pretty pink colour. Anyone for a glass?


    Elderflower Champagne

    1 kg granulated sugar
    juice and zest of 4 lemons (organic, wax-less)
    2 tablespoons white wine vinegar
    about 30 elderflower heads – shake to dislodge insects before adding
    a teaspoon of wine yeast or a few pinches of baking yeast
     
    Boil 4 litres of water in a pan.
    In a large clean bucket, tip the sugar and then the hot/almost boiling water over the top. Use a clean spoon and stir until the sugar has dissolved. Add another 2 litres of water to the bucket.
    Allow this to cool to tepid/luke warm before adding the lemon juice, vinegar and elderflowers. Stir in the yeast.
    Cover with a lid or clean tea towel and stir daily.
    After 5-7 days when the brew is bubbling away well, strain the brew through a sieve lined with muslin and decant into sterilised bottles (I sterilise mine with Milton tablets and rinse out with a little boiled water so as not to taint the taste).
    Do the pressure releasing as described above and wait at least a few weeks before drinking; it is best served very cold and open the bottle very slowly so the yeast that collects in the bottom does not rise. It will keep in a cool, dry place for up to a year.
     
    DSCN1504

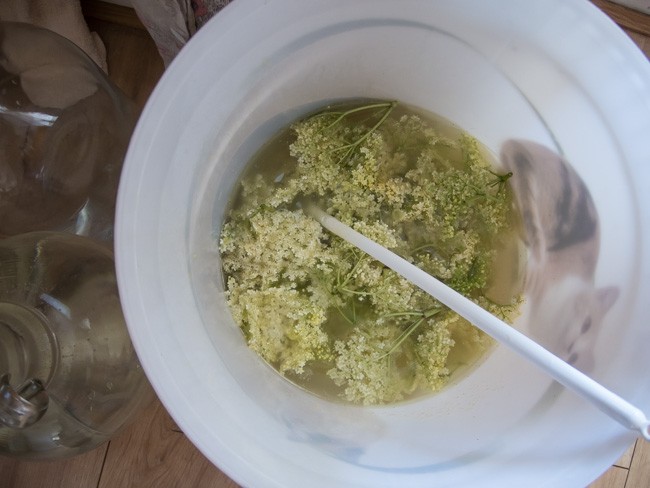
    The champagne bucket!

    Elderflower Cordial

     
    1 kg granulated sugar
     zest of 2 lemons which then sliced roughly
    25g citric acid (available in Wilkinsons)
    30 plus elderflower heads – more is easily acceptable
     
    Boil 1.5 litres of water. In a large clean bucket or bowl, tip the sugar and then pour the boiling water over; stir until the sugar has dissolved.
    Leave to cool and then add the other ingredients. Stir at least once daily for 5 days. Strain through a sieve lined with muslin and decant into sterilised bottles.
    This will keep in the fridge for a few weeks or in the freezer indefinitely. Remember if freezing, leave a little space at the top of the bottle for expansion.
     

    Rhubarb Champagne

     
    2kg rhubarb, roughly chopped
    2 lemons roughly chopped
    2 tablespoons of white wine vinegar
    1.5kg granulated sugar
    1 teaspoon wine yeast or few pinches of baking yeast
     
    Boil 4 litres of water.

    In a large clean bucket, tip the sugar and then the hot/almost boiling water over the top. Use a clean spoon and stir until the sugar has dissolved. Add another 2 litres of water to the bucket. Add the rhubarb now (unlike the elderflower champagne).
    Allow this to cool to tepid/luke warm before adding the lemons, vinegar and yeast.
    Cover with a lid or clean tea towel and stir daily.
    After 5-7 days when the brew is bubbling away well, scoop out the rhubarb with a slotted spoon and strain the brew through a sieve lined with muslin and decant into sterilised bottles (I sterilise mine with Milton tablets and rinse out with a little boiled water so as not to taint the taste).
    Do the pressure releasing as described above and wait at least a few weeks before drinking; it is best served very cold.
     
    DSCN1494

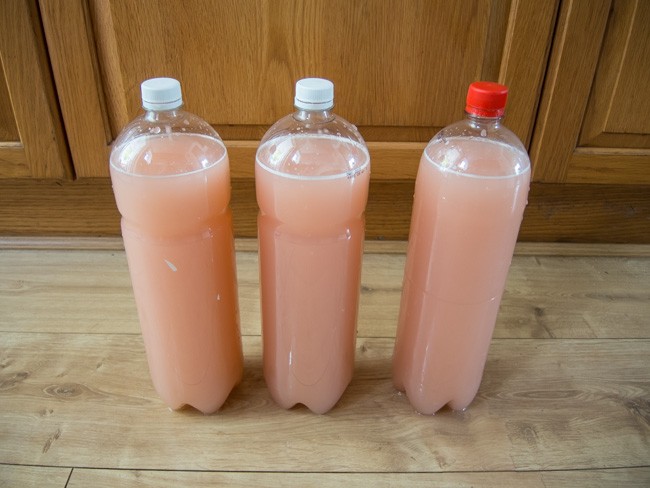
    Rhubarb champagne freshly bottled.


  2. Quilt number one is finished!

    May 27, 2014 by sarah

    quilt (2 of 3)

    The back – I love the patchwork strip I added.

    quilt (1 of 3)

    The front.

    quilt (3 of 3)

    The label

    Last week was a whirl wind of activity in order to get the baby quilt finished in time for its flight to the USA with my parents to get to my new neice. I didn’t get any of it done during the week before because a rotten cold and no energy (hopefully linked). So I watched a few YouTube videos on how to do binding plus some very useful websites and blogs (here and here). I got started at Plain Stitch’s Wendover Sewing Bee on the Tuesday evening, though I think I spent more time chatting and natting than actually sewing, and then finished it on the Friday I had off work. The ladies at the Sewing Bee were adamant I add a label so that was an extra job I hadn’t accounted for but luckily I have some fabric pens so it didn’t take too long to do. And I have to say the label finished it off nicely and I am very proud of my first proper quilt!


  3. Afternoon Tea – chocolate eclairs

    May 25, 2014 by sarah

    A lovely thing to do when friends get together is to make something that can be shared around and enjoyed by all. And last Friday I had the occasion as the practice where I work had a communal Birthday lunch so that we could all celebrate (or not) our Birthdays on one day. More like a ‘unbirthday party’, for you who remember Disney’s Alice in Wonderland. The weather wasn’t too bad so we had a BBQ outside in the garden and I made something sweet for after. I love a fresh pastry and rarely eat cream so these pastries were a real treat.

    I made chocolate eclairs, some meringue nests filled with cream and fruit and strawberry tarts. OK, I cheated a little; the pastry tartlet cases are bought not homemade but all the rest was made by my fair hand. This was only the second time I had made choux pastry and I have to say, it really isn’t too hard. In fact, I only just got over my phobia of making shortcrust pastry last year and I think that choux pastry is actually easier! Well, that’s done it. I am sure next time it will be a complete failure! I will share the recipes for meringue nests and crème patissière on a future post. If the weather is good this Bank Holiday weekend, why not treat your loved ones to some home made pastries as part of an afternoon tea. A lovely way to celebrate together.

    chocolate eclair (3 of 4)

    Cake stand of yummy homemade things!

    chocolate eclair (4 of 4)

    Platter of meringues and strawberry tarts

    Chocolate Eclairs

    Makes 18-20 mini eclairs or 12 full sized ones.

    For the choux pastry

    50g unsalted butter

    65ml water and 65ml milk

    Pinch of salt

    100g plain flour, sifted

    3-4 medium free-range eggs, beaten

    For the filling

    300ml whipping cream, whipped to firm peaks

    Or 450g crème patissière

    The icing

    50g plain chocolate

    2 tablespoons of water

    15g butter

    75g icing sugar, sifted


    chocolate eclair (1 of 4)

    Method

    1. Preheat the oven to 220°C/fan 180°C. Lightly greasy 2 baking trays or line with silicone paper.
    2. For the choux pastry, place the water, milk, butter and salt in a medium non-stick saucepan over a medium heat. Heat gently until the butter has melted then bring to the boil.
    3. Quickly take the pan off the heat, add all the flour at once and beat furiously with a wooden spoon until the mixture is completely smooth and comes together in a ball.
    4. Continue to beat on a low heat for a minute so the mixture comes together in a ball.
    5. Allow to cool slightly then beat in the eggs, one spoonful at a time into the dough. This is very hard work and you need to keep going until the pastry has a smooth shiny consistency and is paste like. You may not need all the eggs to reach the correct consistency as it must not be too soft as it needs to be piped.
    6. Transfer this pastry to a piping bag fitted with a 1cm (1/2 inch) plain nozzle and allow it to sit for 5 minutes to firm slightly. Now pipe the pastry in 3 inch (7.5cm) straight lengths (or full size eclairs are 6 “), leaving room between to spread. Apparently for a professional finish you can pipe into long lengths then freeze the pastry. Then cut the frozen lengths into uniform lengths and defrost before cooking.
    7. Bake the pastry at this temperature for 10 minutes then turn the temperature down to 190 °C/fan 170°C and cook for another 20 minutes.
    8. Remove the pastries from the oven and while still hot and pierce or cut to release the steam and if they feel damp on the inside, place back in the oven for 5 minutes.
    9. Allow to cool fully on a wire rack before filling. If not filling immediately, place in an air-tight container and use within a couple of days. If they are slightly soggy when you take them out, give them another 5 minutes in the oven.
    10. Pipe in the whipped cream or cream patisserie (use a star nozzle for the cream, plain nozzle for cream pat).
    11. For the icing, melt the chocolate slowly in a bain mairé with the water and butter. Remove from the heat and beat in the sugar until smooth. Pipe or spread over the top of each eclair.

    One last thing. The icing recipe didn’t work too great (I found it in Mary Berry’s book) but that may have been because it set firm before I was ready for it so I had to rewarm it and that is when it went grainy. Just to warn you if it looks like it is not going to work, perhaps just go with melted chocolate.chocolate eclair (2 of 4)


  4. Vintage Style Wedding on a Budget

    May 24, 2014 by sarah

    I thought I would share with you some of the lovely photos of our wedding. I can’t believe that we are coming up to our fourth wedding anniversary; the time seems to have slipped by. And before you ask, yes, we are just as happy as ever. Cute! And it is also a milestone for my better half; the longest he has ever lived in one place.

    Our wedding was on a strict budget for two reasons; we were short of money as Jim had been unemployed for six months so I would have to pay for most things and we both believe that you shouldn’t start married life with debt (apart the mortgage). But looking back on it, even if I had had a larger budget I wouldn’t of done anything different. We had everything that was important to us. I would of liked a lovely sunny day, but even money can’t buy that!

    wedding (3 of 13)

    Church flowers done by a friend of the family

    wedding (2 of 13)

    Church flowers done by a friend of the family


    My tips for budgeting a wedding:

    1. Before you start, decide how much you can comfortably afford by saving up before the wedding or working more overtime or selling stuff.

    2. Now put aside a chunk of this (I suggest 10%) and the remainder is your budget. This reserve is because everything costs more than you think.

    3. Between the both of you, decide on two or three aspects of the wedding that are important to both of you. We decided on food and photography. Expect most of your budget to go on these things as they are important; the rest is ‘dressing’.

    4. Think outside the box. In other words, don’t think or mention ‘wedding’ when looking at venues, dresses etc. Village halls are much cheaper than hotels!

    5. Personalise the day and put in some of your personality. For example, make the decorations or invitations, hire a swing band.

    6. Ask favours and rope in friends and family to help with things like the set up and clear up, and possibly even the chauffeuring.

    7. Reduce the number of people you invite and reduce the length of the party – both of these will save pounds.

    8. Making stuff yourself doesn’t always save money when you take into account the time it will take you and material costs.

    I also made back some of the money I had spent by selling or reselling some of the things on eBay – I even got a sizable profit from the vintage china!

    wedding (4 of 13)

    Place settings of vintage china, handmade menu cards, favours of wooden hearts and name tags

    wedding (5 of 13)

    I made the table flowers – mix of garden and bought flowers in Ikea vases

    wedding (8 of 13)

    My mother made the cake – multiple people decorated it when the chocolate ganache finish had a mishap.

    wedding (9 of 13)

    I made my own jewelry after seeing how much it was to buy.

    wedding (13 of 13)

    I wanted an ice-cream cart of van but couldn’t afford to hire one so my Father made this, I bought a small freezer off eBay and filled it with homemade and bought ice cream!

    wedding (10 of 13)

    I made the table plan with a home printer and pretty wallpaper on foam board.

    wedding (11 of 13)

    Another view of the jewelry I made – hair comb, diamante pins and earrings.


  5. Monster Egg

    May 17, 2014 by sarah

    When I opened the nest box today, I could not believe the egg that was there – a monster. I know this must be Mrs White’s egg as the other two are pullets so are laying medium sized eggs at present. This one though weighed a whopping 98g! Here they are enjoying the freedom of the garden before they started digging up my veggie beds.

    egg (1 of 3) egg (2 of 3) egg (3 of 3)


  6. All the greens of Spring

    May 14, 2014 by sarah

    Having just come back from foreign climes, where the environment is much more arid than home, means I am fully reveling in the luscious greenness that is May in England. No dusty or faded colours paint the landscape green here. It is as if everything has been slapped with the freshest glossiest paint of every green shade imaginable. The frothy lace of cow slips fills the gap between hedge and path and hawthorn blossoms drip from every branch above and delicately fragrances the air. It seems I am not the only one rejoicing in the fullness of Spring; every little bird is singing at the top of his little voice as he flits from bush to bush busying himself with household chores. And the cows are chasing us along the footpath, though as I turn to confront them the breaks are applied so suddenly as to make the ground thunder under their hooves. What joys!


    spring (7 of 7) spring (6 of 7)


    We are incredibly lucky to be living near one of the best bluebell woodlands in the country at Ashridge Estate. My heart was beating with anticipated excitement as we drove through the prettiest little village of Aldbury to get to Ashridge. And then it gave a little skip as we turned a corner on the path and there was the most amazing surreal blue sea spread out below the fresh young green of the tall beech trees. There was a fantastic display this year and yet every year it surprises me at how blue it all is. In another week or two it will be just a memory again.

    spring (2 of 7)

    While at Ashridge, we picked some wild garlic leaves as I always had in the back of mind that there must be something of use in them seeing as how they smell so strongly as you brush past on the footpath. And boy, I was not disappointed; raw the crisp leaves are crunchier than spinach with a green taste and pungent aroma of garlic; cooked, the softness is comparable to spinach and the garlic is tempered to a light scent. I ate handfuls straight from the carrier bag; I had leaves folded into a soft egg omelet. I was still left with half a carrier bag and yet wanting to preserve their uniqueness for longer than the leaves would last even in the fridge. And then I remembered a dish that John Wright from River Cottage cooked us when we went on the River Cottage hedgerow course a few years ago; wild garlic pesto. Of course, John made his with pig nuts which we spent many happy hours digging out of their water meadow but in real life only a sadist would want to waste time digging up a tiny pea sized bulb of a plant to make a dish. (Sadly, I have been known to go to such lengths) So I made mine with walnuts brought back from Iran, and I have to say I do not think the recipe suffered for the change. Indeed, if the feeling takes you then please make fresh gnocchi for the second recipe but also do not feel guilty using good quality ready made gnocchi; I don’t.

    spring (9 of 3) spring (8 of 3)

    Wild Garlic Pesto

    60g young wild garlic leaves (please look this up in a book to be sure what you are picking)
    1 small garlic clove (if you don’t think the leaves are garlicky enough!)
    50g nuts – pine nuts are traditional but walnuts, hazelnuts or almonds would work
    60g parmesan cheese finely grated
    zest of half a lemon
    150-200ml light olive oil or rapeseed oil (do not use virgin olive oil, you will not taste it)
     
    In a small food processor, blitz the garlic leaves and garlic clove with a good glug of the oil.When chopped down, add the nuts and blitz again until the nuts are fine. Add the cheese, lemon zest and a good pinch of sea salt and blitz again to mix. Add the remaining oil in small lots until the desired consistency is reached. Store in a sterilised jar with more oil over the top. Keep in the fridge and use within 2 weeks.
     
    spring (10 of 3)

    Gnocchi Primivera

    A 300g packet of fresh gnocchi (do not use the long-life vacuum packed packets in the pasta isle)
    2 tablespoons of fresh wild garlic pesto
    100g English asparagus
    a good shaving of fresh parmesan
     
    Cook the gnocchi according to the packet – using just dump them in boiling water and they are ready when they float. Steam the asparagus. Drain, reserving a little of the boiling water.
    Put the gnocchi back in the pan with the asparagus which you have chopped into short batons and stir through the pesto.
    Serve up and liberally sprinkle over large shavings of parmesan.
    Put the gnocchi

  7. Appletini Time

    May 9, 2014 by sarah

    It is Friday evening and that means cocktail time! Only kidding, but it is a good way to start the weekend. This recipe is deliciously fruity and a bit sour, my favourite combination in a cocktail.

    apple martini (4 of 5)

    Apple Martini

     
    Combine 2oz vodka and 1oz green apple snapps in a cocktail shaker and fill with ice. Shake until well chilled. Pour into a cocktail glass and top up with fresh apple juice. My personal preference is about 50% alcohol to 50% apple juice and some more ice. Garnish with green apple slices.
     
    apple martini (3 of 5)
     

  8. I am back!

    May 7, 2014 by sarah

    I am back from my holidays; I need to tell you about Iran and show you some pictures. In the meantime, I am sorry but you will need to put up with some  random pictures as I caught the most humongous cold on the flight back and I am currently the sneezing snot monster. Sorry for the icky description but I hope to be back on form soon.

    apple martini (1 of 5) apple martini (2 of 5) apple martini (5 of 5)