RSS Feed

Posts Tagged ‘others’

  1. Ice cream cookie sandwiches

    August 4, 2016 by sarah

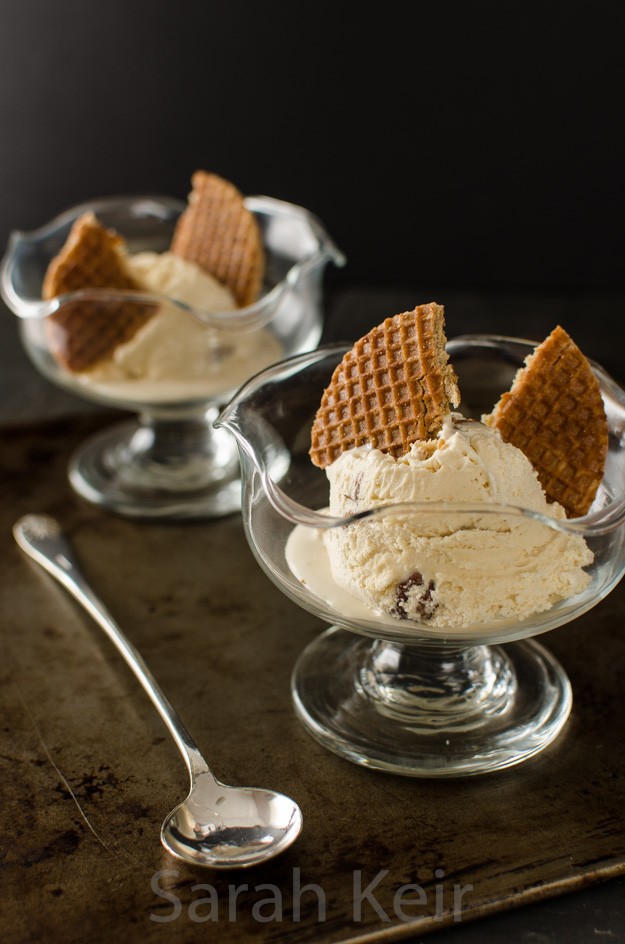
    It feels like summer has finally arrived; the schools are off so my commute to work takes half the time, the weather is warm enough to consider putting on a skirt or a dress (needs to be above 20°C for cold blooded me!), the lawns are looking a little yellow/brown, I can eat a meal outside (at least some of the time), my straw hat sits by the front door for walks in the evenings. And of course, ice cream. Not that I am against eating ice cream at any other time of the year, but in the summer the luxurious iciness seems perfectly, sublimely fitting. Almost  magical, probably from reminiscences of a ‘rose-tinted’ childhood!

    sandwich


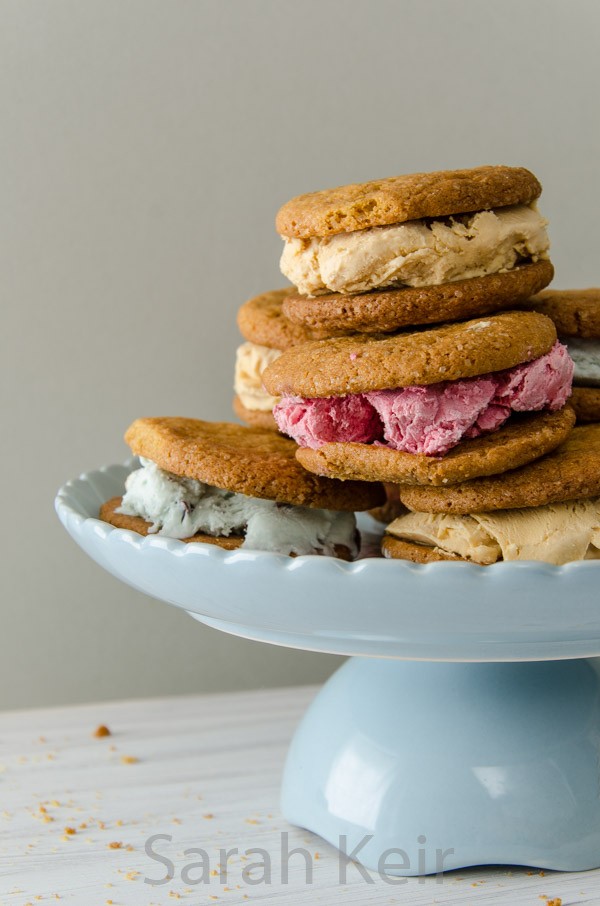
    I was inspired to make this recipe by the ‘delicious’ magazine that fell through the letter box at the weekend – this was the front cover. Though this recipe has several parts, it did not seem onerous to make. I have to admit to actually making the yogurt to go in the recipe, but only because I had excess milk in the house; please don’t bother. The ice cream recipes are supposed to be ‘non-churn’ but the raspberry ice cream was so hard that even after one hour out of the freezer, I needed to use a knife to get it out of the tub!! So I have amended the recipe so that it should not set as hard as concrete. Similarly, do not feel obliged to make ice cream at all; you can buy decent gelato at any supermarket (I admit to having a particular fondness for the cheap mint choc-chip – probably something to do with the Viennettas of the 80’s!).

    sandwich-2

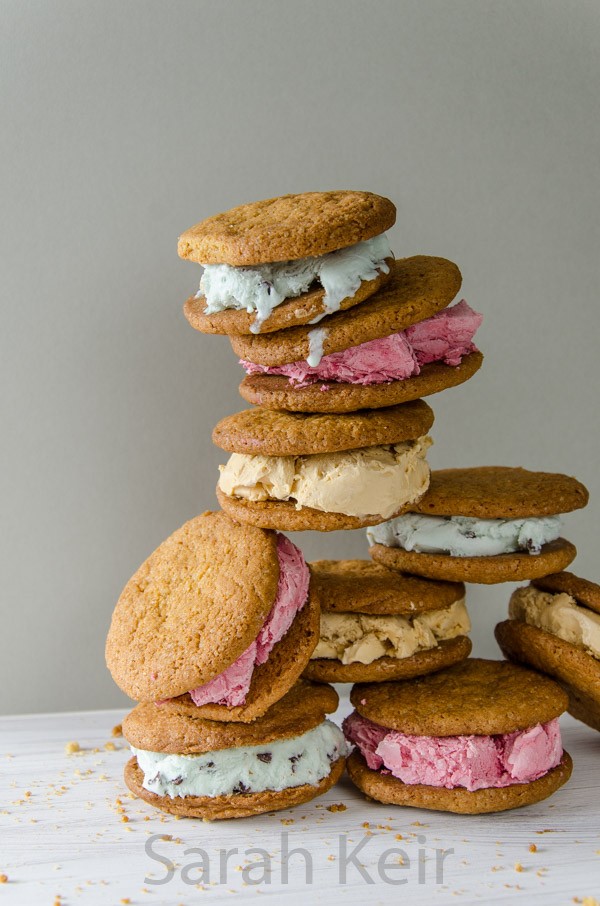
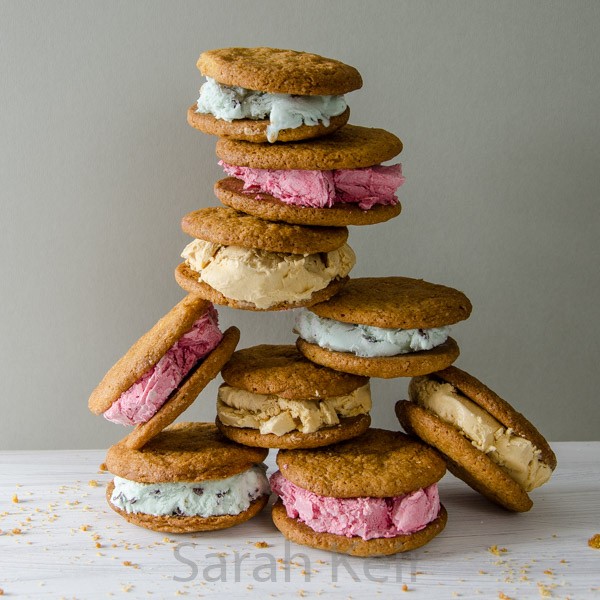
    IceCream Cookie Sandwiches

    Makes 10-12 cookies; they will keep in an airtight tin for a few days. The recipes make far too much ice cream for the cookies but it will keep in the freezer for a month.

    FOR THE COOKIES
    100g unsalted butter, soft
    100g caster sugar
    100g demerara sugar, plus extra to sprinkle
    1 medium free-range egg
    1 tsp vanilla paste
    165g plain flour
    1/2 tsp bicarbonate of soda
    1/4 tsp fine salt

    1. Heat the oven to 200°C/180°C fan and grease 2 large baking sheets with flavourless oil. Mix the butter and both sugars with a stand or hand-held mixer until pale and fluffy. Slowly add the egg and vanilla, then beat in the dry ingredients.

    2. Spoon the mixture on the prepared trays; half a dessert spoon was about right. Scatter with extra demerara sugar. Bake for about 8 minutes until golden around the edges and cracking in the middle. Remove the sheets from the oven and allow the cookies to cool for 10 minutes before removing with a spatula to a cooling rack to cool completely.

    FOR THE SALTED CARAMEL ICE CREAM
    397g can Carnation caramel (I used home made salted caramel sauce as I had it left over from making chocolates)
    350ml double cream
    200ml full-fat greek yogurt
    A large pinch sea salt flakes (if not using salted caramel!)

    In a stand mixer with the paddle attachment, beat until aerated and thick. Transfer to a freezerproof container with a lid and freeze overnight until completely firm.

    FOR THE RASPBERRY ICE CREAM
    350g tub frozen raspberries, thawed then pushed through a sieve (discard the seeds)
    100g icing sugar stirred into the raspberry puree
    400ml double cream
    100ml full-fat greek yogurt
    2 tablespoons of vodka or gin or invert sugar syrup

    In a stand mixer with the paddle attachment, beat all the ingredients until aerated and thick. Ideally churn using an ice cream machine otherwise transfer to a freezerproof container with a lid and freeze overnight until completely firm.

    FOR THE MINT CHOC CHIP ICE CREAM
    350ml double cream
    397g can condensed milk
    1/4-1/2 capful of peppermint extract
    50g dark chocolate, finely chopped
    +/- green food colouring

    In a stand mixer with the paddle attachment, beat all the ingredients until aerated and thick. Add the chocolate chips. Transfer to a freezerproof container with a lid and freeze overnight until completely firm.

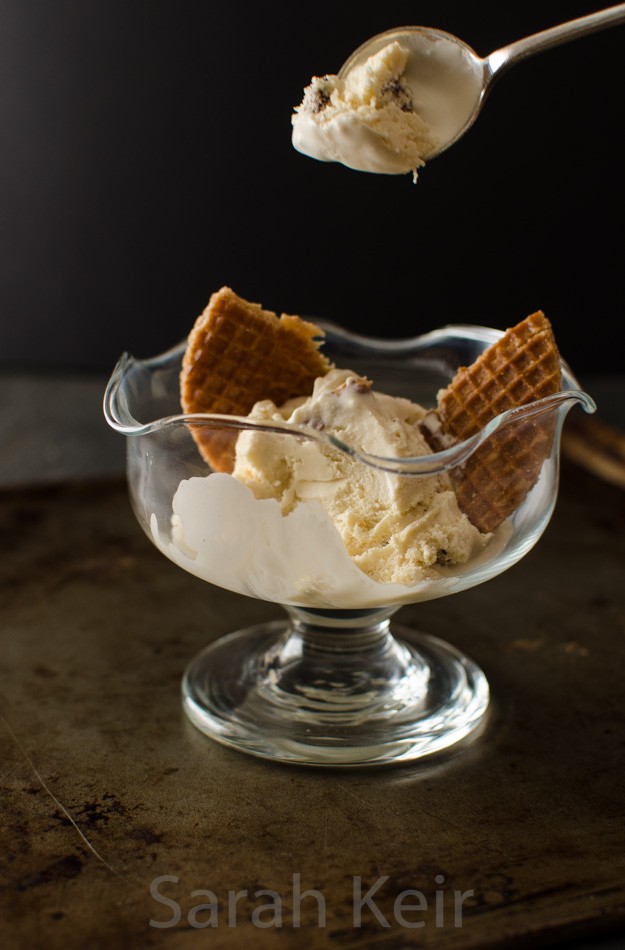
    To make the ice cream cookie sandwiches, take the ice cream out of the freezer at least 10 minutes before needed (sometimes they need much longer). Use a spoon to scoop out flattish scoops of ice cream; place onto the bottom side of a cookie and top with a second cookie. Eat immediately or put on a tray and freeze again for up to 24 hours.

    sandwich-3


  2. Nougat

    October 27, 2015 by sarah

    I love real nougat but usually only get to enjoy it at festive times. A couple of weeks ago I had some egg whites left over and felt in the mood for something sweet and decadent and decided to give it a try. The other option was marshmallows but I don’t like marshmallow so nougat it was. Nougat is a chewy sweet made with sugar and egg whites with nuts and dried fruit. This is ‘white nougat’ a traditional candy from Italy (“torrone”), France and Spain (“turrón”), though weirdly in Germany, gianduja (a smooth mixture of hazenuts and chocolate) is traditionally called nougat. So give this recipe a try and make some artisan nougat!

    nougat-005


    This recipe makes loads of nougat – you could half the recipe if you don’t think you could eat it all or give it away. This recipe is a combination of this one from Great British Chefs website and from Miss Hope’s Chocolate Box book of splendid recipes.

    nougat-002

    Artisan Nougat

    400g caster sugar

    100g liquid glucose

    125g runny honey

    2 egg whites (1 used 3 medium egg whites, about 100g)

    pinch of salt

    200g toasted whole almonds

    40g pistachios

    75g dried sour cherries

    rice paper

    Line the base and sides of a square tin with rice paper.

    Put the sugar, honey and liquid glucose in a large heavy-bottomed pan with 125ml water. Heat gently to dissolve the sugar and then place in a sugar thermometer and bring the mixture to the boil.

    As water is driven off, the temperature will rise; boil to 125°C.

    Place the egg whites in a stand mixer and beat until they form stiff peaks but no further.

    Continue to boil until 145°C is reached, then put the mixer onto medium speed and slowly and steadily pour the hot sugar over the egg whites while they are being beaten.

    When all the sugar is added, add the salt and turn the speed up and beat for 5 minutes until the mixture is thick and glossy.

    Fold in the nuts and fruit then press the mixture into the prepared tin and cover with more rice paper, pressing the mixture so it is level. Alternatively, place between two large sheets of siliconised paper and roll to make an even 2cm thickness. Allow to cool before cutting with a lightly oiled knife. It helps if you clean and oil the knife between each cut.

    nougat-001


  3. Chocolate Caramels

    August 23, 2015 by sarah

    When we were in Paris, which seems a life time ago even though it was only three months hence, I bought some Breton caramels from a posh Parisian shop. I was disappointed in them to tell the truth. All I could taste was sugar, and yes, the ingredients do contain sugar but they should also be buttery and creamy. Also they were crumbly like fudge, instead of smooth and almost chewy like a caramel should be. Only one thing for it; to make them myself. Which is what I did a few weeks ago. Unfortunately I forgot to take any decent photographs of them before they got devoured so you will just have to take my word for it as to how good they were. And the people at the Tea Party; they got to try them. They were so moreish that just one was not enough.

    caramels-001


    I used a combination of recipes from this blog and my ‘Patisserie Maison’ book by Richard Bertinet, a Christmas present from my Mother. A sugar thermometer is a must for this recipe. Use the best possible ingredients you can afford because you taste it all; I splashed out on proper French 40% crème fraîche and butter from Waitrose.

    Chocolate Caramels

    125g food quality chocolate, chopped
    100ml double cream
    100g crème fraîche
    200g caster sugar
    75ml water
    150ml liquid glucose (you can use light corn syrup if you are in the USA, or golden syrup)
    25g salted butter
    1 teaspoon sea salt

    Line a 8-9 inch (20-23cm) square pan with baking parchment.

    Heat the double cream and crème fraîche in a medium pan until just coming to the boil and the crème fraîche has melted. Remove from the heat but keep warm.

    In a separate pan with a heavy bottom, heat the sugar and water until the sugar has dissolved; then bring to the boil without stirring and add the glucose syrup. Simmer until the mixture is thick and syrupy; this took me about 15-20 minutes.

    Take off the heat and stir in the butter and the cream mixture. Put back on the heat and stir continuously and monitor the temperature until you reach 120 ºC. Take off the heat and stir in the chocolate and sea salt, stirring until the chocolate is completely melted.

    Pour the mixture into the prepared tin and leave until completely cool. Slice the caramel into squares and wrap individually in cellophane or parchment paper. They will easily keep for up to a month in a sealed container in the fridge.


    caramels-003


    Update 22/9/17 – recipe for a 8″ x 8″ pan to give a good even depth for dipping. Also cut in to 25mm x 25mm squares so this recipes gives 64.

    155g chocolate
    125ml double cream
    125g creme fraiche
    250g caster sugar
    95ml water
    185g liquid glucose
    30g salted butter
    1 teaspoon sea salt, ground in pestle and mortar

    These won first prize in the Wigginton Show this year!


  4. Spice 11 – Caraway – Sauerkraut

    June 2, 2015 by sarah

    I’m experiencing a bit of writer’s block. I have a folder full of recipes and photos to share . . . but I can’t think of anything to say other than: they are all delicious. And of course they are delicious or I wouldn’t share them with you. The problem is that the more recipes and photos I pile up here and the more I tell myself I need to get writing, the harder it seems to get down to it. Surely there is an end in sight though? The past week of writer’s block will surely translate to a very prolific week of words now? Well, we’ll see. I also keep being distracted by the thought of the patisserie in Paris. I think I need to find a ‘how to’ patisserie course.


    caraway-002


    Perhaps it is because my next spice is not really doing anything for me. Caraway has a pungent anise-like flavour and aroma, which is one group of tastes and smell I don’t get on with. Probably how it gets its alternaltive name of meridian fennel or Persian cumin. The seeds are actually fruits and are a member of the carrot family (thank you wikipedia). It is used extensively in Indian rice dishes and European rye breads, plus British seedy cake. The dish I came across in which I actually mildly liked its flavour was sauerkraut that I had a couple of years ago in Berlin. The recipes for making sauerkraut did not look hard, and indeed it was not difficult to make. The sharp-sour taste works well with pork and fish dishes.

    This recipe is from The Kitchn, altered by adding a  tablespoon of caraway seeds mixed with the cabbage. You can also try adding juniper berried too; lightly crush them first.

    Sauerkraut

    You need a large, or couple of, jars with wide necks. Probably the type you buy sauerkraut in from the supermarket. I used a couple of these jars from Ikea (they are like kilner jars) and they worked great too. The trick is making sure there is enough liquid to submerge the cabbage and to keep the cabbage submerged while it is fermenting.

    1 medium head of white cabbage
    1 and 1/2 tablespoons of table salt
    1 tablespoon caraway seeds

    1. Clean everything. You want good bacteria to ferment your cabbage so sterilise everything with boiling water.

    2. Prepare the cabbage. Remove the outer leaves, cut into quarters and remove the woody core. Then finely shred the cabbage and place in a bowl. I found my mandoline slicer invaluable for this step.

    3. Salt the cabbage. Sprinkle the salt over the cabbage in the bowl. Clean your hands and then massage the salt into the cabbage. You need to do this for 5-10 minutes until juice starts to flow from the cabbage. Mix in the caraway seeds.

    4. Pack the cabbage into the jars/s. Tamp down the cabbage to remove as much air as possible. Add any juice that collected in the massaging stage. You need to weight the cabbage down. The easiest way I found was to use one of the discarded outer cabbage leaves on top of the salted cabbage and place a full jam jar on top of this.

    5. Cover the jar but do not seal – a clean tea towel does fine. Leave out on the work top for several days, pushing down on the cabbage whenever you can. If the cabbage is not submerged in liquid by 24 hours then add some salt water (1 teaspoon in 250ml of water) to cover.

    6. Ferment the cabbage for 3-10 days at cool room temperature. The work top in my kitchen worked fine and meant I could keep an eye on the kraut. Start tasting it after 3 days and when it reaches your ideal of sourness then transfer to the fridge and seal the top to stop further fermentation. It will keep for a couple of months in the fridge.

    caraway-001


  5. Maple Pecan Ice cream

    April 19, 2015 by sarah

    It may seem a strange time of year to have an ice cream recipe but if the heating is on or a fire burning, then why not? Anyway, the weather we have been having over the past few weeks makes me think that this might be the summer so enjoy it while it lasts! Either that or it is global warming and we are all stuffed. Never mind, have some ice cream instead.

    ice cream-002


    You don’t need an ice cream maker to make ice cream; it is just easier with one. If you don’t have an ice cream maker then take the partially frozen ice cream out of the freezer every couple of hours and blend in a food processor or with a stick blender. I only have a very simple ice cream maker which you put the bowl in the freezer for 24 hours before hand. It works fine but I need to let the bowl defrost a little before using it otherwise the mixture freezes solid as soon as it is poured in!

    ice cream-001

    Maple Pecan Ice cream

    150g pecan nuts
    2 egg yolks
    50g soft brown sugar
    200ml milk
    175ml maple syrup
    300ml double cream

    Toast the pecans in a moderately hot oven for about 10 minutes. Remove from the oven and when cool enough to handle, roughly chop. Leave to one side.

    Whisk the egg yolks and sugar until thick and mouse like. Gently heat the milk in a non-stick saucepan until almost boiling then pour over the egg/sugar mix, whisking constantly as you do. Return this to the pan and heat gently while stirring continuously. The custard mixture is thick enough when a finger leaves a trail on the back of a spoon. Remove from the heat and allow to cool fully (overnight in the fridge is best).

    Whisk the double cream until ribbon stage then mix in the cooled custard and maple syrup. Use this mixture to make the ice cream following the instructions of your ice cream maker or the freezer/food processor method. Approximately 2-3 minutes before the end, add the chopped pecans.

    Store in the freezer and eat within a month.

    ice cream-003


  6. Lemon Curd Recipe (Yolks only) and Lemon Tart

    March 25, 2015 by sarah

    After making the Swiss Meringue Buttercream for the chocolate cherry layer cake, I had 4 egg yolks left over. The weather is too cold at the moment for ice cream (a good way of using egg yolks) so I searched for alternative uses for the yolks and came across some lemon curd recipes that just used the yolks. This recipe works well but I have say that since I have made lemon curd both ways, I prefer my lemon curd made with whole eggs as it is lighter in texture and richness. The upside is this recipe is it does not need sieving afterwards to remove the little lumps of firm egg white that inevitable form due to the whites cooking faster than the yolks.

    lemon curd-001


    With several pots of lemon curd in the fridge, I thought I would try making a lemon tart. I pre-cooked a couple of pastry cases (shortcrust or paté sucré) and then filled them with the fresh lemon curd. I tried caramelising the tops by sifting over some icing sugar and then browning under the grill – unfortunately all what happened was I burnt the pastry. But despite this the tarts were still delicious. Next time I will try topping them with some meringue for a lemon meringue tart.

    lemon curd-005


    I also must extol the virtues of a Microplane grater. Having struggled with all kinds of zesters and graters over the years, I gave in and asked for one for Christmas. And it truly does grate lemon zest faster and finer than anything else I have used. Try it for yourself.


    Yolk Only Lemon Curd


    4 egg yolks

    175g caster sugar

    100g butter

    zest and jiunce of 2 large lemons

    1/2 teaspoon lemon extract/oil

    In a heat proof bowl over barely simmering water, place all the ingredients. Stir until the butter is melted and then frequently stir until the mixture thickens. This takes 15 to 20 minutes. When thick enough to leave a clear path through the back of the spoon when a finger is drawn through, it is done. Pour into sterilised jars and leave too cool entirely. Refrigerate until needed but also freezes well. Eat within a couple of weeks.

    lemon curd-003 lemon curd-006


  7. Marmalade

    March 15, 2015 by sarah

    The start of Spring means marmalade making time. The required bitter-sweet Seville oranges are only in the shops for a short time around about now so I always buy a bag when I see them before they disappear again. They bring bitter-sweet thoughts of places that are currently sunnier and warmer than this grey cold British start to Spring. But the sparkling bright orange jelly and tangy orange peel warm any breakfast.


    marmalade-001


    It is a pain hand cutting the peel but there is no way round that; using a food processor just leaves mush, even a mandolin failed. The acid in the oranges also makes the skin of your hands go all pruney! But there is no way round it, so stick on some music and get down to work. Orange or other citrus marmalade seems to be a uniquely British product. I do not recall seeing it in any of the countries I’ve been to around the world. But a certain bear from deepest darkest Peru was rather fond of the stuff!

    marmalade-003

    Marmalade

    Recipe from ‘The National Trust Good Old-Fashioned Jams, Preserves and Chutneys’ by Sara Paston-Williams

    Makes approximately 6 jars.

    1kg Seville oranges
    1 lemon
    2.4 litres of water
    2kg granulated sugar

    Wash the oranges well as the rough skins are prone to be dirty. Cut them in half (plus the lemon) and juice them, reserving the pips. Scrape out the pith (white bits and membranes inside the oranges) and also reserve with the pips. Then shred all the rind fairly finely.

    Place the shredded rind, juice and water in a large saucepan and bring to the boil. Boil for about 2 hours until the rind is very soft and disintegrates when squeezed.

    Heat the sugar in the oven and when the rind is soft enough, add to the pan. Then use the oven to sterilise half a dozen jam jars and lids.

    Tie up the pips and pith into a muslin bag and add to the pan. Gradually stir to dissolve the added sugar. Once the sugar has been added, increase the temperature and bring the mixture to a rolling boil. Boil briskly, stirring frequently so it doesn’t catch on the bottom, for about 20 minutes before starting to test for the set. Once setting point is reached, take the pan off the heat, remove the muslin bag (squeeze well to get the goodness out), skim off any froth and allow the pan to sit for a good 15 minutes. Stir well before potting and stir while potting to evenly distribute the peel.

    marmalade-002


  8. Why I Cook and Blog – and Chocolate Truffles

    February 24, 2015 by sarah

    I am often asked why I put so much effort in to cooking and how I find time to write, photograph and publish this blog. I have been wondering the same thing myself lately. I have just finished 2 weeks of study time, cramming in an amazing amount of information into a sluggish and aging brain. But yet, instead of being sensible and filling the fridge with Marks and Spencer ready meals, I continued to cook our everyday suppers most nights and some treats too. I make the time because it is important to me. Yes, I could eat ready prepared food and it would be nutritious (mostly) and quick but it would not satisfy my soul. This blog may look like a collection of recipes but that is wrong way to look at it. This blog is about my cooking and cooking is about my life, not a list of recipes… I made this dish because I needed cheering up, I made this dish because it was January cupboard clear out, I made this cake for a special event. And so in my way, I am writing about life, my life.

    truffles-004


    Cooking makes me happy and happiness is an art and therefore requires practice and concentration; a different type of concentration to my studies and day-to-day work but no less demanding.  There are few true masters of happiness but we can all dabble, practice and improve. Like art, happiness is ‘in the eye of the beholder’ so whether something makes you happy or not is your choice. Food and cooking makes me happy so I continue to play with it. And the photography too. Also I am not hugging person and being an introvert it is difficult for me to express my care for other people except through my cooking for others and so this has become a tangible way of loving them. I hope they appreciate that. Cakes taste better if made with love.

    I thrive on being busy, when everything (especially emotionally) is in balance. Give me a challenge and I can think of nothing better than running with as far as I can, or until something better comes along. At school I was told I couldn’t do three sciences, so I did; I was told it was too hard to get into vet school, aim your sights lower, so I aimed higher; I was told I was just average and was bullied so strived to prove I wasn’t; I was getting too comfortable in my job so I aimed for a postgraduate certificate. And this blog is part of this journey of my life. I laugh at the photos I took just 18 months ago but look how I play with light now! But it is not easy and I constantly have to push myself to improve and currently this means getting up for work an hour early so I get the photography done in the short daylight hours of a British winter. No 12 hours of sunshine here, unlike the blogs I follow that are written in sunny California.

    Go find the happiness and importance in all you do.

    truffles-003


    I had meant to make these in time for Valentines Day. But it didn’t happen. I suppose part of me despises the crass commercialisation that comes with Valentines Day; the shops fill with pink and heart shaped things and ugly teddies and over priced flowers and cards with sickly sweet sentiments and overpriced heart-shaped food in a restaurant packed out with courting couples. So rather than have one overblown day of the year, my husband and I reaffirm our love on a regular basis with a simple ‘I love you’ when getting in from work, a spontaneous gift, a box of home made truffles…

    Chocolate truffles

    120ml double cream
    120g good quality plain chocolate
    1 tablespoon butter
    1 tablespoon golden syrup
    cocoa powder
    flavouring (optional) - orange liqueur, coffee liqueur

    Place all the ingredients (except the cocoa powder and flavouring) in a double boiler pan or a pyrex bowl over a pan of barely simmering water. The key is to make sure that the mixture is heated very gently. Stir occassionally until almost fully melted, take off the heat and stir until fully melted and smooth and glossy. Stir in your chosen flavouring if wished.

    Place in the fridge for a few hours or overnight until set.

    On a small plate, sift a good dredging of the cocoa powder. Have a second plate nearby. With a teaspoon (or melon baller of you have one), scoop out small scoops of ganache, roll quickly in your hands until roughly spherical, drop on to the cocoa powder and roll around until covered. Store on the second plate. If the chocolate ganache is turning into a sticky mess, cool it down by sitting it in the freezer for 15 minutes or so and cool your hands down (under a cool running tap if you can stand it).

    Once made, store the truffles in the fridge and eat within a week. You can customise these to your favourite flavour by adding a dash of spirits or flavourings to the mix before it sets. Or alter the outside by rolling in desiccated coconut or cocoa nibs.

    truffles-001


  9. Medlars – cheese and jelly

    December 14, 2014 by sarah

    When we were on holiday in Suffolk at the end of October, we came across a medlar tree in the car park of a National Trust property. I had a vague recollection of reading about medlars and being intrigued about this very old fruit, so after asking we filled a carrier bag full. They didn’t seem promising at that stage. I bit into one and it was hard and astringent (really unripe) but after some internet research, I found that they are only edible after ‘bletting’ which really is just another word for allowing to go rotten. So when we got them home, I laid them out in a flat box and put them in the shed. And forgot about them. Until this week. When I entered the shed I could smell a ripe fruity smell, which I followed to find the box of now bletted medlars! They had changed colour from a yellow green to deep brown. Eating them fresh is probably an acquired taste because at first I wasn’t sure if they were any good but after a few days of trying them, they grew on me. The fresh is a disgusting brown colour and a grainy but completely mushy texture, but the flavour is unique; like stewed apple with a hint of rhubarb. So here are a few posts on what I made with my medlars!

    medlar-003


    Medlars are related to roses and therefore apples. They contain about 5 large pips and a have a fairly tough skin. They were a fruit popular in medieval times and known as ‘cats (or dogs) arse’ because of their curious shaped bottoms! I have to say from a veterinary/anatomical point of view, they are not very anatomically correct. An unusual sweetmeat was made from spiced medlar cheese called chardequince, though it was made from that Cinderella of the British orchard, the medlar rather than the more popular quince. The historic food website has all manor of old food facts and trivia and you can see these chardequince. Also this kind of cheese is not a dairy cheese; it is an old-fashioned preserve made with fruit puree and sugar that is slowly simmer for a long time to reach a stiff consistency that is sliceable. Fruit cheeses are traditionally served with cheeses or meats but can also be eaten as a sweet (kind of like fruit pastilles) at the end of a meal or with nuts and port. They should last for a long time, a year at least, but I am keeping them in the spare fridge just to be safe as I don’t have an old fashioned larder (on the wish list though).

    medlar-002


    I have included both recipes here on the same page because they both start out the same. Take the bletted medlars and squish them in your hands into a large pan; if they are well bletted then this is easy. Add enough water to come half way up the fruit and simmer on a medium heat for 15-20 minutes until well and truly mushy. Use a potato masher to get the flesh out of the fruit.

    Medlar Jelly


    Put the cooked fruit and liquid into a jelly bag and suspend at least overnight to allow the juices to drip out. Give a little squeeze to release some more juice (I think I did it too much because the finished jelly was cloudy). Measure this juice into a pan and add the juice of a lemon and 450g granulated sugar for every pint of medlar juice. Warm slowly until the sugar is dissolved and then boil furiously until setting point is reached (it took about 10 minutes for mine). Take off the heat and allow to stand for a few minutes, skim off the scum and pot into sterilised jars while still boiling hot.
     
    medlar-006

    Medlar Cheese

     
    Take the stewed medlars and push the flesh though a sieve, discarding the skins and seeds. This takes ages; put some music or course work on in the back ground!
    Weight the puree into a heavy bottomed pan and add three quarters this weight of granulated sugar (e.g. 1kg puree will need 750g sugar) and the juice of a lemon.
    Heat gently, stirring frequently and constantly towards the time when the cheese is thickening. It is ready when you draw a spoon through the mixture and it stays parted for a few seconds – like the Red Sea! Prepare some moulds (muffin/cupcake pans, mini loaf tins, large loaf tins) by greasing the insides with some oil with no flavour (I used regular sunflower oil) using some kitchen paper. VERY carefully tip/spoon/pour some of the mixture into the moulds and level. Be very careful; it is like molten lava! Leave to cool overnight before turning out and wrapping in greaseproof paper. 
     
    UPDATE 21/9/15 – I tried making damson cheese with this recipe but waiting long enough for the Red Sea meant the mixture was over cooked – it tasted like burnt sugar and was so hard, it would not come out of the moulds and was not cuttable! I think less cooking next time. It is also very time consuming; took over and hour and a half to get this thick.
     
    medlar-007

  10. Quinces and Quince Jelly recipe

    November 6, 2014 by sarah

    After last years mildly disappointing foray into the world of quinces, I decided to brave another go. Especially as I was gifted a bag of freshly picked quinces via a friend. I am glad I gave them another chance because this year I think I finally got what quinces are about.

    quince-002

    Quinces are like a cross between an apple and a pear but with an amazing floral fragrance. Larger than a typical pear, but with a similar shape, they have a bright yellow lumpy skin and are rock hard to cut with a grainy texture. Unique is what I would call them. They are an old-fashioned fruit and were once considered an aphrodisiac and sweatmeats made of quince were served at the end of tudor banquets to help with digestion (and quite possibly the former mentioned effect too). I think what is different about this year’s quinces are that I left them in the fruit bowl for a couple of weeks; they developed some brown soft spots but their famous perfume was immediately apparent. I was a little short of time once the quinces were ready so I decided to try making quince jelly as I can make jam/jelly while listening to lectures for my course; multi-tasking! I was really surprised by the beautiful coral pink jelly that emerged. It wasn’t this colour until being boiled with the sugar. And I cannot stop eating the jelly. Mainly on its own straight from the jar, but also with cheese and  real ham or as a filling for a sponge with whipped cream.

    Now I understand the special-ness of quinces, some recipes I need to try in the future include a flavoured liqueur called ratafia, poached with spices and adding them to apples in pies and crumbles. There are also some intriguing Persian recipes out there too. For more inspiration see historic food and some of the recipes on British Larder such as quince curd, chutney and crumbles.

    quince-003

    Quince Jelly

    1-2 kg quinces, ripe and fragrant
    thinly pared rind and juice of 1 lemon
    granulated sugar
     
    Wash the quinces, rub off the soft down on their skins if present and remove bruised or blemished parts. Roughly chop the whole quinces, skin and cores, and place in a large pan with the lemon rind. Add enough to water to just come to the top of the quinces. Simmer gently for an hour or so until very soft. Stir in the lemon juice.
    Strain the whole lot in a jelly bag (sterilised with boiling water) overnight. I squeeze my jelly bags a little to get more juice out and I do not find it affects the clarity of the the final product (if you read about making jellys then squeezing the bag is supposed to be forbidden as it gives a cloudy jelly).
    Measure the juice and pour into a clean pan. Add 450g of granulated sugar for every 600ml of juice. Heat gently, stirring frequently until the sugar is dissolved. The bring to the boil and boil vigorously until setting point is reached – I found it only took about 10 minutes. Skim, pot into hot sterilised jars and seal.
     
    quince-004