RSS Feed

Posts Tagged ‘baking’

  1. Medlar Pie

    February 8, 2015 by sarah

    Following on from my post about medlars before Christmas, I had a bowlful of medlars left at the beginning of December. It was sort of deliberate as I wanted to experiment a little further using this fruit but was unsure of what to make plus a lack of time. And then I came across a recipe using medlars in a tart and it sounded intriguing. A recipe from 1660 – would it work? Would it translate to modern tastes? So I put some course work lectures on in the background and made this tart.

    medalr tart-003


    The original recipe is a little lacking in details:

    Take medlars that are rotten, strain them, and set them on a chaffing dish of coals, season them with sugar, cinamon and ginger, put some yolks of eggs to them, let it boil a little, and lay it in a cut tart; being baked scrape on sugar.

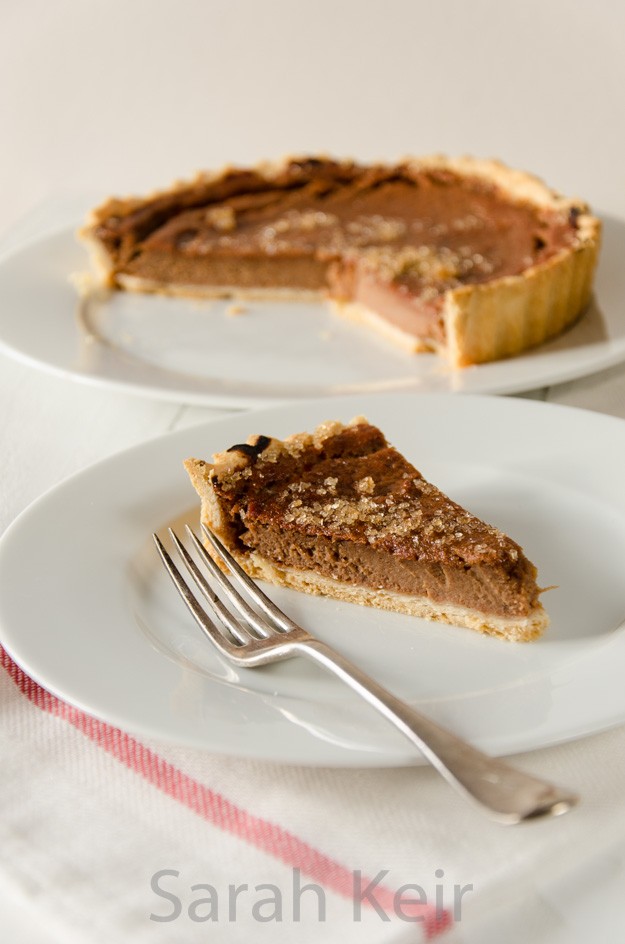
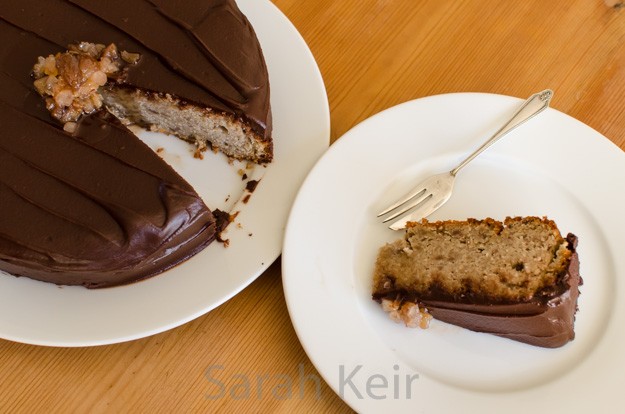
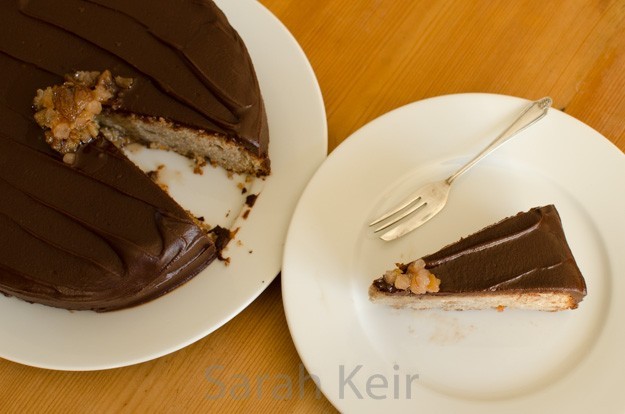
    But luckily Tracey at her Norfolk Kitchen blog had already done some research and testing and came up with this interpretation. And she is right, it is very similar to an American pumpkin pie recipe but so much nicer. Whereas pumpkin is just plain bland, the medlars lend this pie a creamy fruity intenseness which is heightened by the spices rather than being the main event as in pumpkin pie. This pie was delicious to eat at any time of day, warm or cold. Next time I may try adding some orange zest for an extra dimension, though I am not sure this sublime pie needs it.

    My ever thoughtful husband bought me a cookery book for my birthday. But not just any cookery book, ‘The Compleat City and Country Cook: or Accomplifh’d Housewife’, published in 1736. There are some interesting recipes in there that I am going to experiment with when I have time. Finally a recipe for the brace of teal I have in the freezer!
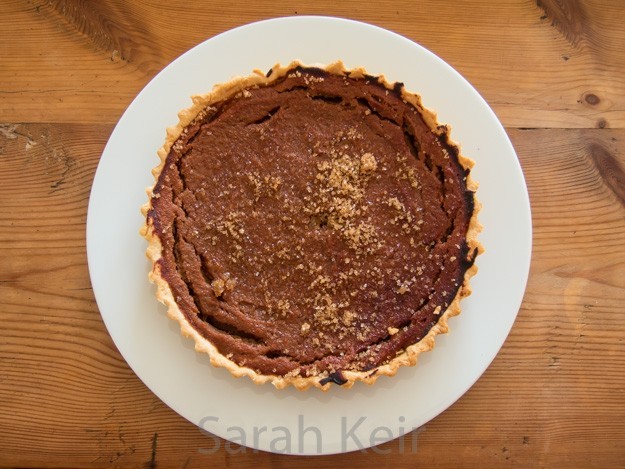
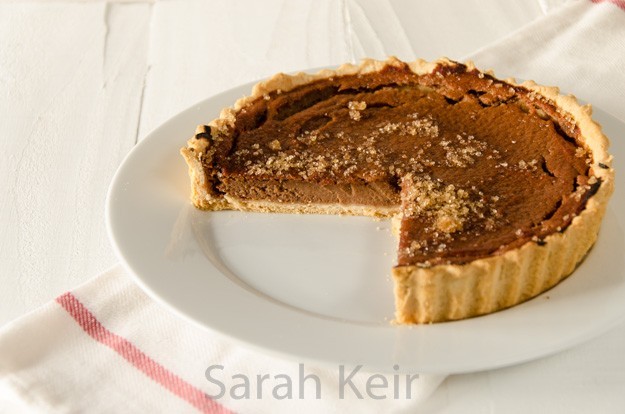
    medalr tart-002

    Medlar Pie

    8″/20cm loose bottomed tart tin, lined with shortcrust party and blind baked
    bowl full of medlars (was about 500g or more)
    70g caster sugar
    3 egg yolks
    1 teaspoon mixed spice
     
    Prepare the medlars – stew with a little water until soft and bash up with a potato masher. Push the fruit through a sieve, discarding the skins and seeds, and put the fruit puree in a medium bowl.
    Beat in the sugar, egg yolks and spice. Taste to see if it requires more sugar or spice.
    Pour this mixture into the cold blind baked pastry case. Place in the oven preheated to 180 ºC/160 ºC fan and bake for 30-40 minutes until set. Allow to mostly cool before serving with a crunchy topping of demerara sugar.
     
    medalr tart-004

  2. Raspberry and Marzipan Scones

    February 1, 2015 by sarah

    scones-001


    January is the month in the year when I go through my cupboards. Clothes I haven’t worn for several years go to the charity shop or eBay and the same for food; any food that is getting near its use by date or just been sitting there or been in the freezer for more than 6 months gets used up. It leads to some odd collections of recipes. What can you do with Christmas puddings except eat them as Christmas pudding? I also had a lump of marzipan left over after the Christmas cake had been iced and the stollen was made. Now, I just love marzipan and would be quite happy just to eat it in chunks or dip it in chocolate or, if I had time, make some marzipan fruits but then that wouldn’t be a baking recipe to put on this site. So I found a recipe in which marzipan was mixed into a scone dough but to cut through the cloggying sweetness of the marzipan, I added a layer of frozen raspberries to my recipe (also in need of using up). The finished scone is more like an American shortcake, in that it is rich enough to not need any other adornments though clotted cream would not go amiss with any scone type recipe. Enjoy!

    scones-002

    Raspberry Marzipan Scones


    120g marzipan
    70g unsalted butter
    25g caster sugar
    250g plain flour
    1 teaspoon baking powder
    1/2 teaspoon salt
    180-200ml of buttermilk or milk mixed with yoghurt
    1/2 teaspoon almond essence
    120g frozen raspberries (or fresh if in season)

    optional – flaked almonds, demarara sugar

    Weigh out the butter and marzipan, wrap in cling film and freeze for at least an hour. Once frozen, grate over the top of the dry ingredients. Using a fork, mix in the buttermilk mixed with the almond essence. Add enough so it comes together but do not work too much otherwise your scones will be tough.

    Dump the dough out onto a floured work surface and pat or roll to a thickness of about half an inch/one centimeter. It is easier if this is a rectangle that is two-thirds deep to long. Pat the raspberries over one half of the width but for the full length and then fold over the over half that hasn’t got the rasberries over the top. Gently pat/squidge together so you have a long narrow sandwich of dough with the raspberries in a layer in the middle.

    Cut the dough sandwich into squares then the squares into triangles and place them on a baking tray lined with baking parchment. Brush the tops of the scones with milk and then sprinkle over flaked almonds and demarara sugar. Put in the fridge while the oven heats to 200 ºC or 180 ºC fan. Place the scones into the middle of the preheated oven – they need about 15 -20 minutes but watch them like a hawk because the marzipan will burn easily and will then taste bitter (mine were almost too brown). Cool on a baking wrack. They are best served warm from the oven but can be reheated for a few minutes in a medium oven to revive them over the next couple of days.

    scones-003


  3. Moist Lemon Bundt Cake

    January 25, 2015 by sarah

    lemon bundt-001


    My bundt tin was calling me from the cupboard and desired to be used. Ideally, I also had a glut of eggs last week and so this cake came about. The moist lemoniness was a great little January pick-me-up especially in the run up to the exams in a few weeks time. I also used cup measures for the first time as I had a folding cup measuring gadget as present from my Mum last year. Makes it easier with all these American recipes, though I have included usual metric measurements for the rest of the world.

    lemon bundt-004

    Moist Lemon Bundt Cake

    2 lemons, grated and juiced, zest sitting in the juice until ready to use
    340g (2 and 1/2 cups) plain flour 
    1 teaspoon baking powder
    1/2 teaspoon baking soda
    1 teaspoon fine salt
    200ml (3/4 cup) buttermilk
    5 medium eggs
    1 teaspoon vanilla extract
    200g soft margarine or butter
    200g (1 and 1/2 cups)caster sugar
    
    For the glaze - 3 tablespoons fresh lemon juice
                  - 100g (1/2 cup) caster sugar
    
    For vanilla icing - 120g (1 cup) icing sugar
                      - 1 teaspoon vanilla extract
                      - 2 tablespoons double cream or milk
    

    Preheat the oven to 160 ºC fan. Spray the bundt tin (10 cup size) with cake release and the dust the inside with flour, knocking out the excess.

    In a stand mixer with the flat beater, beat the margarine and sugar until light and fluffy.

    In a jug, beat the eggs with the buttermilk and vanilla extract. In a large bowl sift the flour, baking powder, baking soda and salt. Dump the egg mix, dry mix and lemon zest with juice into the stand mixer and start off slow speed to mix and then speed up to incorportate all, stopping and scraping down the sides a couple of times. Add some milk if it looks excessively stiff.

    Scrape into the prepared bundt tin so it is evenly distributed. Bake until the top is golden brown and a squewer comes out clean – about 45 minutes.

    While the cake is baking, combine the glaze ingredients, warming in the microwave to get the sugar dissolved if necessary. When the cake is done, allow to cool in the tin for 10 minutes so the sides shrink away and then turn out the right way up onto a cooling wrack. Sit the cooling wrack over a tray (carrying tray or cookie tray) and pour the glaze over the cake slowly so it sinks in. Scrape up excess glaze from the tray and pour over the cake; repeating until bored or the glaze sets.

    When the cake is entirely cool, mix the icing ingredients together (warm very briefly to achieve correct pouring consistency) then artfully drizzle over the cake. Serve!
    lemon bundt-003 lemon bundt-002


  4. Gingernuts – a true biscuit

    January 18, 2015 by sarah

    Gingernuts must be a uniquely British biscuit. I have not come across them anywhere else in the world (though apparently they love them in New Zealand too) and there is a dearth of recipes in blogger land. For me it is the satisfying snap and pleasing gingery warmth that makes the gingernut such a popular biscuit. It is also a top dunker for a cup of tea as it holds together well. There is no way this is an American style cookie. I am not sure why they are called ‘nuts’ rather than biscuit but that is the English language for you. There is some suggestion that is because they are as hard as nuts when freshly baked or that the small pieces of dough that are measured out are called ‘nuts’, but whatever reason they are one of my favourite biscuits.

    gingernut-004


    So here is my version. As usual it is an amalgamation of several recipes with my own tweaks. It was very easy to throw together a batch and they are so much nicer than bought biscuits. It is entirely optional if you wish to add crystallised ginger; it is not traditional to add them but I like the occassional chewy gingery nugget that they add to the experience. The gingernuts have lasted for a couple of weeks in an air tight container. If they go soft then put them on a tray in a moderately hot oven for a couple of minutes then allow to cool and they will be as good as new.

    gingernut-003

    Gingernuts

    200g unsalted butter
    240g golden syrup
    40g treacle
    400g self-raising flour
    150g golden caster sugar (white if you don’t have golden)
    3 tablespoons ground ginger (make sure not old or stale)
    1 tablespoon ground mixed spice
    1 teaspoon salt
    1 ½ tablespoon bicarbonate of soda
    Demerara sugar (optional)
    Crystallised ginger, finely chopped (optional)


    Preheat the oven to 160 ºC/140 ºC fan.

    Line a couple of large baking trays with baking parchment.

    In a small pan, put the butter, golden syrup and treacle and warm over a low heat until the butter is melted.

    Meanwhile, in a large bowl, sift together the dry ingredients, excluding the demerara sugar and crystallised ginger.

    Once the butter has melted, use a wooden spoon to mix this into the dry ingredients to form a soft glossy dough. Add the finely chopped crystallised ginger at this stage if you wish.

    Using clean hands, break off walnut sized lumps of the dough and roll into smooth balls. Place on the prepared baking trays leaving a good 7-8cm (about 2 and 1/2 inches) between each ball. Gently press each ball onto the tray but you don’t need to make it very flat – the baking process will flatten it. If you like, sprinkle a little Demerara sugar on top of each biscuit – it makes them pretty but doesn’t add to the crunch.

    Bake for 20-25 minutes, turning the trays half way through, until they have risen and deep auburn brown. Remove from the oven and transfer to cooling rack to cool completely. Store in an airtight container.

    gingernut-001 gingernut-002


  5. Stollen

    January 7, 2015 by sarah

    Stollen is a traditional German Christmas cake bread found all over the continent at this time of the year and making its way over to the UK. Rather than buying an over priced cake drenched in that awful sweet powder that is not sugar, I decided to give it a go making one myself especially as it would give me an excuse for trying out an enriched dough recipe. An enriched dough contains butter or eggs (this recipe has both) which means the action of the yeast is suppressed. Basically this recipe cannot be rushed as the yeast will take longer to rise so find a day when you are in all day and start early in the morning. Our house does not have heating during the day so to give the yeast some warmth in which to do its magic, I placed the covered bowl on a vivarium heat mat. This heat mat is essential for me to make bread as the house is fairly cool even in summer – it only cost about £10 from eBay (something like this).

    stollen-003


    I am not sure if you would call stollen a yeasted cake or an enriched bread – they are the same thing I guess.  The bread part is sweet and almost cake like in taste and texture, the mixed fruits add interest to the texture and the spices just scream Christmas. I love the taste of marzipan so I cannot think of anything better than stollen but if you don’t like marzipan I suppose you could leave it out (you heathen). I think I left my stollen to prove too long the second time as it slumped in the middle. Has anyone else had this problem? I also made it as one huge stollen but it was a real monster and would probably do better as two smaller loaves. Stollen freezes well once baked so by having two loaves, you could have fresh stollen for the whole Christmas period!

    stollen-001

    Stollen

    500g strong white bread flour
    100g butter, melted
    50g caster sugar
    225ml warm milk
    1/2 teaspoon vanilla extract
    5g salt
    10g fast action yeast (one and half packets of usual supermarket size)
    an egg, beaten
     
    For the filling
    100g raisins
    100g currants
    100g mixed peel
    50g flaked almonds or chopped blanched almonds
    1/2 teaspoon ground cinnamon
    6 green cardamons, seeds removed and crushed
    25g butter, melted
    200g marzipan
     
    For the icing
    25g butter, melted
    icing sugar
     
    In a large bowl put the flour and sugar. Add the yeast to one side of the bowl and the salt on the other. Add the melted butter, beaten egg, vanilla extract and most of the milk and using your hand, mix well together until comes together. Use the extra milk if the dough is dry; this dough starts off very sticky but will become shiny, smooth and elastic as it is kneaded. It needs kneaded for 10 minutes. When the dough is soft and elastic, place in a well floured bowl and cover with cling film. 
    Leave to rise somewhere warm to double in size – this may take a couple of hours.
    In a clean bowl, mix together the filling ingredients except the butter and marzipan. 
    Once the dough has risen, knock back the dough in the bowl and then transfer the dough to the filling bowl. Mix the filling into the dough by kneading the dough from the outside of the bowl into the centre. 
    When all the filling is incorporated into the dough, turn the dough out onto a lightly floured surface and roll out to a rectangle (either one large one or two smaller ones). Sticking down the edge of the dough to the work surface nearest you and rolling away from the body is the easiest way of achieving this.
    Roll out the marzipan to a rectangle that fits within the dough the dough rectangle. Brush the dough rectangle with the melted butter, lay over the marzipan and roll up the whole lot, making sure the marzipan is completely enclosed and the long edge and ends are well sealed (squidge with fingers). Place this rolled loaf or loaves onto a floured baking sheet, place inside a large plastic bag (I had to use a bin bag to get one big enough) and leave somewhere warm to prove. It needs to double in size again and when touched, the surface springs back.
    Preheat the oven to 180 ºC/fan 160 ºC. Bake the loaf/loaves for 40 minutes to an hour depending on the size; they should be pale golden. When the loaf/loaves are removed from the oven,place on a wire rack, brush with the last lot of melted butter and dust liberally with icing sugar.
    Once cool, wrap in paper or cling film to store. Keeps for 3 or 4 days.
     
    stollen-002

  6. Chocolate Cake and Swiss Meringue Buttercream

    January 3, 2015 by sarah

    To remind you what I used these recipes for, here a picture of the finished cake. Unfortunately I haven’t got a picture of the layers inside as I forgot to take my camera to the party where it was served and I was asked to be the one to serve up the cake. It is kind of hard destroying your own piece of art but it was in a good cake eating cause!

    noel-006


    The cake recipe is slightly modified one from Donna Hay, an Australian online magazine, but has been extensively reused in blog land. Despite having never made this recipe before and it being a little odd (gallons of water in the recipe) I felt sure enough to give it a go for the cake proper, though I did have back up ingredients in case I needed to go back to a regular sponge cake. I used one batch of the cake recipe to make three 8″/20cm layers and a second batch to make one more tier and a tray bake of 25 x 35 centimeters . The orginal recipe states to cook in two 20cm tins and then cut each in half to get the four layers but I wanted stouter layers for the stump cake so went with an extra layer. I think either would work. This cake is lovely and moist and despite being flavoured only with cocoa powder, has a surprisingly good chocolate taste. I don’t think it would last very long as it is made with a lot of water so is likely to dry out quickly. It didn’t last long enough to find out this time!

    Chocolate Buttermilk Layer Cake

    375ml water
    190g unsalted butter, chopped into chunks
    50g cocoa powder
    450g plain flour
    1 and 1/2 teaspoons bicarbonate of soda
    550g caster sugar, golden if you have it
    4 medium eggs
    180ml buttermilk, or couple tablespoons natural yogurt in 150ml milk
    1 and 1/2 teaspoon vanilla extract
     
    Grease and line with baking parchment (silicone paper)  two or three 8″/20cm cake tins.
    Preheat the oven to 180 ºC/ fan 160 ºC.
    Place the water, butter and cocoa powder in a medium saucepan over a low to medium heat, stirring occassionally until all the butter is melted and the cocoa powder has dissolved and then take off the heat.
    In a large bowl, mix the flour, sugar and bicarbonate of soda.
    In a jug beat the eggs and then beat in the buttermilk (or yogurt/milk mixture) and vanilla extract.
    Mix the wet ingredients into the dry (make sure the cocoa/butter mix is no warmer than blood temperature), scrapping down the sides of the bowl and bottom a couple of times. This is much easier to mix in a stand mixer with the mixer paddle attachment.
    Divide the batter between the prepared tins and place all the cakes on the same shelf in the preheated oven. Cook for 40-45 minutes. They are done when a skewer inserted into the middle of the cake comes out clean and the cake has shrink away from the sides of the tin a little. 
    Leave to cool in the tins for 10-15 minutes then turn out on a wire rack to cool completely. I covered them with a clean tea towel while they cooled to stop them drying out (and stop cat hairs getting on them!). Trim the tops of the cakes level before assembling.
     
     
     noel-001 noel-003


    Swiss meringue buttercream sends even experienced bakers into fits of weeping. Too many bowls of wasted buttercream when it splits, curdles or seizes. My previous attempts at this type of icing where not particularly successful (see last years icing for the wedding cake) but the more I read about it, the more I wanted to give it another try. Several times during the process I thought it looked a disaster, but as I read other blogs about just keep whipping it and it will come right, low and behold that is what happened. I thought the butter had been too cold when I added it because half way through I could still see lumps of butter but I just turned the mixer up to medium/high and left it for 15 minutes to console myself reading about other peoples Swiss meringue buttercream disasters. When I looked back, it was perfectly smooth and just as it should be. It wasn’t a fast process to make this icing but the results are spectacular – soft, silky smooth with a perfect balance of butteriness and sweet without cloying. Just like eating chocolate mousse on a cake! Perfect!

    This recipe made enough to ice the 4 layer stump cake (between layers and all over) and a small amount for the top of the tray bake. This icing pipes very well but you would need probably double if you were going to pipe on the textures, whereas I only needed a thinner layer which would hold on the chocolate bark. This icing keeps for up to a week in the refrigerator but it needs to come up to room temperature before using (and will need rewhipping for 5 minutes) or eating. It can apparently be frozen for a month or two but I haven’t tried this.

    Chocolate Swiss Meringue Buttercream


    6 egg whites (180g)
    300g white granulated sugar
    400g unsalted butter, take out of fridge and cut into cubes
    1/4 teapoon fine salt
    200g dark chocolate, melted
     
    Place the egg whites and sugar in the mixing bowl of the stand mixer and sit this over a saucepan of barely simmering water (a bain marie). Using the whisk attachment from the stand mixer, whisk pretty well continuously (but it doesn’t need to be vigorous) until the sugar has completely dissolved (cannot feel any grains under fingers) and the mixture looks opaque white. If you have a sugar thermometer, you are aiming for 60-70 ºC or 150-160 ºF.
    Remove the bowl from the heat and fit to the stand mixer with the whisk attachment. Whip on high speed until completely cold i.e. the bowl feels neutral to the touch. This took me at least 15 minutes and I was getting impatient to I took the bowl out of the stand mixer and put it outside for half an hour and that cooled it down.
    The critical bit now is the temperature of the meringue and the butter. The meringue must be cool and the butter must be soft but still cool (I had to put it back in the fridge for a little to cool off as the kitchen was too warm as the oven was on). 
    Switch over to the paddle attachment on the mixer and add the butter a cube at a time, allowing about 15 seconds between cubes, with the mixer on low to medium speed. *
    Once all the butter is added, you can add the flavourings and salt, and colourings you might like. In this case it was chocolate, but like the butter it must not be warm when added. Vanilla extract and bean puree can be added, or lemon zest and oil, fruit purees (make sure concentrated so minimal water is added).
     
    *If the mixture looks like it is curdling or lumpy then don’t add any more butter, set the mixer up to high and leave until it has come back together then you can resume adding the butter. If the buttercream seems too loose then put in the fridge for a while before trying to pipe or ice. Conversely, if the buttercream has become too firm (for example kept in the fridge) and it does not become satiny smooth after 5 minutes of rewhipping then microwave a quarter of the buttercream for just 10 seconds, add this back into the main buttercream and continue whipping.
     
     SMB-001 noel-002

  7. Meringue Mushrooms

    December 30, 2014 by sarah

    My idea for the stump de Noël cake came indirectly. I saw pictures of beautiful traditional bûche de Noël that were decorated with meringue mushrooms but a bûche would not be large enough to feed the number of people expected at the Christmas party so the cake metamorphosed into a larger stump which required more and more elaborate mushrooms. They are all made very simply from French meringue; field mushrooms with dark chocolate gills, bracket fungi from half moons of meringue dusted with cocoa powder and fly agarics decorated with the quintessential toadstool red cap with white spots.

    meringue-003


    I felt I had to try and make the fly acargic toadstools; the myth from the far icy North of reindeer flying apparently comes the eating of fly agarics which are supposedly hallucinogenic. I don’t recommend trying them; all our mushroom collecting books suggest they are nasty poisonous. The fly agarics were the hardest to make because white chocolate is a nightmare to work with. Three times I melted white chocolate and added red gel paste and three times the chocolate seized. I read all the tricks I could; I added it before melting the chocolate, I added it to some melted chocolate and then added it to the rest. I tried freeze dried raspberry dust moistened with water instead but that wasn’t red enough. In a fit of desperation I read somewhere in blogland that adding a little water to chocolate is a disaster (it seizes) but if you add alot then something miraculous happens. And it did. I added about equal volume of hot (almost boiling) water to a lump of seized white chocolate which I had coloured red, beat it vigorously with a wooden spoon and lo and behold, liquid red chocolate! I used this to dip half the cooked meringue tops (I did it twice, repeating the process when the first layer was set in order to get a good strong red colour). Once set, I added white dots in melted white chocolate. I think next time I make them, I will try colouring the meringue for the tops red so there is no messing around with finicky white chocolate.

    meringue-004

    Meringue Mushrooms

     
    3 medium egg whites (60g) at room temperature
    1/4 teaspoon cream of tartar
    pinch of salt
    75g caster sugar
    25g icing sugar
    cocoa powder and melted chocolate to decorate
     
    Prepare two large baking sheets by lining them with baking parchment (siliconised paper). 
    Preheat the oven to 100 ºC.
    Make sure a large glass/pyrex bowl and whisks are completely clean of any grease – I wipe down with kitchen paper dampened with vinegar.
    In the large bowl, whisk the egg whites, cream of tartar and salt until soft peaks form.
    At this stage, add the caster sugar one tablespoonful at a time, whisking well between each addition. When all the caster sugar is added, sift over the icing sugar and then whisk again until the mixture is thick and glossy. Stop at this stage otherwise over beating will cause the bubbles in the egg whites to breakdown and you’ll end up with runny meringue.
    Put the meringue in a pipping bag fitted with a 1 to 1.5cm plain nozzle.
    To pipe the caps, hold the bag vertically just above the baking sheet and squeeze the bag with even pressure until a round is formed – size and height up to you. Stop squeezing and twist the bag to remove. If any meringue peaks stay sticking up then you can flatten them with a dampened finger. Repeat this to make about 20 caps, leaving at least a couple of centimeters between each disc.
    To pipe the stems, hold the bag vertically again but as you squeeze the bag, pull upwards to form a vertical stem of meringue. Don’t worry if they are a little lopsided – it adds to the mushrooms charm. Use the remaining meringue to make as many stems as possible.
    The bracket fungi were made from meringue piped into semi-circles with the inner circumference roughly what I though the curve of the cake would be.
    Dust with a light shower of cocoa powder over the meringue caps that will become regular mushrooms (I did half and half without).
    Place in the preheated oven for about an hour and half. Turn the oven off, prop the door open ajar and leave to completely cool.
    To assemble the mushrooms, use a metal skewer or small knife to make a small hole about 0.5cm diameter in the underside of the mushroom caps.
    Melt plain chocolate and when cooling down, paint the underside of the caps with the chocolate, use a toothpick to draw gill lines in the chocolate, drawing into the centre and firmly press a meringue stem into the centre of the underside of the cap so that it seats itself into the hole you made with a good glob of chocolate around. Set upside down on a baking tray until the chocolate has set.
    For the fly agarics, I made the holes in the underside of the caps then decorated the caps with red chocolate and piped on white chocolate spots and once dry I used some more melted white chocolate to fix the stems into the underside of the caps.
     
    meringue-001

  8. Chestnut and Almond Cake

    December 20, 2014 by sarah

    Being a foodie has it down sides. Apart from the inevitable battle of the bulge (i.e. weight gain, not anything to do with trumpets) and the critical assessment of every meal you eat, you end up with an odd assortment of ingredients lurking in the fridge and cupboards and nothing real to eat on a day to day basis. Or at least I do. After a bit of a cupboard tidy out at the weekend (really to fit in more special buys), I found a tin of chestnut puree (out of date by 6 months) and some tiny jars of homemade marron glacé in syrup (in which the sugar had crystalised – I made them at least 2 years ago). Most of the recipes I searched for required sweetened chestnut puree or marron glacé puree but they sounded too sweet and sickly. So this recipe is a hash up of a couple of different recipes; Nigella in’How to be a Dometic Goddess’ and this recipe on someone else’s blog. My recipe can easy be made dairy free (see the added notes) and is naturally gluten free, being based on ground almonds and the chestnut puree. It is not calorie or guilt free; it is rich and dense but not overwhelmingly sweet or cloying like some chestnut based recipes can be. It is so moreish and decadent; perfect for this for this time of year. And apparently chestnuts are good for you.

    chestnut-002


    This year I bought my chestnuts from Oxford covered market and they are a complete contrast to the ones in the supermarkets. They are so large, moist and sweet. We roasted them on our sitting rom fire last weekend and the sweet nutty smell filled the house with seasonal joy. I made my own marron glacé a few years ago but I have to say it was not worth the effort, no matter how expensive they are! I did find a small jar of crumbled bits in syrup that I had stashed away and that made a perfect finish for this cake. Feel free to buy them rather than make them; I won’t hold it against you. Next time will try adding 250g melted plain chocolate to the mixture, as Nigella has in her recipe. This recipe is very rich and feeds 10-12 easily. It doesn’t need cream to counteract any sweetness but some creme fraiché would go well if serving this cake for desert.

    chestnut-001

    Chestnut and Almond Cake

     
    4 large eggs, separated
    200g caster sugar
    100g butter (or replace with 70ml of vegetable oil for vegan version)
    200g ground almonds
    400g tin of chestnut puree (make sure unsweetened)
    1/2 orange, zested
    1 teaspoon baking powder
    1 teaspoon vanilla extract
    1-2 tablespoon honey flavour liqueur or rum or almond milk
     
    For the chocolate covering
    200g plain chocolate
    1 tablespoon glucose syrup or golden syrup
    pinch salt
    70g butter or 100ml cream or 70g dairy-free margarine
     
    Preheat oven to 180 ºC/160 ºC fan.
    Line the bottom and grease well a 20cm/8 inch springform tin.
    Whisk the egg yolks, sugar and vanilla extract together until light in colour and creamy.
    Add the melted butter – make sure it is only at blood temperature, no hotter.
    In a bowl, tip the chestnut puree and fork up until smooth paste.
    Add the chestnut puree, ground almonds, orange zest and baking powder to the egg/sugar bowl and mix well; add the extra liquid as required so mixture not too stiff (it should fall off the spoon easily).
    In a large clean bowl, whisk the egg whites until stiff peaks form. Add a quarter of these whisked whites to the cake mix and beat to loosen the mixture. Gently fold in the rest of the whites being careful not to knock out too much air.
    Pour into the tin and place in the middle of the oven. Bake for about 45 minutes to an hour until a skewer comes out clean. Leave to cool entirely in the tin before running a knife around the outside and turning upside down onto a plate. Don’t worry if the cake looks dry and cracked – it won’t be dry inside.
    Make the chocolate covering by putting all the ingredients for the covering into a bain marie (i.e. a bowl over a gently simmering pan of water), stir until smooth then pour over the cake. You may need to wait 10 minutes or so for the covering to thicken – if it is too thin it will just run off the cake.
    Allow the covering to set before serving.
     
    chestnut-003

  9. Tuile leaf biscuits

    December 4, 2014 by sarah

    Autumn feels the right time to make biscuits like this. With their delicate shades of cream and brown and the crisp crunchy texture, they are so like the real leaves that inspired them. I thought that tuiles would be hard to make as they are so delicate but although a fairly messy process (definitely time to get the pinnie on), they weren’t as bad as first feared. There certainly was some trial and error, especially with cooking times to get enough colour for them to be almost brown and leaf-like but also soft enough to be formed into different shapes. I think next time I may experiment with adding some coco powder to the batter in place of some of the flour, to give a darker colour without them needing so long in the oven. Also perhaps adding a little flavouring with almond or vanilla extracts.

    tuile-005


    Instead of buying expensive stencils, I cut out shapes from the thick plastic of an ice cream tub lid using a craft knife. I tried thinner plastic sheets but the tuiles were too thin to lift off the baking sheet. The choice of shape is entirely up to your imagination and biscuitry skills.A simple circle tuile could be drapped over the bottom of a cup or glass to form a bowl perfect for posh ice creams or sorbets. Fancier shapes could be used to top patisserie.

    tuile-002 tuile-003 tuile-004

    Tuile Biscuits

     
    2 medium egg whites
    70g icing sugar
    40g plain flour
    35g butter, melted
    pinch of salt
    optional – almond extract or vanilla extract
     
    Preheat the oven to 170 ºC fan. Line a flat baking sheet with a silicone baking sheet or mat.
    Beat the egg white and sugar with a whisk until combined. Sift over the flour and salt and whisk these in. Make sure the butter is only tepid and then beat that in too.
    Leave the mixture to sit for 30 minutes before using so it thickens.
    Place the stencil in the corner of the baking sheet on the silicone mat. Using a small offset spatula, spread the batter in a thin layer over the stencil, scraping off the excess. Carefully lift the stencil. Repeat to cover the baking mat.
    Bake until the tuiles are golden, only takes 5 minutes or so. Working very quickly, use a spatula to lift the tuiles off the baking sheet and drape them over a rolling pin or gently fold into an egg carton. If the tuiles get too stiff to bend then pop the tray back in the oven for 30 seconds or so.
    Repeat the process until all the batter is used. Store in an airtight container but the tuiles are best eaten within 24 hours of  making them as they go soft.
     
    tuile-006

  10. Spiced apple bundt cake – thanksgiving recipe

    November 26, 2014 by sarah

    This recipe is dedicated to my American and German friends and now I’ll explain why. ‘Bund’ roughly means gathering in German (please correct me if Google is wrong) so I guess that this traditional ring cake would be to feed a group of people, hopefully friends, so it would be a ‘bundkuchen’. An alternative German translation is ‘waistband’ so probably equally suitable! Bundt is actually the trademarked name given to cast aluminum pans by Nordic Ware made in North America and made popular in the 1950’s and 1960’s. But bundt cakes seem to have been around longer than that and probably are an evolution of the gugelhopf/kugelhopf, a cake made of yeasted dough and baked in a similar tin. I guess a sponge cake is quicker and easier for most people these days than an enriched yeasted dough. There is no one recipe that defines a bundt cake so it is completely open to interpretation – my ideal. Because a large point of a bundt cake is the molded decoration on the cake (and therefore the cost of the tin), bundt cakes are generally simply decorated with icing sugar or a pour-over glaze.

    bundt-004


    I have been drooling over pretty bundt cakes in bloggerland  for many weeks now. Though just a cake, the distinctive ring shapes with folds and peaks really pulls this cake into another level of sculptural. But I really did not feel like paying £30 plus for one of the ultra pretty Nordic Ware ones. Until I found one half price in TK Maxx this past Friday; I couldn’t resist. So cake tin bought, I needed a recipe that would do justice to my new tin. Big problem; all the recipes I could find were in cups and sticks of butter. For a precise chemical reaction such as cake making, inaccurate and annoying American measurements are infuriating. So I made up my own recipe, a sort of amalgamation of several different recipes from the USA which I converted to weight measurements and added some inspiration of my own. I have to admit it worked out well and I will be looking forward to experimenting with my pretty tin again in the future.

    bundt-006


    This cake is lovely and moist and looks so impressive sitting on a pretty cake stand with glaze dribbling down the sides. The glaze forms a tasty crust and helps the cake keep longer, as does the addition of ground almonds. I think this would make a perfect Thanksgiving centre piece for those of us who don’t like pumpkin pie or who don’t live in the USA. Although the recipe list looks extensive, it really isn’t. If you haven’t got all the spices, try substituting ground mixed spice.

    Spiced Apple Bundt Cake with Maple Glaze

     
    Makes 12-14 servings
     
    225g unsalted butter, soft
    150g golden caster sugar
    150g soft brown sugar
    250g plain flour
    75g ground almonds
    2 teaspoons baking powder
    1 teaspoon bicarbonate of soda
    1/2 teaspoon fine salt
    1 teaspoon ground ginger
    1 teaspoon ground cinnamon
    1/4 teaspoon ground cloves
    1/4 teaspoon ground allspice
    5 medium eggs
    200ml natural yogurt
    1 teaspoon vanilla extract
    zest of 1 lemon
    30ml or so of milk
    3-4 medium apples (about 400-450g), peeled, cored and finely chopped
    100g chopped pecans, toasted
     
    For the glaze –
    120g icing sugar
    30g unsalted butter
    50ml maple syrup
    1/2 teaspoon vanilla extract
     
    Preheat the oven to 180 ºC/160 ºC fan. Generously grease and flour a 12 cup (1.4 L) bundt tin. My tin is 10 cup capacity so I also greased  four mini loaf tins.
    In a medium bowl, sift together the dry ingredients except the sugars.
    In a jug, mix together the yogurt, vanilla extract, eggs and lemon zest until the eggs are well beaten.
    In another large bowl, cream together the butter and sugars until light and fluffy; you will probably want to use an electric mixer for this. With a large spoon mix in the wet ingredients and then the dry but do not over mix (there should still be streaks of flour). If at this stage the batter is rather dry then add some milk – I needed 30ml.  Add the pecans and apples and mix again until well mixed.
    Scrape the batter into the prepared bundt tin – it should not be filled more than three quarters full so if you have extra mix then put it in additional tins.
    Place in the middle of the preheated oven for 45 minutes to an hour; smaller cakes will take proportionally less time (the mini tins took 30 minutes).
    Allow the cake to cool in the tin for 30 minutes before turning out onto a cooling rack to finish cooling.
    Meanwhile make the glaze; heat the butter and maple syrup in a small pan until melted and bubbling. Take off the heat and beat in the sugar and then the vanilla. Leave to cool to thicken and pour over the cake once the cake is cold otherwise the icing will just run off.
     
    bundt-003