RSS Feed

Posts Tagged ‘baking’

  1. Carrot cake and topping

    May 20, 2015 by sarah

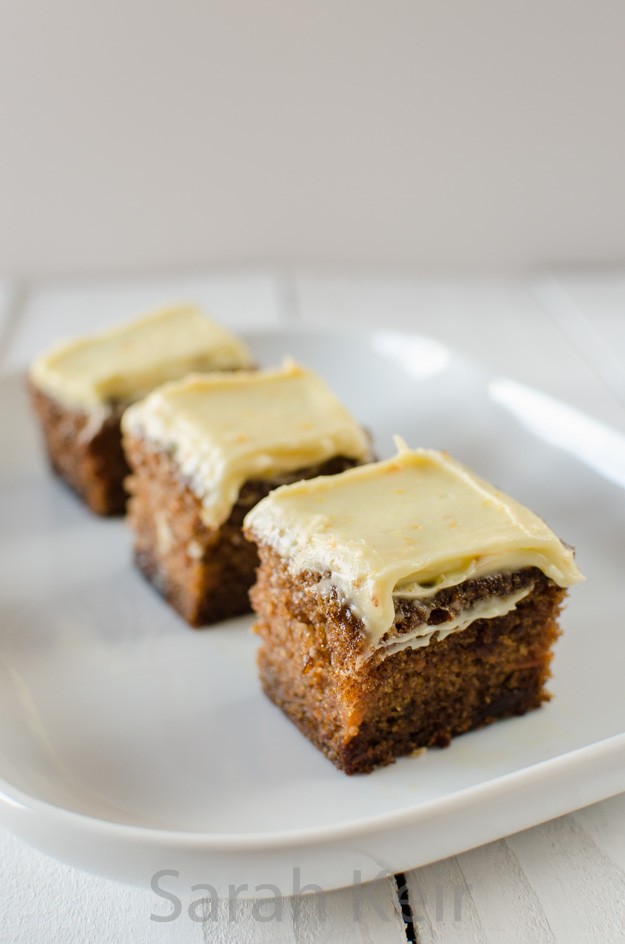
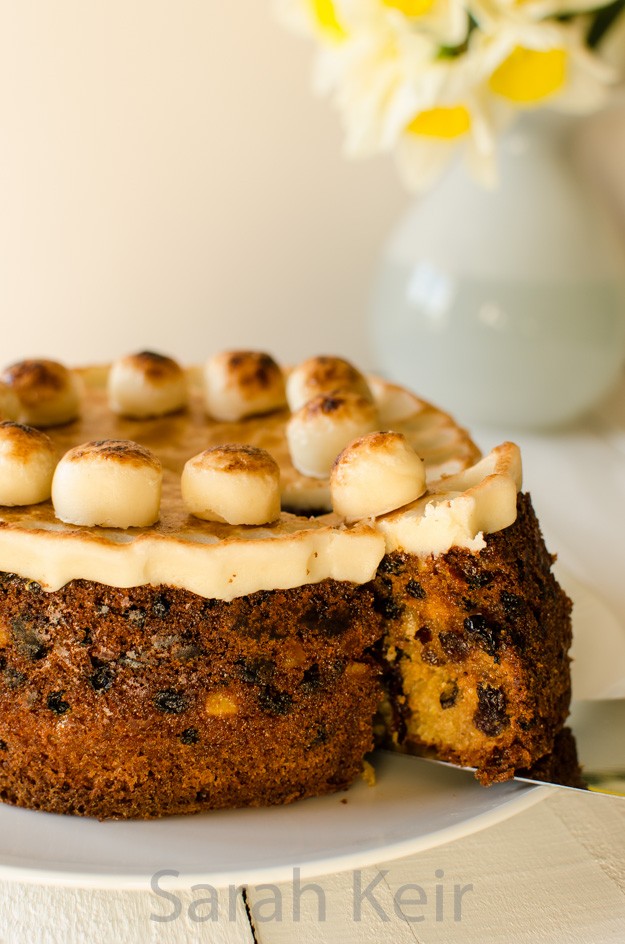
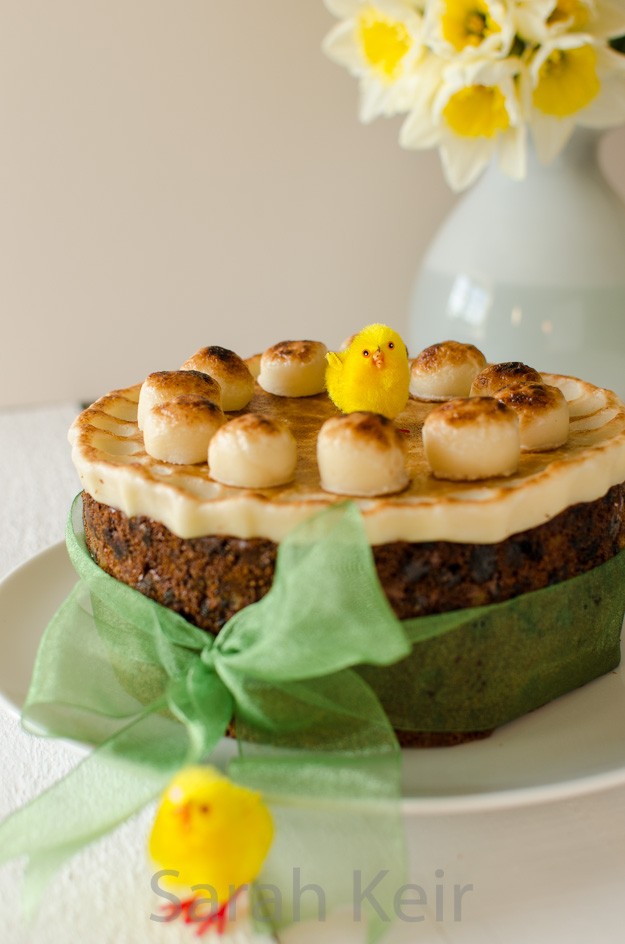
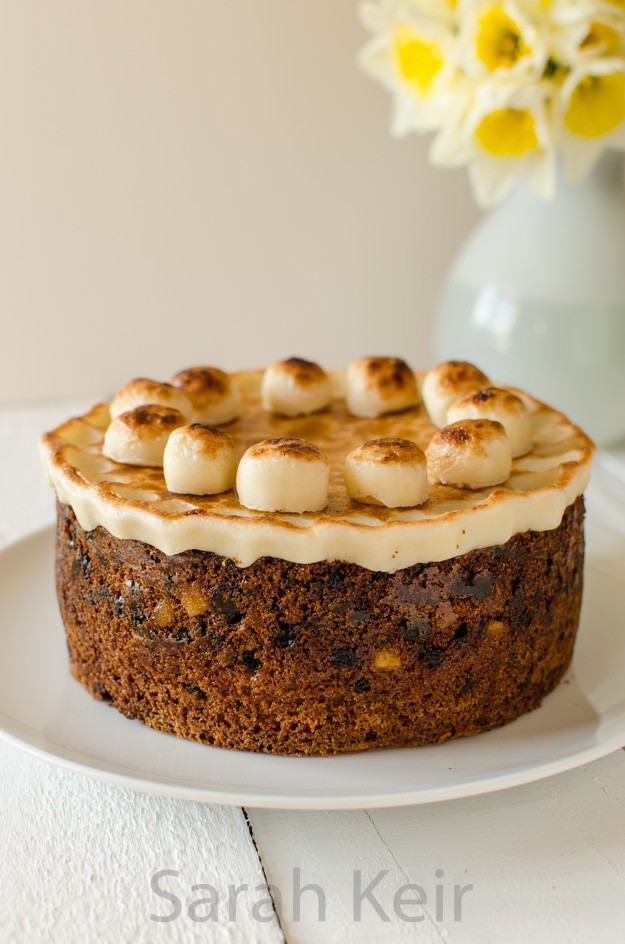
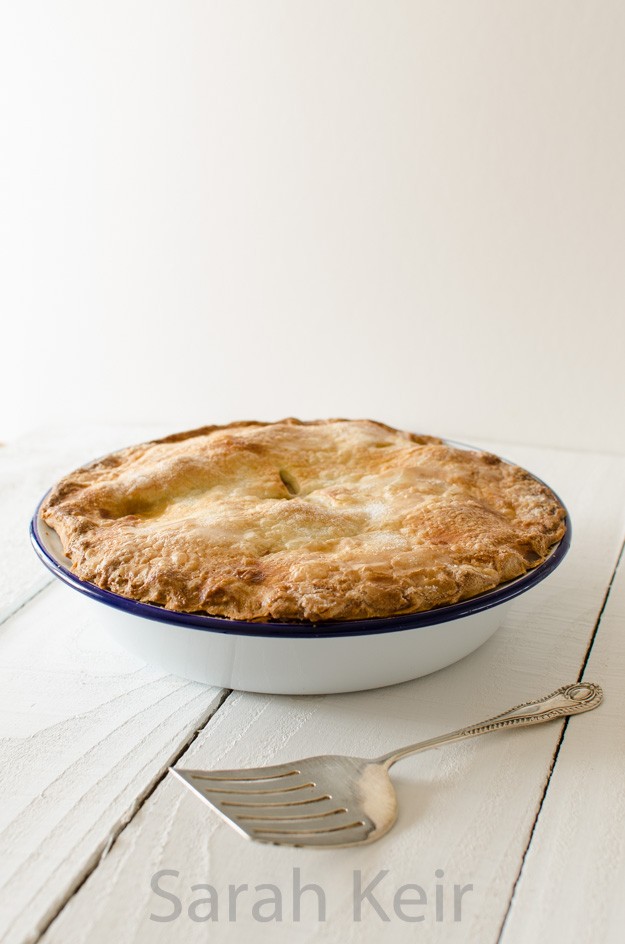
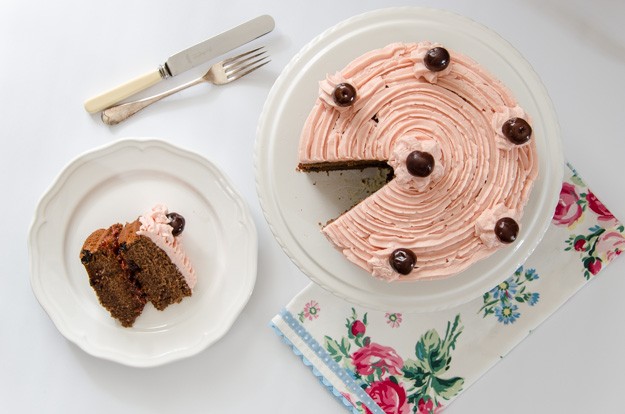
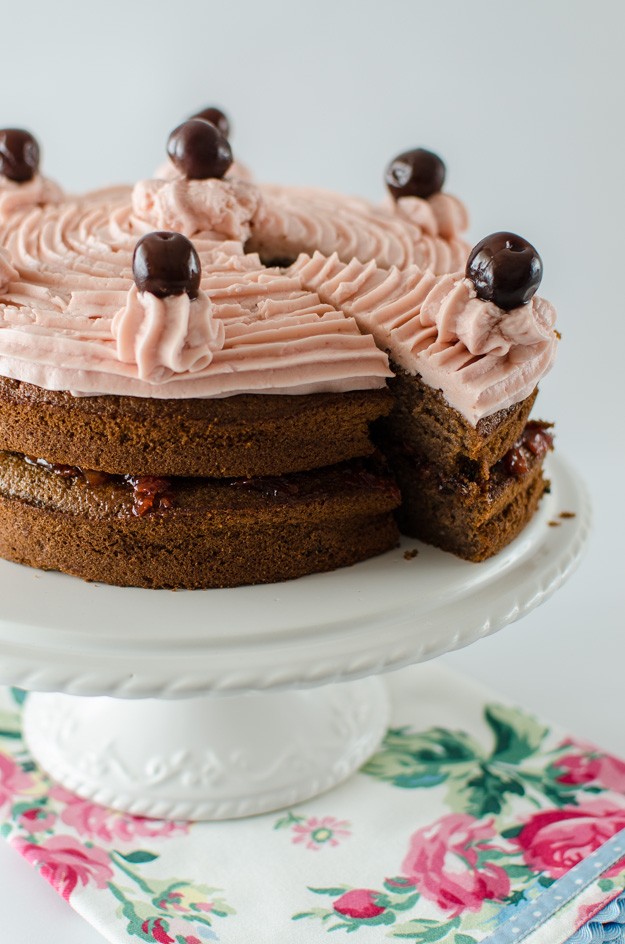
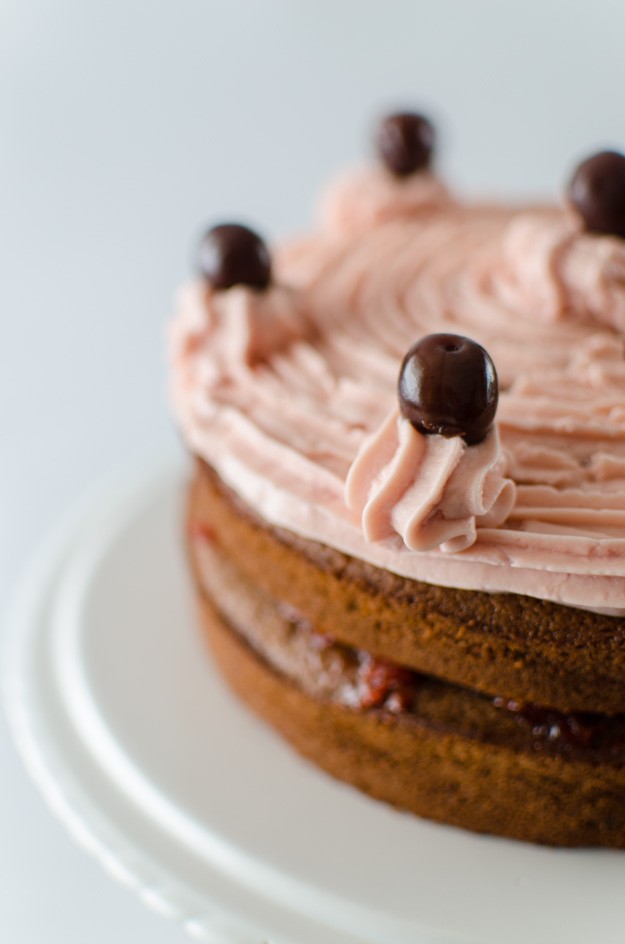
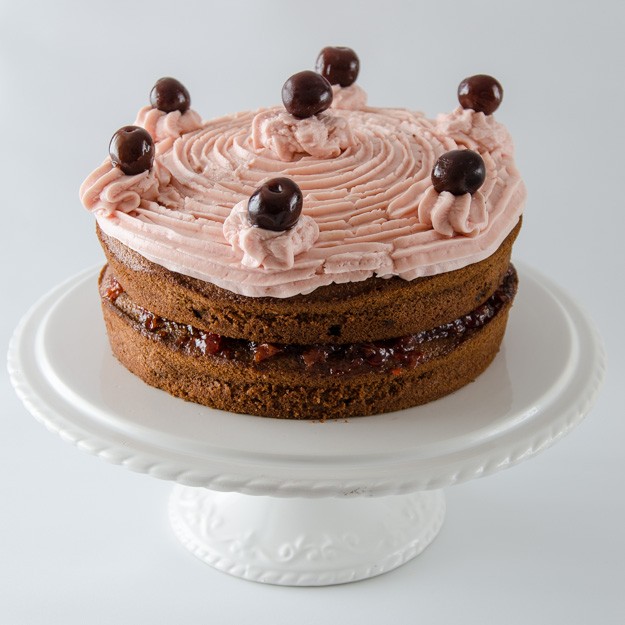
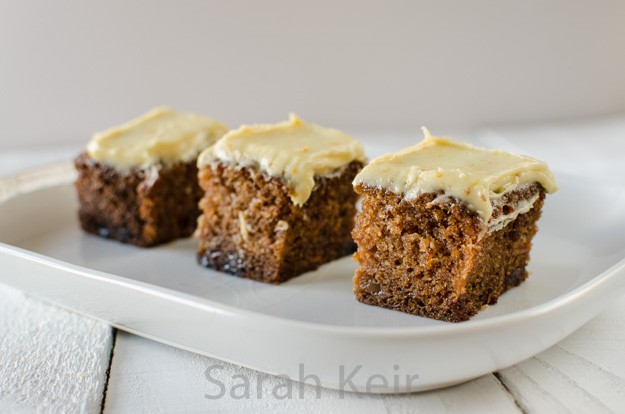
    This recipe is one of those which turns out to be much greater than the sum of all its parts. It is ridiculously moist, homely yet in fashion, chewy but light. You can glam it up with decoration or leave it rustic and plain. Bake in a round tin or rectangular, this cake never fails me in the bake or others in the tasting.

    Many people don’t like nuts so I use sultanas in my version which add texture and some sweetness. Feel free to change back to nuts; walnuts are traditional. It keeps well as it is an oil based cake, but the icing will only keep for a day or so at room temperature, depending on how hot it is!

    carrot cake-004

    Passion Cake

    For the cake:
    175ml vegetable oil, flavourless
    200g caster sugar
    3 eggs
    1 teaspoon vanilla essence
    100g sultanas
    200g carrots, grated coarsely
    150g plain flour
    1 teaspoon bicarbonate of soda
    1 teaspoon baking powder
    1 teaspoon each of cinnamon and mixed spice
    1/2 teaspoon salt

    For the topping:
    75g cream cheese or ricotta or quark
    50g softened butter
    1/2 teaspoon vanilla
    finely grated zest of 1 orange
    100g icing sugar

    Prepare a tin by lining the bottom with parchment paper and greasing the sides. Either a 22cm round tin or a 20 x 30cm rectangular tin, or muffin cases (about 12). Preheat the oven to 180ºC/ 160ºC fan.

    Beat the oil, sugar, eggs and vanilla in a jug.

    Put the dry ingredients into a large bowl, add the grated carrots and wet mixture. Beat well until mixed.

    Pour into the prepared tin and bake for about an hour for the large tins, half an hour for individual muffins. Allow to cool in the tin for 10minutes before turning out to cool completely on a cooling rack.

    To make the topping, put the soft butter in a bowl and beat until smooth. Add the cream cheese (which should be cold from the fridge) and vanilla and orange zest and beat until smooth. Sift over the icing sugar and beat until all incorporated. This topping is soft and cannot be piped; look at my other recipes if you need a topping that can be pipped.

    carrot cake-003


  2. Rhubarb and custard tart – recipe

    May 4, 2015 by sarah

    A couple of weeks ago, I made some individual sized custard tarts. But I had loads of pastry and filling left so I turned it into this patisserie style rhubarb and custard tart. I don’t think it would go down well in Paris (not finished well enough for a start) but I love the contrast of the silky egg interior and the tart juicy rhubarb on top. It looks so pretty with the regular rows of soft pink and green stems. One tip – measure and cut your rhubarb before it is cooked, otherwise it is too soft and will disintegrate to a mush when cut.

    custart&rhubarb-001


    You know it is Spring when you harvest your first crop of rhubarb from the garden. Rhubarb is technically a vegetable but is used most often as a fruit in cooking. Without a sweetener, rhubarb is bracingly sour. If you think about those unfolding leaves and growing stalks appearing after a long winter diet of meat and starch, rhubarb’s tartness could serve as a welcome tonic. But add some sugar and the fruit flavour is revealed in all its glory. The flavour of rhubarb is complemented by many things; vanilla, nutmeg, orange, ginger.

    custart&rhubarb-003

    Rhubarb and custard tart

    Custard tart made as here
    500-750g rhubarb
    50-100g caster sugar

    Clean the rhubarb and cut into lengths to fit on your tart, especially if making a rectangular tart like mine.

    Place the cut rhubarb into a shallow dish suitable for the oven. Sprinkle over the sugar and tightly seal with foil. Place in a preheated oven at 200 ºC/180 ºC fan for 20-25 minutes until the rhubarb is tender. Allow to cool completely before arranging on your tart. Serve immediately as the juice from the rhubarb will make the pastry soggy.

    custart&rhubarb-002


  3. Spice 10 – Nutmeg – Custard Tart

    April 28, 2015 by sarah

    Nutmeg is an unassuming spice. The brown kernel has a pleasing sweet aroma but the magic happens when it is added to dishes containing dairy products or eggs. Nutmeg has been used in European cuisine since medieval times so no wonder there is a multitude of unique recipes using it; custard tarts, bread sauce, rice pudding, mulled wine and even haggis!

    custart tart-003


    Nutmeg is the seed of a tree that indigenous to the Banda Islands in the Moluccas (or Spice Islands) of Indonesia, though now grown in the Caribbean and Kerala in India. Two spices are obtained from this tree, the other being mace which is the lacy outer wrapping to the nutmeg seed inside. Although mace and nutmeg are not identical in flavour, they are so similar that for most recipes they can be interchanged. Use mace for recipes requiring a whole form such as chutneys and pickles, and use nutmeg for when ground spice is required. It really does need to be ground fresh, as it quickly loses its power when ground; I keep a mini grater obtained from a Christmas cracker for this very purpose. As a little aside, nutmeg is supposedly a hallucinogen but you would have to eat rather a lot of it and the other side effects sound grim! Do not try at home!


    custart tart-002

    This recipe is adapted from ‘The Great British Book of Baking’ by Linda Collister.

    Custard Tart

    For the sweet shortcrust pastry:
    175g plain flour
    pinch of salt
    2 tablespoons caster sugar
    110g unsalted butter, chilled and diced
    1 medium egg yolk

    For the filling:
    400ml single cream
    200ml milk
    plenty of freshly grated nutmeg (to taste but at least half a kernel)
    3 medium eggs, plus 3 yolks
    75 caster sugar

    Make the pastry – rub the butter into the dry ingredients until makes fine crumbs. Use a round ended knife to mix in the egg yolk and some cold water until it comes together as a firm dough. Wrap in cling film and pop the the fridge for at least 30 minutes, but overnight is better.

    Roll out the pastry until thin and then use to line your tart tin; use a 22cm diameter round fluted tin with a removable base or several individual sized ones. Prick the bottoms all over with a fork. Chill in the fridge for at least 30 minutes (or freezer for 10 minutes if you are short of time). Preheat the oven to 200 ºC/180 ºC fan. Bake the pastry cases blind for 15-20 minutes. To do this, cut out a square of baking parchment a few inches larger than the tin, scrunch up the paper, flatten out and scrunch again. Flatten out the paper and lay over the pastry, fill with ceramic baking beans, dried pulses or even copper coins. Doing this cooks the base so you don’t get a soggy bottom and the baking beans stop the sides from collapsing. Remove the paper and baking beans and return to the oven for another 5-10 minutes. Take out of the oven and with a pastry brush, brush the pastry with one of the eggs (beaten) and return to the oven for 1-2 minutes. This egg layer means your pastry bottom really will not go soggy.

    Turn the oven down to 160 ºC/fan 140 ºc.

    custart tart-004


    Put the cream and milk into a pan and slowly bring to just below the boil, take off the heat and set aside for 5 minutes. Meanwhile eggs, egg yolks and sugar in a large bowl. Slowly pour over the hot cream/milk mixture, whisking constantly. Add about half of the amount of nutmeg you wish to add and transfer the mixture to a jug.

    Set you pre-cooked pastry case on a hot oven tray and place on the top shelf of the oven. Carefully pour in egg/milk mixture right to the brim, carefully slide it into the oven and close the door. Bake the tart for about 30 minutes. The middle of the tart should still have a bit of a wobble (the individual tarts took about 15 minutes). Leave to cool and serve warm or cool, with more grated nutmeg if wished. Best eaten the day it is made.

    custart tart-001


  4. Cupcakes

    April 26, 2015 by sarah

    I have shied away from putting up a recipe for cupcakes so far as they seem to have had their time in the spot-light and are now considered ‘has beens’. I think this is rather harsh as a good cupcake is a lesson in portion control; no guessing how many the cake is supposed to feed and trying to gauge slice sizes. The key though is a GOOD cupcake. Far too often have I been tempted by the bling exterior of a coffee shop or market stall cupcake, just to be sorely disappointed by the dry, tasteless, overly sweet interior with far too much sweet, tasteless icing.

    cupcakes-001

    Coffee cupcakes with coffee flavoured Swiss meringue buttercream and decorated with chocolate covered coffee beans.


    But cupcakes do not need to be like this. For cupcakes to be a joy they must be freshly baked (no more than 24 hours old or they are too dry), as they come out of the oven liberally brush the top with appropriately flavoured sugar syrup, consider filling the centre with jam or fruit curd and consider the icing to be in proportion with the cake below (Swiss meringue buttercream is luxuriant but not too sweet). My favourite cupcakes that I make are a lemon sponge, doused with lemon syrup as they come out of the oven and then filled with lemon curd and topped with lemon cream cheese topping (half cream cheese, half butter, sweetened with a little icing sugar). Decorations should be simple but appropriate and are not the entire reason for a cupcakes existence. Go on, give cupcakes a second chance.

    comic relief-001

    Selection of different cupcakes I made for charity fund raising – lemon, strawberry, chocolate, coffee and almond amaretto.

    Cupcakes


    Makes 12 of larger/muffin sized cakes

    175g soft butter or margarine
    175g caster sugar
    3 medium eggs at room temperature
    175g self-raising flour plus 1/2 teaspoon baking powder
    or 175g plain flour with 2 teaspoons of baking powder
    2 tablespoons of milk
    flavourings – 1 teaspoon vanilla extract, or
    – zest of 2 lemons, or
    – replace 25g of flour with cocoa powder, or
    – replace the milk with 4 teaspoons of instant coffee dissolved in 2 tablespoons boiling water

    Preheat the oven to 180ºC/160ºC fan. Put cupcake cases into hollows of a cupcake tin.

    Put the butter/margarine into a large bowl with the sugar and cream together until light and fluffy.

    Add all the other ingredients in one go and beat on slow speed until mixed thoroughly and a smooth, thick batter is formed. I prefer to do the last bit by hand with a silicone spatula so that all the ingredients from the sides and bottom are thoroughly mixed in and the batter is not over mixed.

    Divide the batter between the cupcake cases – should come three-quarters full.

    Bake for 18-20 minutes, turning half way through cooking. Take out the oven and allow to cool for at least 15-20 minutes in the tin before turning out; this stops the paper cases pulling away from the cake.

    Prick the tops all over with a skewer and use a pastry brush to soak in sugar syrup.

    Sugar syrup – 5 tablespoons of water plus 75g sugar – place in a small pan and heat gently until the sugar is dissolved then allow to cool. Add flavourings – a split vanilla pod or for lemon replace the water with lemon juice. Will last up to a month in a sealed container in the fridge.

    cupcakes-002


  5. Simnel Cake – an Easter treat

    April 5, 2015 by sarah

    I am one of those crazy people that could just eat marzipan. Forget the icing and sometimes even the cake, I go for the marzipan. If you are one of these people too then keep reading; if not then skip this recipe! Simnel cakes are considered an Easter treat these days, but in the past they were part of a Mothering Sunday tradition of girls in service taking a cake to their mothers on the one day off work. The eleven balls on top, to represent the apostles minus Judas, are a Victorian puritanical addition. By the way, has anyone out there baked a scripture cake, where the recipe is hidden in bible verses? Maybe a project for the future?

    simnel-004


    I like to decorate my simnel cake with ribbons and those kitsch plastic chicks in the shops at this time of year. It is amazing how just the past couple of weeks, the weather and feeling in the air has turned spring-like. Even between the squally showers, the daffodils nod their ridiculously over the top yellow-cream heads, birds are shouting ‘come and get me’ from every branch and already the lawn needs mown. Happy Easter everyone!

    simnel-002


    Simnel Cake


    Serves at least 14 – it is rich

    Recipe adapted from BBC Good Food

    500g pack of natural marzipan
    175g butter
    175g soft brown sugar
    4 medium free-range eggs, beaten
    175g plain flour

    1/2 teaspoon baking powder
    pinch of fine salt
    1/2 teaspoon mixed spice
    350g mixed dried fruit – raisins, currants, sultanas
    50g chopped candied peel
    zest of 1 lemon
    1-2 tablespoon apricot jam

    Preheat the oven to 140 C/120 C fan. Prepare a 18cm/7 inch tin like for the Christmas cake recipe here (grease, line and wrap the outside in newspaper).

    Cream the butter and sugar until pale and fluffy. Sift over the flour, salt, baking powder and mixed spice and add the beaten eggs. Beat until well mixed. Add some milk if it is very stiff but you need a fairly stiff batter to support the dried fruit. With a metal spoon, fold in dried fruit, candied peel and lemon zest.

    Put half the mixture into the prepared pan and level the top. Take one third of the marzipan and roll out to be a circle of diameter that will fit inside the tin. Use the bottom of the tin to measure and trim to fit; place on the cake mixture. Add the rest of the cake mixture and smooth the top then leave a slight dip in the centre.

    Place in the middle of the preheated oven for 2 to 2 and half hours until a skewer comes out mostly clean (the melted marzipan will mean it will never be truely dry until completely over cooked). If the top is browning too fast, make a baking parchment or foil hat with a small hole in the centre for steam to escape. Allow to cool fully in the tin before turning  out.

    Brush the top of the cooled cake with apricot jam. Roll out another third of the marzipan and cover the top of the cake, scalloping the edges by pinching the almond paste. Toast this under a preheated grill until medium brown; watch constantly as it burns easily. Roll the remaining marzipan into 12 equal balls and eat one (it much easier to divide into 12 than 11 and the extra ball is a cooks perk!), toast under the preheated grill on foil and when cooled add to the top of the cake, gluing the balls in place with apricot jam if necessary.

    simnel-003


  6. Apple Pie – an old fashioned pie plate recipe

    April 1, 2015 by sarah

    I bought an old-fashioned pie plate in the January sales but it languished in the pan cupboard until this week. It has a classic retro feel about it so I just had to make a good, old fashioned apple pie. Now, normally pastry is not my strong point but I recently bought a pastry blade from Lakeland and it has revolutionised my pastry making. It means that even without a full sized food processor, I can whip together a batch of pastry within 10 minutes and no sticky hands and scrubbing pastry from under my wedding ring!

    apple pie-006


    I love how this apple pie turned out. Having kept the filling simple, the apple flavour really does shine through. Perfect for serving warm with custard or ice-cream or cold with cream. Mmmm! Go on, spoil someone this week with this old-fashioned recipe.

    apple pie-003 apple pie-001


    Apple Pie

    Serves 6-8
    For the Pastry
    250g plain flour
    50g icing sugar
    125g cold butter
    1 egg
    1/2 teaspoon salt
    egg wash (one egg beaten with 1 tablespoon of water)
    caster sugar for dusting
    For the Filling
    2 large Bramley apples
    3 eating apples (need about 1kg apples in total)
    100g soft brown sugar
    1 teaspoon ground cinnamon
    1/4 teaspoon ground nutmeg
    1/8 teaspoon ground cloves
    1 tablespoon lemon juice


    Preheat the oven to 200 ºC/180 ºC fan. Grease a 20cm pie plate with butter.

    Make the pastry by rubbing the butter into the flour, icing sugar and salt, either by hand, food processor or pastry blade, until it resembles breadcrumbs. Crack the egg into the pastry and gently mix with your hands until it comes together into a ball. If the mixture is too dry, add a drop or two of cold milk or water. Wrap the pastry in cling film and put in the fridge to rest and cool for about an hour or more.

    Peel the apples, place in a large bowl and sprinkle with the lemon juice to stop them turning brown. Add the sugar and spices and mix well. Put in a large saucepan and over a medium heat, cook gently for 5 minutes until the apples are tender but not complete mush. Remove from the heat and allow to cool completely.

    Divide your pastry in half and on a worktop dusted with flour, roll out to about 1/2 cm thick. Transfer the pastry to the pie plate by drapping over the rolling pin. Ease the pastry into the dish, making sure it is well pushed into the sides. Sprinkle the base of the pastry with a handful of ground almonds, dry cake crumbs or bread crumbs; this will absorb excess water from the apples so the bottom of the pastry crisps up. Pack in the cooled apple mixture into the pie; it should be domed high as it will sink down.

    Roll out the other half of the pastry, also to 1/2 cm thick. Run a line of egg wash around the rim of the pastry in the tin. Carefully lift the lid onto the top of the pie.

    Use your forefinger and thumb to firmly crimp the edge of the pastry to ensure bottom and lid are well glued together.
    Brush the top of the pie with the egg wash and sprinkle over the caster sugar.
    With a small sharp knife, make a couple of small slits in the top of the pie so that steam can escape.

    Place the pie in the preheated oven for 40-45 minutes until golden and firm. Serve immediately or allow to cool.

    apple pie-004


  7. Chocolate Cherry Layer Cake

    March 18, 2015 by sarah

    Sometimes a cake has to made for the sheer beauty of the thing. Don’t get me wrong; flavour is still my primary aim but sometimes it is nice to luxuriate in the beauty of a cake before devouring it. And this cake has it in spades. The delicate pink icing and filling contrasting with the dark brown moist cake and the cherries on the top. Like a cute black forest gateau.

    cherry-004


    I wandered hungry and alone

    Downstairs to the kitchen

    Where upon I came across

    A recipe for a cherry chocolate cake.

    It was baked and made and iced

    And I drowned in the beauty of the cake I beheld.’

    cherry-002

    Chocolate Cherry Cake


    225g butter at room temperature
    225g caster suagr
    175g plain flour
    50g cocoa powder
    2 teaspoons baking powder
    1/2 teaspoon fine salt
    5 medium eggs
    200ml greek yogurt or cream or buttermilk
    1 teaspoon vanilla extract
    Handful (about 50g) of sour dried cherries

    Cherry jam, preferably sour cherry
    Swiss meringue buttercream (recipe here), add some cherry puree made from blended frozen cherries
    Cherries in alcohol for decorating, reserving some of the syrup/alcohol.

    Preheat the oven to 180 ºC/160 ºC fan. Grease and line the base of two 20cm/8″ sponge tins.

    Beat together the butter and sugar until creamed well. Sift over the dry ingredients. Beat together the wet ingredients to break up the eggs then add this to the bowl. Beat all together until well mixed, scraping down the sides of the bowl a few times. Fold in the dried cherries and then pour the batter into the prepared tins, trying to divide it equally.

    Cook for 30-35 minutes until a skewer comes out clean. While the cakes are cooking, make a cherry flavoured syrup by heating the cherry syrup or alcohol base with some extra sugar to make it syrupy. Allow the cakes to cool for 10 minutes in the tins then brush over this syrup. After half an hour, take the cakes out of the tins and allow to cool fully on cooling wracks.

    Assemble the cake with some cherry jam as the filling and pipe the pink tinged buttercream on top. Decorate with the reserved preserved cherries, or fresh cherries if they are in season.

    cherry-003 cherry-001


  8. Biscuity Chocolate Truffle Balls

    March 8, 2015 by sarah

    These were actually made by my husband. He remembers buying them from the local bakers, Aulds, in Scotland in his youth and wanted a bit of nostalgia. He actually made them all by himself though I had to do the washing up! He says they taste very authentic. I wouldn’t know about that, having been deprived of Aulds bakery goods in my youth, but they do go down rather easily! And not at all posh unlike the proper chocolate truffle recipe I posted a couple of weeks ago. Also enjoy the random photo of our not posh cat, Brian.

    balls-003

    brian-001

    Biscuity Chocolate Truffle Balls

    20 oaty digestive type biscuits

    125g butter

    200g condensed milk

    2 tablespoon cocoa powder

    125g desiccated coconut

    chocolate strands or desiccated coconut to roll them in

    Put the butter and condensed milk in a small pan heat gently until the butter is melted.

    Put the biscuits into a food bag, hold the end closed and bash with a rolling pin until you have fine crumbs. Put the biscuits, cocoa powder and desiccated coconut into a large bowl and pour over the melted butter/condensed milk. Mix until well combined.

    Form the mixture into ping pong sized balls with your hands and place on a tray lined with grease-proof paper. Put the extra coconut or chocolate strands into a food bag. Drop in the balls and roll around to cover them. Place them back on the grease-proof paper and store in the fridge until set firm. Store in the fridge until needed. These will last a week once made.

    balls-002 balls-001


  9. Polenta and olive oil cake

    March 3, 2015 by sarah

    Reading this title you probably thought that something had gone wrong. Perhaps a supper dish from Italy? But a cake? Made from savoury ingredients? Have I gone mad? No, my dear readers I have not gone mad. This cake is indeed a delicious and light sponge perfect any time of day from breakfast to dinner, as my husband can attest. It also happens to be healthier too as it is not made with butter.

    This cake was deliberately chosen to use up some store cupboard ingredients I found in my January clear out. I don’t particularly like polenta as a starch for a meal so this recipe was ideal way of trying it in a different way. I have to admit though it is a little drier than one would expect a teatime cake to be, probably because of its lack of butter, but this was definitely balanced with some poached fruit or yogurt on the side. The polenta gave a fine gravelly, but not unpleasant, mouth feel. Buon appetito!

    polenta-008

    Polenta and Olive Oil Cake

    6 medium eggs

    1 cup white caster sugar

    freshly grated zest of 2 lemons

    1 and 1/2 cups of plain flour

    3/4 cup instant fine polenta

    2 teaspoons baking powder

    1 teaspoon fine salt

    3/4 cup olive oil

    drizzle: juice of the 2 lemons and 100g caster sugar

    Preheat the oven to 180 ºC/160 ºC fan. Lightly grease a 9″/20cm springform pan with oil.

    Place the eggs and sugar in the bowl of a mixer and with the whisk attachment, beat for at least 5 minutes until light in colour and tripled in volume. Pour in the oil and sift over the dry ingredients. Start the mixer on very slow, beat until incorporated, scraping down the sides a couple of times. Pour the batter into the prepared cake tin and place in the middle of the preheated oven for 25 to 35 minutes until risen and slightly coming away from the sides; a skewer should come out clean.

    While the cake is in the oven, dissolve the sugar in the lemon juice for the drizzle; you may need to heat it in a small pan to get it to dissolve fully. Once the cake is cooked and taken out the oven, sit it on a tray and pour over the drizzle. Allow to cool fully in the pan before turning out.

    polenta-007


  10. Tahini biscuits

    February 18, 2015 by sarah

    I apologise for my absence over the past couple of weeks. I have been very busy studying for my certificate exams that were last week. But now they are out the way I should have more time for baking and blogging! It feels like such a relief to get them out the way. At the weekend I had the complete freedom of choice of what to do so I cleaned the house thoroughly on Saturday and relaxed on Sunday. Bliss!

    tahini-002


    This recipe is another beginning of the year attempt at using up cupboard bits and bobs, a side effect of my food hoarding. I can’t remember why I even had tahini in the cupboard, perhaps from a hummus recipe. But though I love hummus, I cannot currently imagine making it as the weather is so cold and the supermarket stuff is pretty good. So these biscuits came about as a way of using up the last bit of tahini in a jar. As usual, this is a combination of several recipes cobbled together but I have to admit they turned out perfectly. They are very short and crumbling with a buttery sesame seed flavour in the background that is not at all over powering but is mystical and mouthwatering. These biscuits did not last long, I can tell you; they didn’t even make it as far as my work colleagues. Darn, now I will have to buy some more tahini just to make these biscuits…


    tahini-003

     tahini-005

    Tahini Biscuits


    100g white caster sugar
    120g unsalted butter, soft
    175g plain flour
    1/2 teaspoon baking powder
    1/2 teaspoon fine salt
    120ml/110g tahini, well stirred
    1/2 tablespoon runny honey
    1 teaspoon vanilla extract

    sesame seeds, for sprinkling

    In a bowl, beat the butter and sugar with a wooden spoon. Add the tahini, honey and vanilla and beat in. Add the dry ingredients and bring together to a soft ball. Wrap this dough in cling film and put in the refridgerator for an hour until firm.

    Preheat the oven to 170 ºC/150 ºC fan.

    Using clean hand, break off small lumps of dough and roll in your hands until roughly spherical. Place on a baking parchment lined baking tray, allowing 2cm/1″ between the balls, and press down gently with your fingers to flatten slightly. Once all the dough has been used up this way, sprinkle the biscuits with sesame seeds and place in the preheated oven for 12-15 minutes. Watch carefully as they brown easily. Allow to cool on the tray for 5-10 minutes before transferring to a cooling wrack to complete the cooling. Store in an airtight container and eat within a week.

     tahini-006