RSS Feed

Posts Tagged ‘baking’

  1. Christmas Pudding Slice

    February 7, 2016 by sarah

    At the beginning of the year I like to go through my cupboards and have a clear out. Clothes I haven’t worn all year go to the charity shop and the food cupboards are sorted too. And so I found a lonely Christmas pudding, a few months out of date; it wouldn’t last to next Christmas but neither did I feel like eating it as a pudding. This recipe is a great way of using up Christmas pudding, mincemeat or even cranberry sauce; mix up the filling how you like it! You could have pastry top and bottom or have a crumble topping like I made. Make them yours and use up your lonely cupboard ingredients!

    christmas pudding slice-2

    Christmas Pudding Slice

    For the pastry base
    175g cold butter, cubed
    250g plain flour
    1/2 teaspoon salt
    25g caster sugar
    1 egg, beaten

    For the filling
    400-500g Christmas pudding or a jar of mincemeat
    2 cooking apples, peeled and grated
    1 lemon, juice and zest

    For the crumble topping
    185g plain flour
    125g butter, cubed
    1 teaspoon baking powder
    150g caster sugar
    50g rolled oats

    Preheat the oven to 190°C/ 170°C fan.

    To make the pastry base, rub the butter into the flour and salt, stir in the caster sugar and then stir in the egg using a knife. You may need a touch of ice cold water to bring it together. Tip this crumbly mixture in the base of a tin about 20x30cm and press down to make a smooth layer.

    Bake the pastry for 10-15 minutes until just colouring.

    Mix the filling ingredients together then spread evenly over the pastry base.

    For the crumble topping, rub the butter into the flour then stir in the other ingredients. Sprinkle evenly over the filling.

    Bake for 40-45 minutes. Leave to cool in the tin and then cut into squares. Enjoy!

    christmas pudding slice


  2. Quick soda bread

    January 17, 2016 by sarah

    I love bread, but it needs to be fresh and crusty and tasty. If I had time I would make sourdough every day, but most of it would go to waste as we don’t eat that much bread. And it takes time, a serious commitment. I sadly had to consign my sourdough starter to the bin this week as it had been forgotten at the back of the fridge for too long and gone bad. When I crave bread, I either go to Waitrose and get some of the expensive French stuff or I make this bread. This goes perfectly with homemade soup so is great for these cold, snowy (at last) winter days and if knocked together in the time that the soup is cooking as there is no kneading or anything. Perfect! It is best eaten on the day it is made but you can freeze it successfully.

    soda bread-003


    Soda Bread (Paul Hollywood recipe)

    500g strong flour – I used stone ground wholemeal from Isle of Wight watermill
    1 teaspoon bicarbonate of soda
    1 teaspoon salt
    400ml buttermilk

    Heat the oven to 200°C and line a baking tray with baking parchment.

    Put all the dry ingredients into a large bowl and use a balloon whisk to mix. Stir in the buttermilk to form a sticky dough. Tip the dough out on to a lightly floured surface and shape into a rough ball.

    Place the ball of dough on to the baking tray. Using a sharp knife, mark the dough into quarters, cutting all the way to the tray. Dust with a little flour.

    Bake for 30 minutes (check sounds hollow underneath). Leave to cool on a baking rack.

    soda bread-002 soda bread-001


  3. Lemon & Blueberry Layer Cake

    December 12, 2015 by sarah

    I made this cake way back in the seemly long distant summer, for the tea party I held in our garden. Gosh, it seems so long ago that the sun was here especially as now the days are very short and what daylight there is is veiled in grey cloud and rain. I am dreaming of the lovely Ethiopian sunshine! Even my blue light therapy cannot dispel the winter blues!

    lemon-001


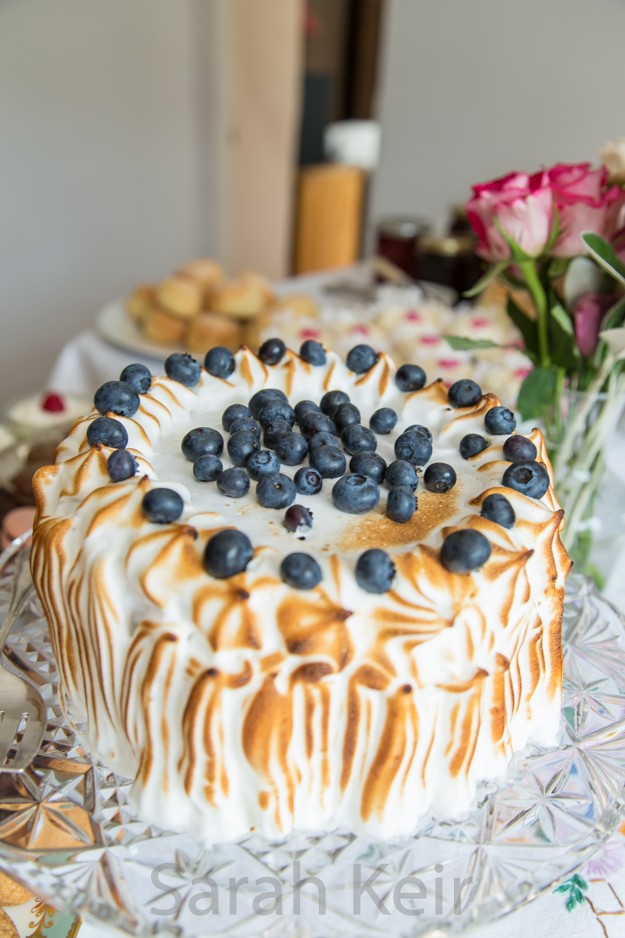
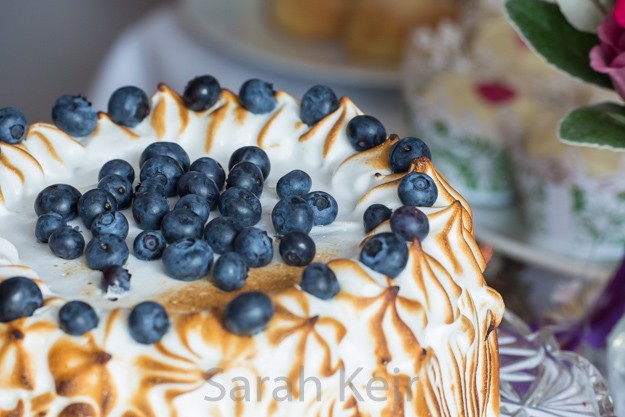
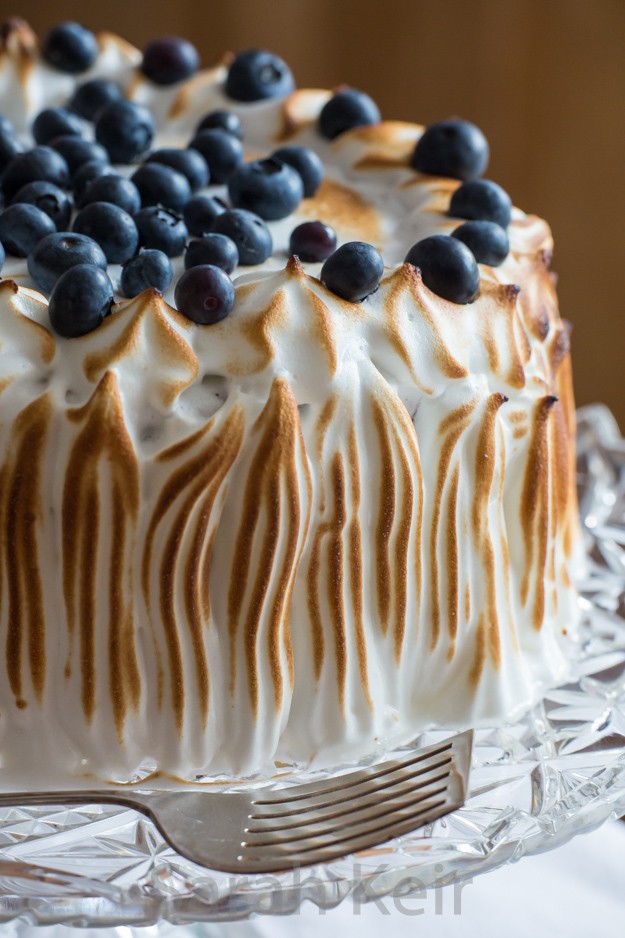
    But I chose to write up this recipe now as it has a sunny warm feeling about it. I wanted a light fruity cake to complement the heavier, richer cherry chocolate cake and lemon flavour always goes down well. And this cake ticked all those boxes; the light but flavourful sponge interspersed with bright bursts of blueberries, the bright sour flavour of the homemade lemon curd and the soft marshmallow of the Italian meringue topping enveloping the whole lot with a touch of caramel sugar where the blow torch caught as a foil against the floral tones of the elderflower. The list of ingredients and steps may seem an insurmountable hurdle but broken down into components, it really is not that a big a deal. You can make the lemon curd (you can find my fool-proof recipe here) a week or so in advance or buy a good quality one (I’m not judging). The cake layers (recipe adapted from here) can be made the day before and stored well wrapped in cling film. Only the assembly and meringue topping needs to be done shortly before eating. I was surprised by the keeping qualities of this cake. The meringue did weep terribly after about 12 hours but the syrup it produced kept the cake moist for several days!

    lemon-003


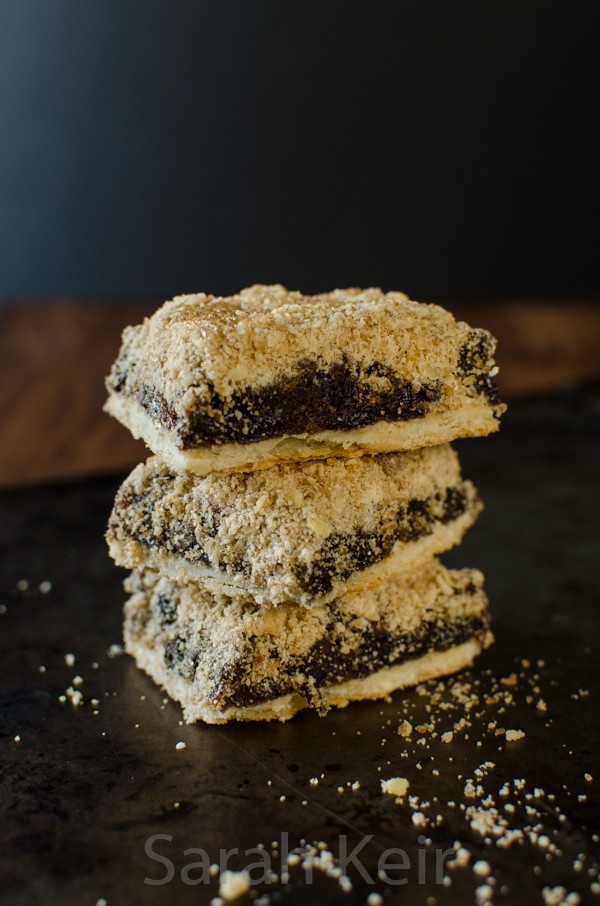
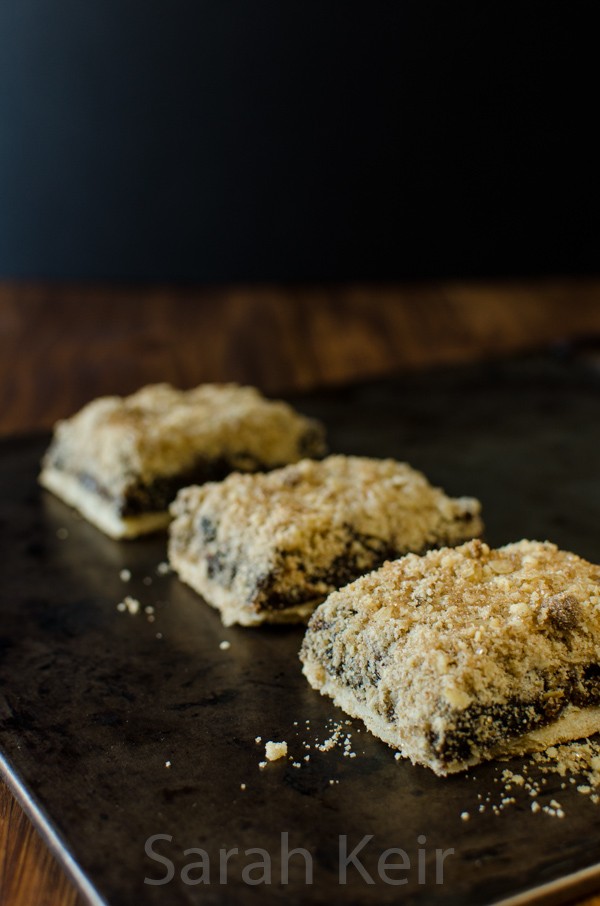
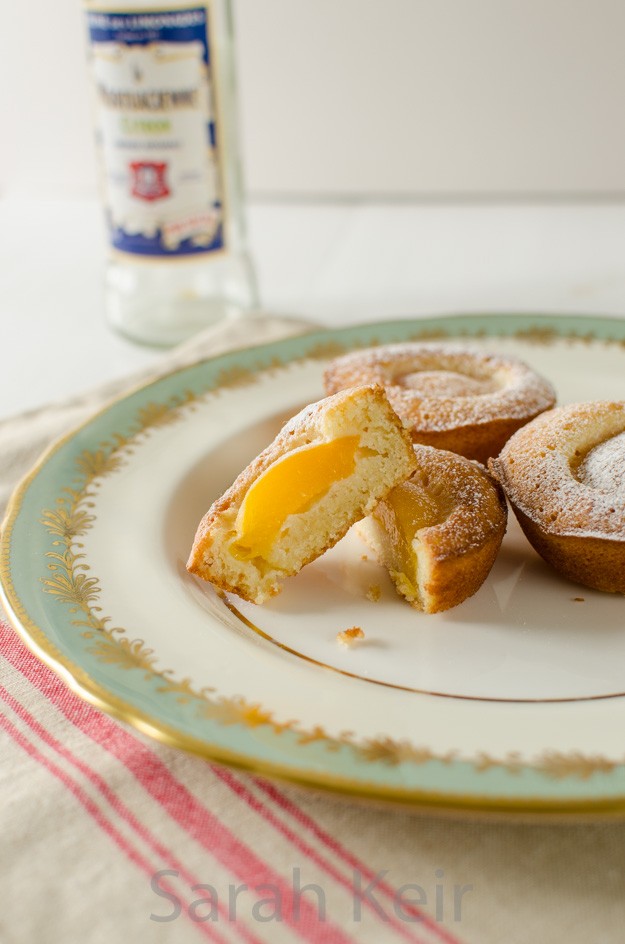
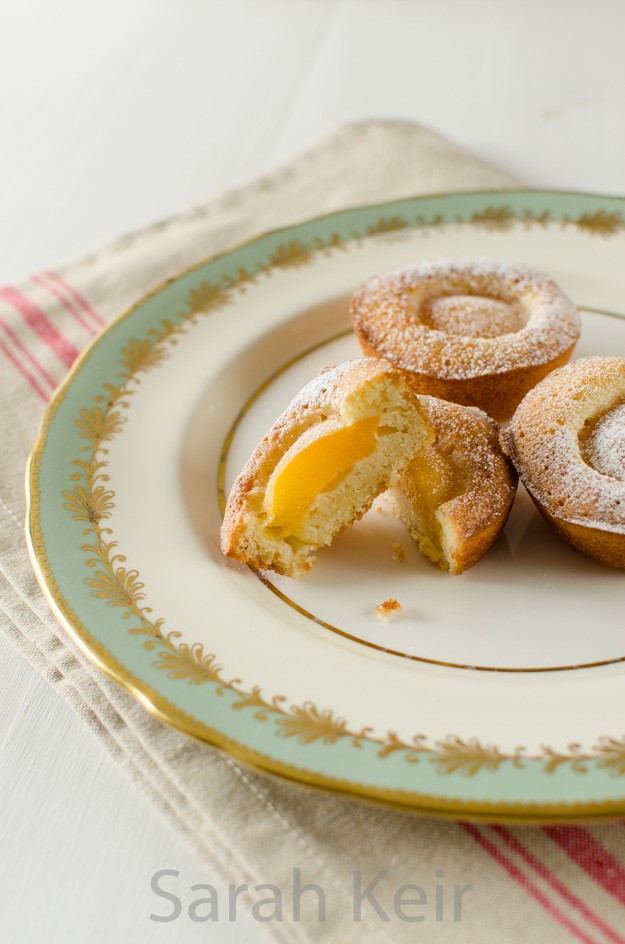
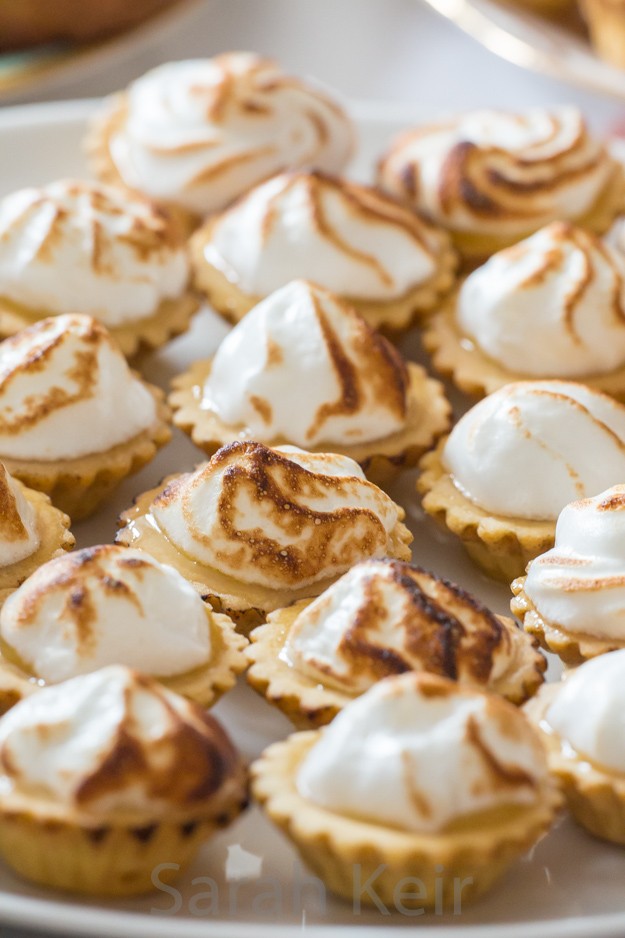
    If you have any lemon curd and meringue left over, you can easily make a form of lemon meringue pie – I made mini ones to have at the tea party. Marks and Spencer sell good quality ready made pastry shells which are so easy to use for this recipe.

    lemon-002

    Lemon & Blueberry Layer Cake

    Cake Layers
    230g soft unsalted butter
    250g caster sugar
    100g soft light brown sugar
    6 medium eggs
    1 tablespoon vanilla extract
    360g plain flour, sifted
    1 tablespoon baking powder
    1/2 teaspoon salt
    240ml buttermilk (or full cream milk with lemon juice added)
    zest and juice of 3 lemons
    275 of still-frozen blueberries, tossed in 2 tablespoon plain flour just before adding
    
    Filling
    Jar of lemon curd
    Some plain or lemon buttercream (100g butter, 200g icing sugar, a little milk if necessary)
    
    Italian Meringue
    300g caster sugar
    200g egg whites
    1/2 teaspoon cream of tartar
    1 teaspoon elderflower essence (I used Uncle Roy's, available here)
    
    Fresh blueberries for decoration.


    Preheat the oven to 180°C/160°C fan. Grease and line the base of three 9″ cake pans. It is easier to make this cake in a stand mixer, but it is perfectly possible to use a hand mixer or even entirely by hand.

    Beat the butter with paddle attachment until creamy. Add the sugars and beat until well creamed, scraping down the sides of the bowl as needed.

    Beat together the eggs and vanilla. Add to the butter/sugar mix a spoonful at a time with the beaters on medium, adding tablespoons of the flour if it looks like it is separating.

    Sift the dry ingredients (remaining flour, salt and baking powder) over the wet mixture, beat very slowly and then start adding the buttermilk, lemon zest and lemon juice. Do not over mix otherwise it will be tough – it is better to so the last bit by hand. Toss the blueberries into the flour and fold in. Spoon the batter evenly into the three prepared tins.

    Bake the three layers on the same shelf on the oven if possible and they will take 20-25 minutes, until a toothpick comes out clean. Remove from the oven, cool in the tins and do not proceed until they are completely cold.

    Stick the bottom layer of the cake to the serving dish with a blob of buttercream. Pipe a ridge of butter cream around the outer edge of the top of the cake layer – this is going to act as a dam to stop the lemon curd running out from the layers! Spoon the lemon curd into the centre, as much as you dare and then place the next cake layer on top and repeat the buttercream dam and lemon curd and then sit the final cake layer on the top.

    Make the Italian meringue by placing the sugar in a saucepan with 175ml water and bring to a rolling boil; place in a candy thermometer. Meanwhile, place the egg whites and cream of tartar in a stand mixer with the whisk attachment and beat to soft peaks. When the sugar syrup has reached 115°C, slowly trickle in down the side of the bowl of egg whites while they are going at high speed. Continue to whisk the meringue on high speed for about 10 minutes during which time it will thicken and cool but it is easier to use when still warm. Whisk in the elderflower essence if using and spoon into a piping bag. Use some of the meringue to cover the top first, smoothing with a spatula, then piping vertical lines (it is easier to go from bottom to top and it leaves nice spikes on top too) so that the whole of the cake is covered. If you have a blow torch then run it over the meringue to colour it. Dump some fresh blueberries on top, and an individual one on the top of each piped blob!
    lemon-004


  4. Mille feuille

    November 13, 2015 by sarah

    Just a very brief post to say bye-bye for a couple of weeks as we are off on holiday – back to lovely Ethiopia. I was hoping to have time to write some posts before I went but I ran out of time. So I’ll leave you with a little taster of what is to come… dulce de leche mille feuille!

    Cheats recipe – Bought ready-rolled all-butter puff pastry. Bake according to packet but lie a heavy flat baking sheet on top to prevent too much rise. Cool on wire rack. Once cool, carefully cut into rectangles. Caramalise the top of what will be the top layer with sugar under the grill or with blow torch.

    Whip cream until soft peaks, fold in dulce de lech and pinch of salt. Spread some more dulce de leche on the top of the bottom and middle layers of pastry. Pipe the flavoured cream on top of the bottom and middle layers and sandwich together, adding some carmalised nuts if you have some available. Done. Eat. Enjoy.

    bye-001


  5. Baked cheesecake

    August 29, 2015 by sarah

    I never used to like cheesecake. I used to find it dense and cloying in the mouth and far too heavy to end a meal. But when we were on the Isle of Wight at Easter time, I tried a baked cheesecake in the local pub and it was sublime; rich but not dense, smooth and creamy. I knew I had to try making this myself.

    cheesecake-003


    I actually made this cheesecake over a month ago, but low and behold what was on Great British Bake Off this week; baked cheesecakes! I would like to think that mine would have done well against the other contestants. I was certainly please about how it turned out. I have been converted to the joys of baked cheesecake and I hope you are too!

    cheesecake-001

    Baked Caramel Cheesecake

    Serves 12-14

    Many alternative recipes separate the eggs, whisk the egg whites until stiff and fold them in at the end. This probably gives a lighter resulting cheesecake.

    250g ginger snap biscuits, crushed to fine crumbs
    125g butter, melted

    750g full fat cream cheese
    150ml sour cream
    150ml double cream
    200g caster sugar
    2 tablespoons corn flour
    4 eggs
    2 teaspoons vanilla extract
    1/2 teaspoon salt
    a 400g tin of caramel e.g. Nestle Carnation, I used dulche de leche

    Mix together the crushed biscuits and melted butter. Press into a 24cm spring-form pan. Put in the fridge for at least half an hour to set.

    Preheat oven to 170 °C/150 °C fan.

    In a large bowl, mix the sugar, corn flour and salt then beat in the cream cheese, sour cream, eggs and vanilla. In a separate bowl, beat the double cream until soft whipped and then fold this into the mixture too.

    Pour half the cream cheese mixture over the prepared biscuit base. Top with caramel – caramel tends to be thick so just glop small lumps dotted over the top and then use a knife to swirl it through. Pour over the remaining cream cheese mixture.

    Place on a baking tray and cook for 1 to 1 and half hours until the cheesecake is golden brown on top and just set (slight wobble still). Run a knife around the edge of the cheesecake and pop back in the oven. Turn the oven off, prop the door slightly ajar and leave the cheesecake to sit for another 2 hours at least; overnight is fine. Unmold from the spring-form pan and place in the fridge for another few hours until set. Spread some more caramel over the top and the cheesecake is ready to serve!

    cheesecake-002


  6. Spice 12 – Saffron – Cornish buns

    July 18, 2015 by sarah

    I can say I have truely found a food I don’t like. It is rare and apart from dried fish and burnt rice tea, I can’t think of anything else I actually would chose not to eat. But I found another one – saffron. Until recently, I hadn’t appreciated the true flavour of saffron. I had added little pinches to my paellas and tagines but never was it a flavour on its own. The main reason for this is saffron, real saffron not any old cheap imitation, is hugely expensive. But when in Iran last year, I bought a 5g packet for $10 in the market in Tehran and after tasting the amazing Persian cuisine, most of which contains liberal amounts of saffron, I wanted to try it out further. So why don’t I like the flavour of saffron? Well, to me it tastes chemically and metallic almost like bleach! And my husband agrees with me. And it is not the saffron I bought because I tried some Spanish saffron and it tasted the same! But you might be one of the lucky people that find that saffron tastes of honey, the sea or smokey hay, so don’t let my experience of saffron put you off trying this recipe.

    saffron-002


    I have to admit that saffron does lend a fantastic splash of colour to whatever recipe you use it in; a beautiful sunshine, egg-yolk, golden yellow. The colour really comes through in these buns. I also use saffron to colour rice in the Persian style as just a few grains of golden rice on top of the plain white, accompanied but shards of grass green pistachios, makes an eye catching dish. So perhaps in the case of saffron, I can allow appearance to trump flavour. Just this once you understand. And I have quite a lot of saffron to use up.

    saffron-005


    saffron-003


    These saffron buns come from Cornwall but a similar form is also traditional in Scandinavian countries as lussekatt or Lucia buns which are made and eaten around Lucia’s Day. I enjoyed these buns for breakfast, warmed up and with some good quality butter. Enjoy and please let me know what you flavour you get from saffron!

    Cornish Saffron Buns


    Makes 12 buns.

    2 large pinches of saffron threads
    60ml hot water
    500g strong white bread flour
    1/2 teaspoon salt
    200g unsalted butter
    80g caster sugar
    7g sachet easy-blend yeast
    220g mixed raisins, currants, sultanas, sour cherries, cranberries
    45g mixed candied peel
    about 170ml milk
    demerara sugar

    Dry fry the saffron threads in a frying pan over a medium heat for a few seconds to toast them. In a small pestle and motar, grind the saffron with the salt until a fine powder. Put this powder in a small bowl and pour over the hot water; leave to sit.

    In a large bowl, rub the butter into the flour then add the sugar, yeast, dried fruit and candied peel. Pour in the saffron liquid and enough milk to make a soft and little bit sticky dough. Knead the dough for a good 10 minutes until it is soft, elastic and no longer sticky. Grease a large bowl with oil and place the dough in this bowl and cover with oiled cling film. Leave somewhere warm until doubled in bulk. Because this is an enriched dough, it will be slower than bread dough and could take 3-4 hours.

    Punch the dough down, knead again briefly and divide into 12 pieces. Using your hands, roll each into a ball. Place on greased baking trays, leaving about 5cm in each direction around the buns. Cover the trays with oiled cling film and leave somewhere warm until doubled again. This will take 2-3 hours.

    Preheat the oven to 200ºC/ 108ºC fan. Bake the buns for 20-25 minutes until golden brown. Remove from the oven, brush the tops with milk and sprinkle with demerara sugar; return to the oven for another 2 minutes to dry the glaze. Allow to cool completely on a wire rack.

    saffron-001


  7. Apricot and Almond Friands

    July 7, 2015 by sarah

    I have to apologise but here is another French inspired recipe. But then I shouldn’t apologise because it is such a great recipe and our recent trip to Paris inspired me to make more French dishes. It does not need to be fancy patisserie to be good. In fact, this recipe is so easy to throw together and tastes super sophisticated. If you have never tried friands before, they are a lovely light fluffy sponge with an almond taste and the fruit cooked into them is almost like the best jam possible; so fruity but also retaining the sour tang. The original recipe used plum quarters instead of apricots but as it is full summer currently, apricots are in season and plums are not. I think this recipe would also work well with a small handful of raspberries or a large strawberry – perhaps something to try next time.

    friands-003

    Apricot and Almond Friands


    Recipe from Waitrose magazine

    125g unsalted butter
    50g plain flour
    115g icing sugar
    75g ground almonds
    4 medium egg whites
    1/4 teaspoon almond extract
    6 apricots, halved and stoned

    1. Preheat the oven to 200º C/180º C fan. Grease a 12-hole muffin pan with non-stick cake spray and line the bases with circles of baking parchment – I found jam pot discs fitted perfectly so no fussy cutting out.

    2. Melt the butter. Sift the flour and icing sugar into a bowl and stir in the ground almonds.

    3. In a separate completely clean bowl, whisk the egg whites until they form soft peaks. Stir the melted butter and almond extract into the flour mixture, mixing well to combine. Using a large metal spoon, fold a quarter of the beaten egg whites into the butter/flour mixture then carefully fold in the remainder.

    4. Divide the batter among the holes in the pan. Arrange a half apricot on top and bake for 15-18 minutes until just firm and gold around the edge.

    5. Leave to cool in the tin for 5minutes then loosen the edges with a knife and carefully flip out. Cool completely on a wire rack and dust with icing sugar to serve.

    friands-002


  8. Lavender shortbread biscuits

    June 30, 2015 by sarah

    When in Paris, we walked by a massive department store and I could not help myself from going in. The food hall was like at Harrods. We spent 3 hours in there, or more accurately I dragged my husband around for 3 hours! It had an amazing array of food stuffs from all over France, naturally, but also from all round the world. I wish I could of taken more back but we managed to bring back a bag of different cheeses, saucissons and dried ham, plus some chestnut flavoured yogurts (yum!). I also found some unusual spices that I did not have in my cupboard (including wild pepper from Madagascar) and I bought some culinary lavender and a cute Eiffel tower cookie cutter. And so this recipe was inevitable. The lavender adds a slight floral hint without it tasting of your favourite Aunt’s eau de toilette!

    Lavender-001


    Use the best quality butter your can get i.e. the top shelf butter in the supermarket, probably French stuff if they have it. You will REALLY taste the butter in this recipe so it must be good and not fridgey either. Handle it very gently using implements not a food processor. Refridgerate the dough well before cooking as with any pastry and do not over cook. It must be crisp but pale – the butter and sugar will make it colour easily so watch it like a hawk and I would recommend checking every 5 minutes maximum towards the end of cooking.

    Bon appétit!

    Lavender-004

    Lavender Shortbread Biscuits


    150g unsalted butter, cut onto small pieces and soft

    75g caster sugar

    150g plain flour, ‘OO’ if you can get it

    75 rice flour

    good pinch of salt

    1 tablespoon of culinary lavender flowers, finely chopped (with a mezzaluna chopper is easiest)

    Use a wooden spoon to cream the butter and sugar together. Then use a fork to mix in the flours, lavender and salt. Bring the crumbs together into a ball and knead until it just comes together and no more, otherwise the shortbreads will be tough. Pat into a flat round and wrap well in cling film. Refridgerate for 30 minutes or more if you have the time to do so.

    Lightly flour a smooth work surface and a rolling pin. Gently roll out the dough, working from the middle out to reduce stretch on the dough. Cut out into shapes and place on baking parchment on a baking sheet. Place in the fridge for at least 30 minutes.

    Cook at 170º C or 150º C if fan oven, for 25-30 minutes, watching carefully towards the end so it stays pale. Cool on a wire wrack and dredge with caster sugar if desired. The shortbread will last for several days in an airtight container – if you can resist eating it all in one go!

    Lavender-003


  9. Scones plus jam plus cream

    June 9, 2015 by sarah

    Scones are perhaps too plain for today’s tastes but no afternoon tea is complete without them. Some (my husband) consider them a vehicle for cream and jam but a properly made scone should be a delight on its own, perhaps with some fresh butter. A slightly crisp crust outside and fluffy but not cakey or spongy interior. They need to rise well and have some colour on the top. Not as easy as it sounds; just look at my rather flat offerings. My excuse is I knocked them together in a few minutes between gardening and painting the back of the house at the weekend. Not much of an excuse but I’m sorry.

    scones-002


    There are a few trick and tips to help your scones turn out better. My main problem was that I patted the dough too thin before I realised and didn’t have the time to rework it. Do not use recipes that add egg; the scones turn out too cakey. Work the mixture as little as possible, leave large flakes of butter in the dough, pat into correct thickness (2cm) rather than using a rolling pin and do not twist the cutter when stamping out. Finally, clotted cream and homemade jam are essential.

    Ultimate Scones


    225g self-raising flour
    1/4 teaspoon salt
    1 teaspoon baking powder
    50g chilled butter, cut into cubes
    25g caster sugar
    150ml buttermilk or whole milk to which couple teaspoons of lemon juice is added

    Preheat the oven to 220 ºC/200 ºC fan. Lightly grease a baking sheet with spare butter.

    Sift the flour, salt and baking powder into a large bowl and rub in the butter but stop when there are still some large flakes. With a knife, stir in the sugar and then three quarters of the buttermilk, mixing until it comes together and using more buttermilk if necessary. It makes a fairly sticky dough.

    Flour your work surface well, tip out the dough and give a couple of brief kneads then pat to a thickness of 2 to 2.5cm (one inch). Stamp out rounds with a 5cm pastry cutter, trying not to twist the cutter (it makes the towering scones topple) and place on the baking sheet. Brush the tops with milk.

    Bake in the preheated oven for 10-12 minutes, until the tops are golden. Serve immediately but they also freeze well and can be pepped up by a few minutes in the oven.

    scones-001


  10. Madeleines – a post from Paris

    May 24, 2015 by sarah

    When this post goes live, I will be enjoying a well earned break in little olde Paris! And probably eating these little cakes which are a Parisian specialty. A little something to have with afternoon tea.

    madeleines-004


    While drooling over guide books for Paris over the past few weeks, I felt inspired to make some madeleines. Just one problem; they require a specialist tin which seems rather wasteful for something to be made once in a while. But while surfing (the net, no water round here), I came across the Lakeland sale and there was the tin I needed, half price. Of course, I had to buy other tins to make it free postage but that really is not a hardship!

    The batter for these cakes does not take long to whip together and it can sit for several hours up to overnight but madeleines MUST be eaten fresh from the oven; they really don’t keep as they dry out quickly. Who needs a greater excuse to eat them up fast? This recipe is a hibrid of Rachel Koo’s from ‘The Little Paris Kitchen’ and David Lebovitz from his website, because as usual I couldn’t decide which recipe to follow. For this first attempt, I went with simple vanilla madeleines but next time I will try being more adventurous by adding fillings and glazes.

    Apparently the way to tell a good madeleine is the size of the hump. There seems to be all sorts of magic and witchcraft (freezing the molds, freezing the mixture, no baking powder) involved in getting it to form, but forget all that and just enjoy them for what they are; a nice lump of cake!

    madeleines-005 madeleines-003

    Madeleines

    Makes 20-24 (so two trays worth)

    3 large eggs
    130g caster sugar
    175g plain flour
    1/8th teaspoon fine salt
    1 teaspoon baking powder
    finely grated zest of 1 lemon

    1 teaspoon vanilla extract
    170g butter, melted and cooled
    some milk
    extra melted butter and flour for the molds

    Prepare the molds by brushing with melted butter , dust with flour and tap off the excess. Place into the fridge or freezer.

    Beat the eggs and sugar until light and moussy. Sift over the flour, baking powder and salt and fold in with the lemon zest.Drizzle the cooled melted butter over this, folding it in as you go until it is all incorporated. Cover the bowl and sit in the fridge for at least an hour up to 12 hours.

    When ready to bake, preheat the oven to 200 ºC/ 190 ºC fan. Plop a heaped teaspoon of batter into each indentation; do not spread it out. Bake for 8-10 minutes until just set. Turn out to cool on a wire rack. Wash and dry the tin and pop it in the freezer for as long as you can bare, then repeat with the second batch. Eat as soon as possible!

    madeleines-006