RSS Feed

‘Recipe Index’ Category

  1. Maple Pecan Ice cream

    April 19, 2015 by sarah

    It may seem a strange time of year to have an ice cream recipe but if the heating is on or a fire burning, then why not? Anyway, the weather we have been having over the past few weeks makes me think that this might be the summer so enjoy it while it lasts! Either that or it is global warming and we are all stuffed. Never mind, have some ice cream instead.

    ice cream-002


    You don’t need an ice cream maker to make ice cream; it is just easier with one. If you don’t have an ice cream maker then take the partially frozen ice cream out of the freezer every couple of hours and blend in a food processor or with a stick blender. I only have a very simple ice cream maker which you put the bowl in the freezer for 24 hours before hand. It works fine but I need to let the bowl defrost a little before using it otherwise the mixture freezes solid as soon as it is poured in!

    ice cream-001

    Maple Pecan Ice cream

    150g pecan nuts
    2 egg yolks
    50g soft brown sugar
    200ml milk
    175ml maple syrup
    300ml double cream

    Toast the pecans in a moderately hot oven for about 10 minutes. Remove from the oven and when cool enough to handle, roughly chop. Leave to one side.

    Whisk the egg yolks and sugar until thick and mouse like. Gently heat the milk in a non-stick saucepan until almost boiling then pour over the egg/sugar mix, whisking constantly as you do. Return this to the pan and heat gently while stirring continuously. The custard mixture is thick enough when a finger leaves a trail on the back of a spoon. Remove from the heat and allow to cool fully (overnight in the fridge is best).

    Whisk the double cream until ribbon stage then mix in the cooled custard and maple syrup. Use this mixture to make the ice cream following the instructions of your ice cream maker or the freezer/food processor method. Approximately 2-3 minutes before the end, add the chopped pecans.

    Store in the freezer and eat within a month.

    ice cream-003


  2. Simnel Cake – an Easter treat

    April 5, 2015 by sarah

    I am one of those crazy people that could just eat marzipan. Forget the icing and sometimes even the cake, I go for the marzipan. If you are one of these people too then keep reading; if not then skip this recipe! Simnel cakes are considered an Easter treat these days, but in the past they were part of a Mothering Sunday tradition of girls in service taking a cake to their mothers on the one day off work. The eleven balls on top, to represent the apostles minus Judas, are a Victorian puritanical addition. By the way, has anyone out there baked a scripture cake, where the recipe is hidden in bible verses? Maybe a project for the future?

    simnel-004


    I like to decorate my simnel cake with ribbons and those kitsch plastic chicks in the shops at this time of year. It is amazing how just the past couple of weeks, the weather and feeling in the air has turned spring-like. Even between the squally showers, the daffodils nod their ridiculously over the top yellow-cream heads, birds are shouting ‘come and get me’ from every branch and already the lawn needs mown. Happy Easter everyone!

    simnel-002


    Simnel Cake


    Serves at least 14 – it is rich

    Recipe adapted from BBC Good Food

    500g pack of natural marzipan
    175g butter
    175g soft brown sugar
    4 medium free-range eggs, beaten
    175g plain flour

    1/2 teaspoon baking powder
    pinch of fine salt
    1/2 teaspoon mixed spice
    350g mixed dried fruit – raisins, currants, sultanas
    50g chopped candied peel
    zest of 1 lemon
    1-2 tablespoon apricot jam

    Preheat the oven to 140 C/120 C fan. Prepare a 18cm/7 inch tin like for the Christmas cake recipe here (grease, line and wrap the outside in newspaper).

    Cream the butter and sugar until pale and fluffy. Sift over the flour, salt, baking powder and mixed spice and add the beaten eggs. Beat until well mixed. Add some milk if it is very stiff but you need a fairly stiff batter to support the dried fruit. With a metal spoon, fold in dried fruit, candied peel and lemon zest.

    Put half the mixture into the prepared pan and level the top. Take one third of the marzipan and roll out to be a circle of diameter that will fit inside the tin. Use the bottom of the tin to measure and trim to fit; place on the cake mixture. Add the rest of the cake mixture and smooth the top then leave a slight dip in the centre.

    Place in the middle of the preheated oven for 2 to 2 and half hours until a skewer comes out mostly clean (the melted marzipan will mean it will never be truely dry until completely over cooked). If the top is browning too fast, make a baking parchment or foil hat with a small hole in the centre for steam to escape. Allow to cool fully in the tin before turning  out.

    Brush the top of the cooled cake with apricot jam. Roll out another third of the marzipan and cover the top of the cake, scalloping the edges by pinching the almond paste. Toast this under a preheated grill until medium brown; watch constantly as it burns easily. Roll the remaining marzipan into 12 equal balls and eat one (it much easier to divide into 12 than 11 and the extra ball is a cooks perk!), toast under the preheated grill on foil and when cooled add to the top of the cake, gluing the balls in place with apricot jam if necessary.

    simnel-003


  3. Apple Pie – an old fashioned pie plate recipe

    April 1, 2015 by sarah

    I bought an old-fashioned pie plate in the January sales but it languished in the pan cupboard until this week. It has a classic retro feel about it so I just had to make a good, old fashioned apple pie. Now, normally pastry is not my strong point but I recently bought a pastry blade from Lakeland and it has revolutionised my pastry making. It means that even without a full sized food processor, I can whip together a batch of pastry within 10 minutes and no sticky hands and scrubbing pastry from under my wedding ring!

    apple pie-006


    I love how this apple pie turned out. Having kept the filling simple, the apple flavour really does shine through. Perfect for serving warm with custard or ice-cream or cold with cream. Mmmm! Go on, spoil someone this week with this old-fashioned recipe.

    apple pie-003 apple pie-001


    Apple Pie

    Serves 6-8
    For the Pastry
    250g plain flour
    50g icing sugar
    125g cold butter
    1 egg
    1/2 teaspoon salt
    egg wash (one egg beaten with 1 tablespoon of water)
    caster sugar for dusting
    For the Filling
    2 large Bramley apples
    3 eating apples (need about 1kg apples in total)
    100g soft brown sugar
    1 teaspoon ground cinnamon
    1/4 teaspoon ground nutmeg
    1/8 teaspoon ground cloves
    1 tablespoon lemon juice


    Preheat the oven to 200 ºC/180 ºC fan. Grease a 20cm pie plate with butter.

    Make the pastry by rubbing the butter into the flour, icing sugar and salt, either by hand, food processor or pastry blade, until it resembles breadcrumbs. Crack the egg into the pastry and gently mix with your hands until it comes together into a ball. If the mixture is too dry, add a drop or two of cold milk or water. Wrap the pastry in cling film and put in the fridge to rest and cool for about an hour or more.

    Peel the apples, place in a large bowl and sprinkle with the lemon juice to stop them turning brown. Add the sugar and spices and mix well. Put in a large saucepan and over a medium heat, cook gently for 5 minutes until the apples are tender but not complete mush. Remove from the heat and allow to cool completely.

    Divide your pastry in half and on a worktop dusted with flour, roll out to about 1/2 cm thick. Transfer the pastry to the pie plate by drapping over the rolling pin. Ease the pastry into the dish, making sure it is well pushed into the sides. Sprinkle the base of the pastry with a handful of ground almonds, dry cake crumbs or bread crumbs; this will absorb excess water from the apples so the bottom of the pastry crisps up. Pack in the cooled apple mixture into the pie; it should be domed high as it will sink down.

    Roll out the other half of the pastry, also to 1/2 cm thick. Run a line of egg wash around the rim of the pastry in the tin. Carefully lift the lid onto the top of the pie.

    Use your forefinger and thumb to firmly crimp the edge of the pastry to ensure bottom and lid are well glued together.
    Brush the top of the pie with the egg wash and sprinkle over the caster sugar.
    With a small sharp knife, make a couple of small slits in the top of the pie so that steam can escape.

    Place the pie in the preheated oven for 40-45 minutes until golden and firm. Serve immediately or allow to cool.

    apple pie-004


  4. Lemon Curd Recipe (Yolks only) and Lemon Tart

    March 25, 2015 by sarah

    After making the Swiss Meringue Buttercream for the chocolate cherry layer cake, I had 4 egg yolks left over. The weather is too cold at the moment for ice cream (a good way of using egg yolks) so I searched for alternative uses for the yolks and came across some lemon curd recipes that just used the yolks. This recipe works well but I have say that since I have made lemon curd both ways, I prefer my lemon curd made with whole eggs as it is lighter in texture and richness. The upside is this recipe is it does not need sieving afterwards to remove the little lumps of firm egg white that inevitable form due to the whites cooking faster than the yolks.

    lemon curd-001


    With several pots of lemon curd in the fridge, I thought I would try making a lemon tart. I pre-cooked a couple of pastry cases (shortcrust or paté sucré) and then filled them with the fresh lemon curd. I tried caramelising the tops by sifting over some icing sugar and then browning under the grill – unfortunately all what happened was I burnt the pastry. But despite this the tarts were still delicious. Next time I will try topping them with some meringue for a lemon meringue tart.

    lemon curd-005


    I also must extol the virtues of a Microplane grater. Having struggled with all kinds of zesters and graters over the years, I gave in and asked for one for Christmas. And it truly does grate lemon zest faster and finer than anything else I have used. Try it for yourself.


    Yolk Only Lemon Curd


    4 egg yolks

    175g caster sugar

    100g butter

    zest and jiunce of 2 large lemons

    1/2 teaspoon lemon extract/oil

    In a heat proof bowl over barely simmering water, place all the ingredients. Stir until the butter is melted and then frequently stir until the mixture thickens. This takes 15 to 20 minutes. When thick enough to leave a clear path through the back of the spoon when a finger is drawn through, it is done. Pour into sterilised jars and leave too cool entirely. Refrigerate until needed but also freezes well. Eat within a couple of weeks.

    lemon curd-003 lemon curd-006


  5. Chocolate Cherry Layer Cake

    March 18, 2015 by sarah

    Sometimes a cake has to made for the sheer beauty of the thing. Don’t get me wrong; flavour is still my primary aim but sometimes it is nice to luxuriate in the beauty of a cake before devouring it. And this cake has it in spades. The delicate pink icing and filling contrasting with the dark brown moist cake and the cherries on the top. Like a cute black forest gateau.

    cherry-004


    I wandered hungry and alone

    Downstairs to the kitchen

    Where upon I came across

    A recipe for a cherry chocolate cake.

    It was baked and made and iced

    And I drowned in the beauty of the cake I beheld.’

    cherry-002

    Chocolate Cherry Cake


    225g butter at room temperature
    225g caster suagr
    175g plain flour
    50g cocoa powder
    2 teaspoons baking powder
    1/2 teaspoon fine salt
    5 medium eggs
    200ml greek yogurt or cream or buttermilk
    1 teaspoon vanilla extract
    Handful (about 50g) of sour dried cherries

    Cherry jam, preferably sour cherry
    Swiss meringue buttercream (recipe here), add some cherry puree made from blended frozen cherries
    Cherries in alcohol for decorating, reserving some of the syrup/alcohol.

    Preheat the oven to 180 ºC/160 ºC fan. Grease and line the base of two 20cm/8″ sponge tins.

    Beat together the butter and sugar until creamed well. Sift over the dry ingredients. Beat together the wet ingredients to break up the eggs then add this to the bowl. Beat all together until well mixed, scraping down the sides of the bowl a few times. Fold in the dried cherries and then pour the batter into the prepared tins, trying to divide it equally.

    Cook for 30-35 minutes until a skewer comes out clean. While the cakes are cooking, make a cherry flavoured syrup by heating the cherry syrup or alcohol base with some extra sugar to make it syrupy. Allow the cakes to cool for 10 minutes in the tins then brush over this syrup. After half an hour, take the cakes out of the tins and allow to cool fully on cooling wracks.

    Assemble the cake with some cherry jam as the filling and pipe the pink tinged buttercream on top. Decorate with the reserved preserved cherries, or fresh cherries if they are in season.

    cherry-003 cherry-001


  6. Marmalade

    March 15, 2015 by sarah

    The start of Spring means marmalade making time. The required bitter-sweet Seville oranges are only in the shops for a short time around about now so I always buy a bag when I see them before they disappear again. They bring bitter-sweet thoughts of places that are currently sunnier and warmer than this grey cold British start to Spring. But the sparkling bright orange jelly and tangy orange peel warm any breakfast.


    marmalade-001


    It is a pain hand cutting the peel but there is no way round that; using a food processor just leaves mush, even a mandolin failed. The acid in the oranges also makes the skin of your hands go all pruney! But there is no way round it, so stick on some music and get down to work. Orange or other citrus marmalade seems to be a uniquely British product. I do not recall seeing it in any of the countries I’ve been to around the world. But a certain bear from deepest darkest Peru was rather fond of the stuff!

    marmalade-003

    Marmalade

    Recipe from ‘The National Trust Good Old-Fashioned Jams, Preserves and Chutneys’ by Sara Paston-Williams

    Makes approximately 6 jars.

    1kg Seville oranges
    1 lemon
    2.4 litres of water
    2kg granulated sugar

    Wash the oranges well as the rough skins are prone to be dirty. Cut them in half (plus the lemon) and juice them, reserving the pips. Scrape out the pith (white bits and membranes inside the oranges) and also reserve with the pips. Then shred all the rind fairly finely.

    Place the shredded rind, juice and water in a large saucepan and bring to the boil. Boil for about 2 hours until the rind is very soft and disintegrates when squeezed.

    Heat the sugar in the oven and when the rind is soft enough, add to the pan. Then use the oven to sterilise half a dozen jam jars and lids.

    Tie up the pips and pith into a muslin bag and add to the pan. Gradually stir to dissolve the added sugar. Once the sugar has been added, increase the temperature and bring the mixture to a rolling boil. Boil briskly, stirring frequently so it doesn’t catch on the bottom, for about 20 minutes before starting to test for the set. Once setting point is reached, take the pan off the heat, remove the muslin bag (squeeze well to get the goodness out), skim off any froth and allow the pan to sit for a good 15 minutes. Stir well before potting and stir while potting to evenly distribute the peel.

    marmalade-002


  7. Cullen Skink – otherwise known as smoked haddock chowder

    March 10, 2015 by sarah

    I love how food can transport us around the world in one dish and we are privileged in this country to have access to so many different cuisines. Some people lament the lack of decent British cooking (which is something else that is not true, but a discussion for another time) but why worry when one night I can eat in India, the next in Mexico, the next in France, then Italy, China or Thailand. So partially my cooking is a way of satisfying my wanderlust without crossing continents and bankrupting us. I travel in my kitchen each time I cook.

    Cullen skink (no, it is not a typo) is a traditional Scottish soup.  It is hearty enough to be an entire meal, served with some crusty bread. The last time I had it when it was not homemade was in Seattle where it is called a ‘Chowder’ and sprinkled with dry water crackers like you would have with cheese. The American version also contains sweetcorn but is otherwise the same dish. You must use good quality smoked haddock that is naturally smoked, not the bright yellow stuff.

    cullen-001

    Cullen Skink


    25g butter
    1 onion, finely chopped
    1 bay leaf
    1 blade of mace
    600ml/1 pint of milk
    100ml double cream
    350g floury type potato such as maris piper, cut into large chunks
    450g undyed smoked haddock

    can of sweetcorn, drained (optional)

    Melt the butter in a heavy bottomed large saucepan. Add the onions and a pinch of salt; sweat until the onions are translucent.

    Add the milk, 300ml water and the bay leaf and mace. Add the potatoes, bring to the boil and simmer for 15 minutes until the potatoes are soft.

    Meanwhile cook the smoked haddock. I usually poach it in a water/milk mixture and then add the liquid to the soup for more flavour. Allow the haddock to cool enough to touch and then remove skin and bones and break into large flakes.

    Remove the bay leaf and mace from the soup, use a potato masher to gently crush the potatoes so that some thicken the soup but some are still in chunks. Add the cream and sweetcorn if using and the fish. Heat again to the boil and taste, adjusting the seasoning as desired. Serve immediately or allow to cool and store in the fridge for up to 48 hours.

    cullen-002


  8. Biscuity Chocolate Truffle Balls

    March 8, 2015 by sarah

    These were actually made by my husband. He remembers buying them from the local bakers, Aulds, in Scotland in his youth and wanted a bit of nostalgia. He actually made them all by himself though I had to do the washing up! He says they taste very authentic. I wouldn’t know about that, having been deprived of Aulds bakery goods in my youth, but they do go down rather easily! And not at all posh unlike the proper chocolate truffle recipe I posted a couple of weeks ago. Also enjoy the random photo of our not posh cat, Brian.

    balls-003

    brian-001

    Biscuity Chocolate Truffle Balls

    20 oaty digestive type biscuits

    125g butter

    200g condensed milk

    2 tablespoon cocoa powder

    125g desiccated coconut

    chocolate strands or desiccated coconut to roll them in

    Put the butter and condensed milk in a small pan heat gently until the butter is melted.

    Put the biscuits into a food bag, hold the end closed and bash with a rolling pin until you have fine crumbs. Put the biscuits, cocoa powder and desiccated coconut into a large bowl and pour over the melted butter/condensed milk. Mix until well combined.

    Form the mixture into ping pong sized balls with your hands and place on a tray lined with grease-proof paper. Put the extra coconut or chocolate strands into a food bag. Drop in the balls and roll around to cover them. Place them back on the grease-proof paper and store in the fridge until set firm. Store in the fridge until needed. These will last a week once made.

    balls-002 balls-001


  9. Polenta and olive oil cake

    March 3, 2015 by sarah

    Reading this title you probably thought that something had gone wrong. Perhaps a supper dish from Italy? But a cake? Made from savoury ingredients? Have I gone mad? No, my dear readers I have not gone mad. This cake is indeed a delicious and light sponge perfect any time of day from breakfast to dinner, as my husband can attest. It also happens to be healthier too as it is not made with butter.

    This cake was deliberately chosen to use up some store cupboard ingredients I found in my January clear out. I don’t particularly like polenta as a starch for a meal so this recipe was ideal way of trying it in a different way. I have to admit though it is a little drier than one would expect a teatime cake to be, probably because of its lack of butter, but this was definitely balanced with some poached fruit or yogurt on the side. The polenta gave a fine gravelly, but not unpleasant, mouth feel. Buon appetito!

    polenta-008

    Polenta and Olive Oil Cake

    6 medium eggs

    1 cup white caster sugar

    freshly grated zest of 2 lemons

    1 and 1/2 cups of plain flour

    3/4 cup instant fine polenta

    2 teaspoons baking powder

    1 teaspoon fine salt

    3/4 cup olive oil

    drizzle: juice of the 2 lemons and 100g caster sugar

    Preheat the oven to 180 ºC/160 ºC fan. Lightly grease a 9″/20cm springform pan with oil.

    Place the eggs and sugar in the bowl of a mixer and with the whisk attachment, beat for at least 5 minutes until light in colour and tripled in volume. Pour in the oil and sift over the dry ingredients. Start the mixer on very slow, beat until incorporated, scraping down the sides a couple of times. Pour the batter into the prepared cake tin and place in the middle of the preheated oven for 25 to 35 minutes until risen and slightly coming away from the sides; a skewer should come out clean.

    While the cake is in the oven, dissolve the sugar in the lemon juice for the drizzle; you may need to heat it in a small pan to get it to dissolve fully. Once the cake is cooked and taken out the oven, sit it on a tray and pour over the drizzle. Allow to cool fully in the pan before turning out.

    polenta-007


  10. Why I Cook and Blog – and Chocolate Truffles

    February 24, 2015 by sarah

    I am often asked why I put so much effort in to cooking and how I find time to write, photograph and publish this blog. I have been wondering the same thing myself lately. I have just finished 2 weeks of study time, cramming in an amazing amount of information into a sluggish and aging brain. But yet, instead of being sensible and filling the fridge with Marks and Spencer ready meals, I continued to cook our everyday suppers most nights and some treats too. I make the time because it is important to me. Yes, I could eat ready prepared food and it would be nutritious (mostly) and quick but it would not satisfy my soul. This blog may look like a collection of recipes but that is wrong way to look at it. This blog is about my cooking and cooking is about my life, not a list of recipes… I made this dish because I needed cheering up, I made this dish because it was January cupboard clear out, I made this cake for a special event. And so in my way, I am writing about life, my life.

    truffles-004


    Cooking makes me happy and happiness is an art and therefore requires practice and concentration; a different type of concentration to my studies and day-to-day work but no less demanding.  There are few true masters of happiness but we can all dabble, practice and improve. Like art, happiness is ‘in the eye of the beholder’ so whether something makes you happy or not is your choice. Food and cooking makes me happy so I continue to play with it. And the photography too. Also I am not hugging person and being an introvert it is difficult for me to express my care for other people except through my cooking for others and so this has become a tangible way of loving them. I hope they appreciate that. Cakes taste better if made with love.

    I thrive on being busy, when everything (especially emotionally) is in balance. Give me a challenge and I can think of nothing better than running with as far as I can, or until something better comes along. At school I was told I couldn’t do three sciences, so I did; I was told it was too hard to get into vet school, aim your sights lower, so I aimed higher; I was told I was just average and was bullied so strived to prove I wasn’t; I was getting too comfortable in my job so I aimed for a postgraduate certificate. And this blog is part of this journey of my life. I laugh at the photos I took just 18 months ago but look how I play with light now! But it is not easy and I constantly have to push myself to improve and currently this means getting up for work an hour early so I get the photography done in the short daylight hours of a British winter. No 12 hours of sunshine here, unlike the blogs I follow that are written in sunny California.

    Go find the happiness and importance in all you do.

    truffles-003


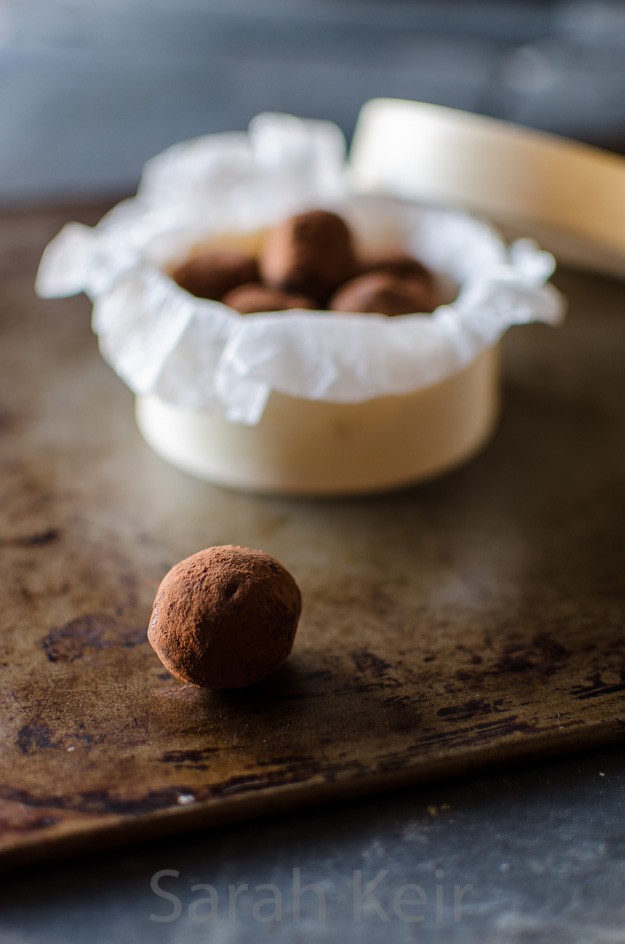
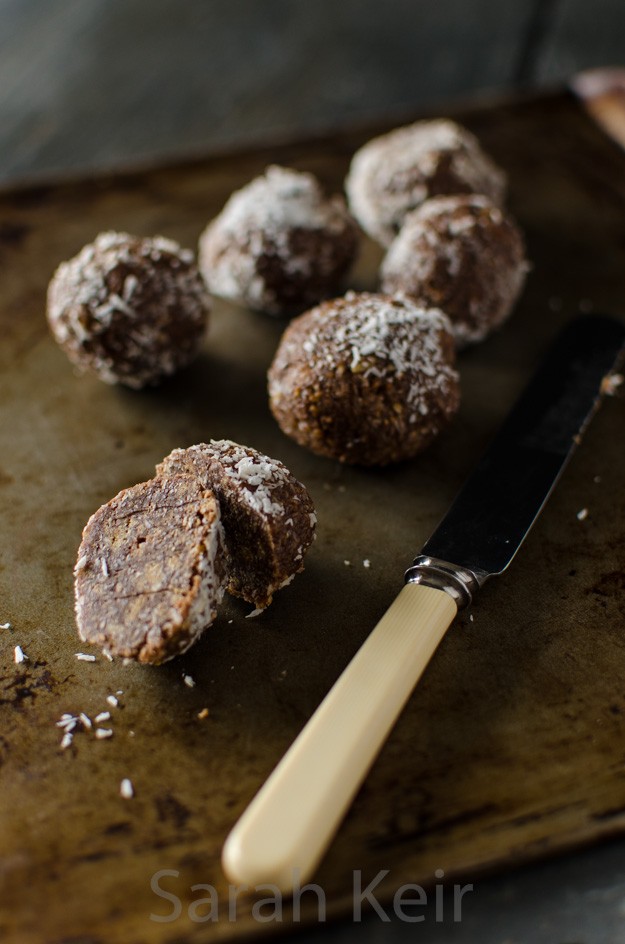
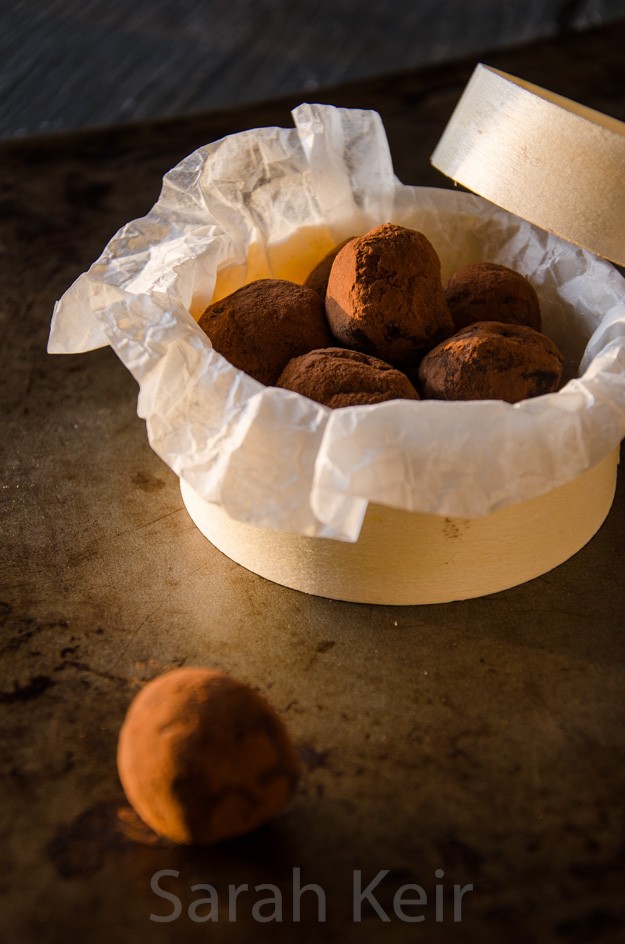
    I had meant to make these in time for Valentines Day. But it didn’t happen. I suppose part of me despises the crass commercialisation that comes with Valentines Day; the shops fill with pink and heart shaped things and ugly teddies and over priced flowers and cards with sickly sweet sentiments and overpriced heart-shaped food in a restaurant packed out with courting couples. So rather than have one overblown day of the year, my husband and I reaffirm our love on a regular basis with a simple ‘I love you’ when getting in from work, a spontaneous gift, a box of home made truffles…
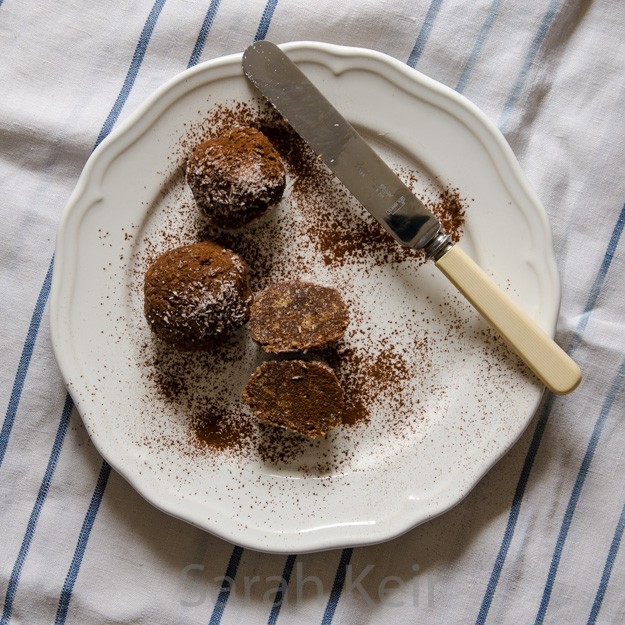
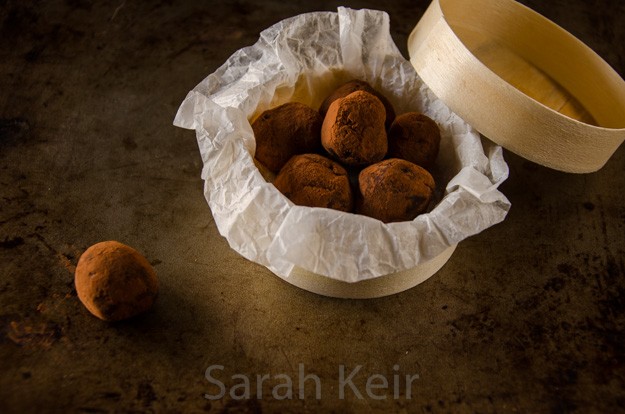
    Chocolate truffles

    120ml double cream
    120g good quality plain chocolate
    1 tablespoon butter
    1 tablespoon golden syrup
    cocoa powder
    flavouring (optional) - orange liqueur, coffee liqueur

    Place all the ingredients (except the cocoa powder and flavouring) in a double boiler pan or a pyrex bowl over a pan of barely simmering water. The key is to make sure that the mixture is heated very gently. Stir occassionally until almost fully melted, take off the heat and stir until fully melted and smooth and glossy. Stir in your chosen flavouring if wished.

    Place in the fridge for a few hours or overnight until set.

    On a small plate, sift a good dredging of the cocoa powder. Have a second plate nearby. With a teaspoon (or melon baller of you have one), scoop out small scoops of ganache, roll quickly in your hands until roughly spherical, drop on to the cocoa powder and roll around until covered. Store on the second plate. If the chocolate ganache is turning into a sticky mess, cool it down by sitting it in the freezer for 15 minutes or so and cool your hands down (under a cool running tap if you can stand it).

    Once made, store the truffles in the fridge and eat within a week. You can customise these to your favourite flavour by adding a dash of spirits or flavourings to the mix before it sets. Or alter the outside by rolling in desiccated coconut or cocoa nibs.

    truffles-001