RSS Feed

‘Recipe Index’ Category

  1. Spice 12 – Saffron – Cornish buns

    July 18, 2015 by sarah

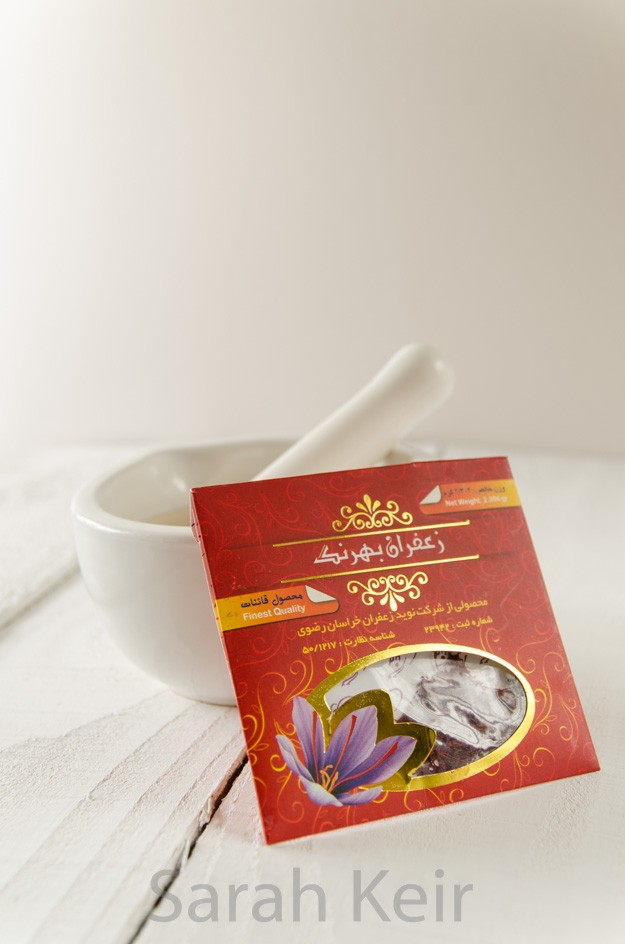
    I can say I have truely found a food I don’t like. It is rare and apart from dried fish and burnt rice tea, I can’t think of anything else I actually would chose not to eat. But I found another one – saffron. Until recently, I hadn’t appreciated the true flavour of saffron. I had added little pinches to my paellas and tagines but never was it a flavour on its own. The main reason for this is saffron, real saffron not any old cheap imitation, is hugely expensive. But when in Iran last year, I bought a 5g packet for $10 in the market in Tehran and after tasting the amazing Persian cuisine, most of which contains liberal amounts of saffron, I wanted to try it out further. So why don’t I like the flavour of saffron? Well, to me it tastes chemically and metallic almost like bleach! And my husband agrees with me. And it is not the saffron I bought because I tried some Spanish saffron and it tasted the same! But you might be one of the lucky people that find that saffron tastes of honey, the sea or smokey hay, so don’t let my experience of saffron put you off trying this recipe.

    saffron-002


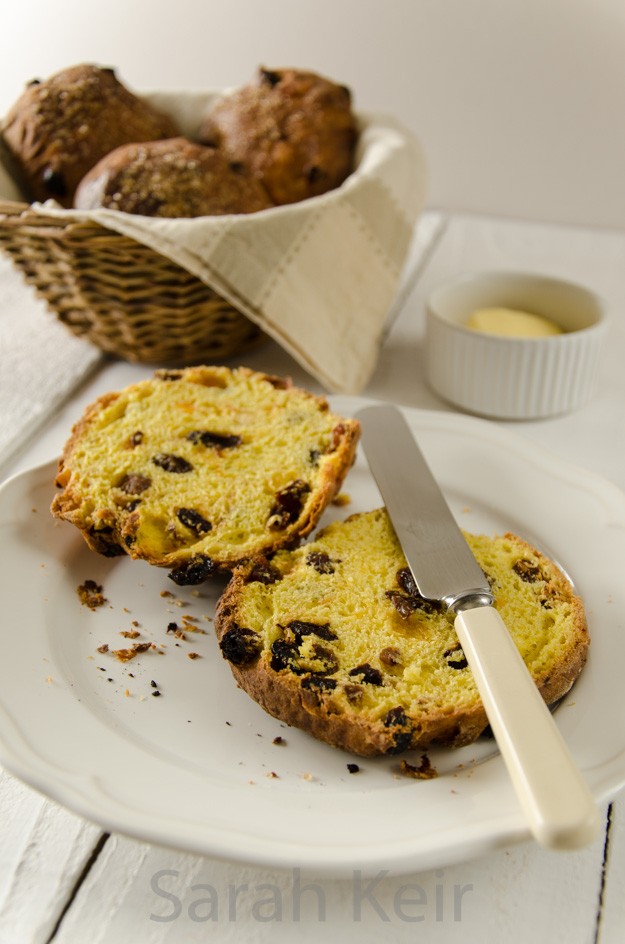
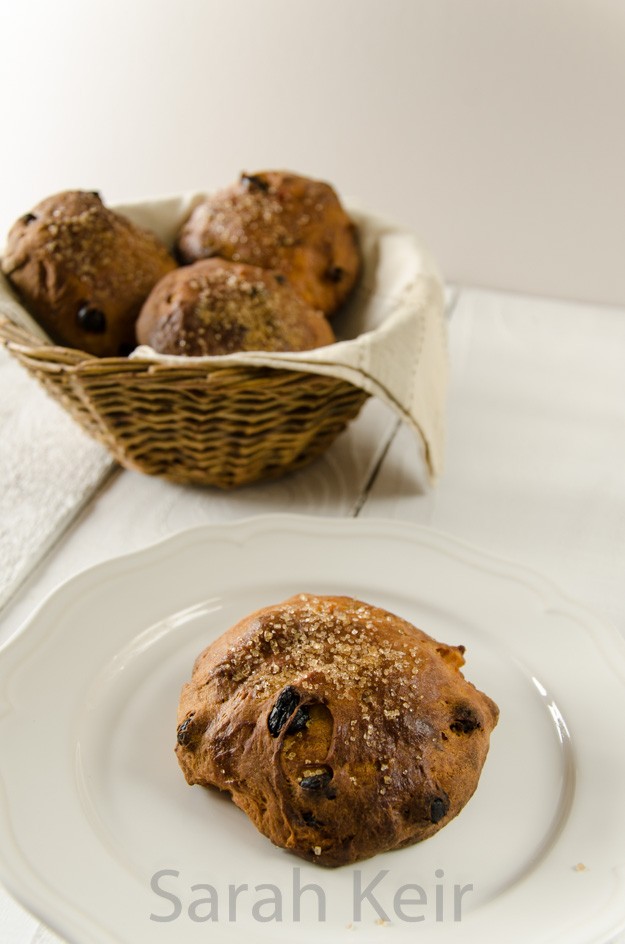
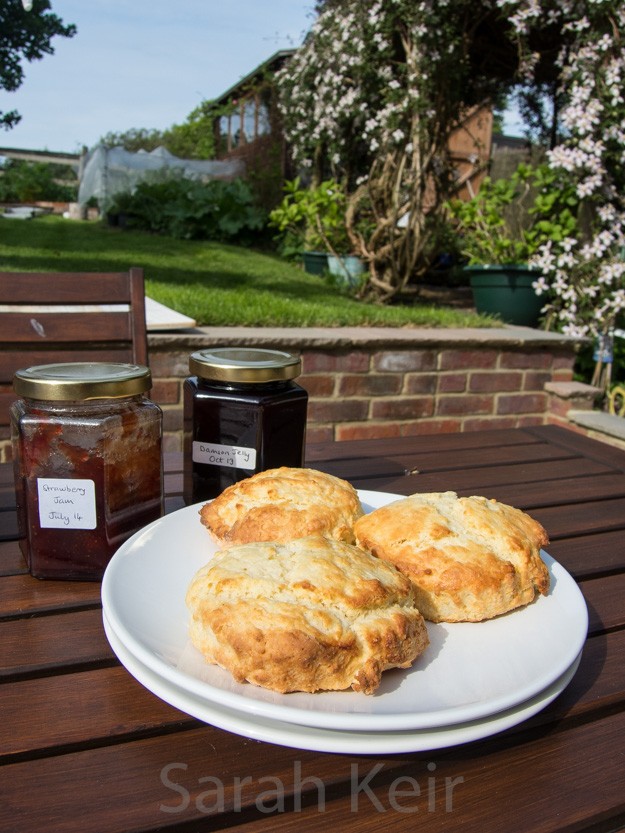
    I have to admit that saffron does lend a fantastic splash of colour to whatever recipe you use it in; a beautiful sunshine, egg-yolk, golden yellow. The colour really comes through in these buns. I also use saffron to colour rice in the Persian style as just a few grains of golden rice on top of the plain white, accompanied but shards of grass green pistachios, makes an eye catching dish. So perhaps in the case of saffron, I can allow appearance to trump flavour. Just this once you understand. And I have quite a lot of saffron to use up.

    saffron-005


    saffron-003


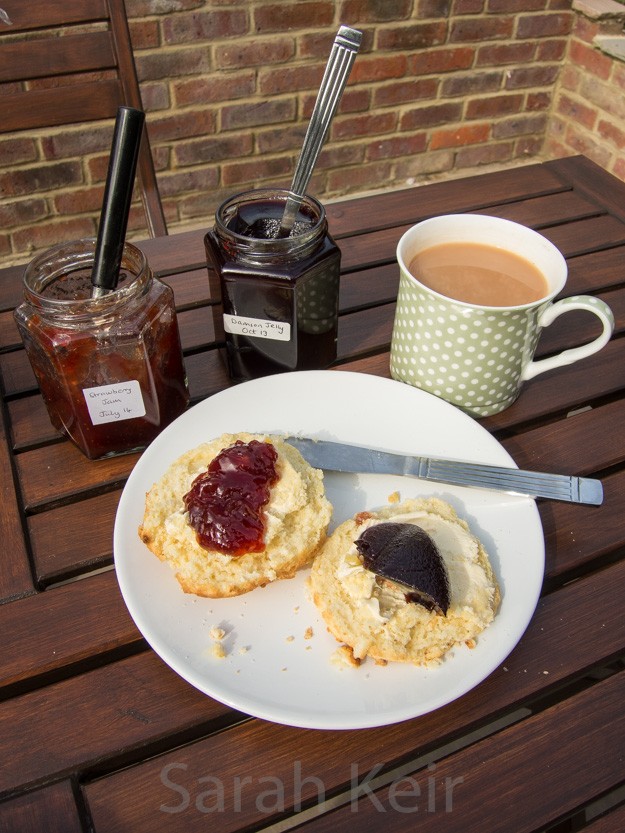
    These saffron buns come from Cornwall but a similar form is also traditional in Scandinavian countries as lussekatt or Lucia buns which are made and eaten around Lucia’s Day. I enjoyed these buns for breakfast, warmed up and with some good quality butter. Enjoy and please let me know what you flavour you get from saffron!

    Cornish Saffron Buns


    Makes 12 buns.

    2 large pinches of saffron threads
    60ml hot water
    500g strong white bread flour
    1/2 teaspoon salt
    200g unsalted butter
    80g caster sugar
    7g sachet easy-blend yeast
    220g mixed raisins, currants, sultanas, sour cherries, cranberries
    45g mixed candied peel
    about 170ml milk
    demerara sugar

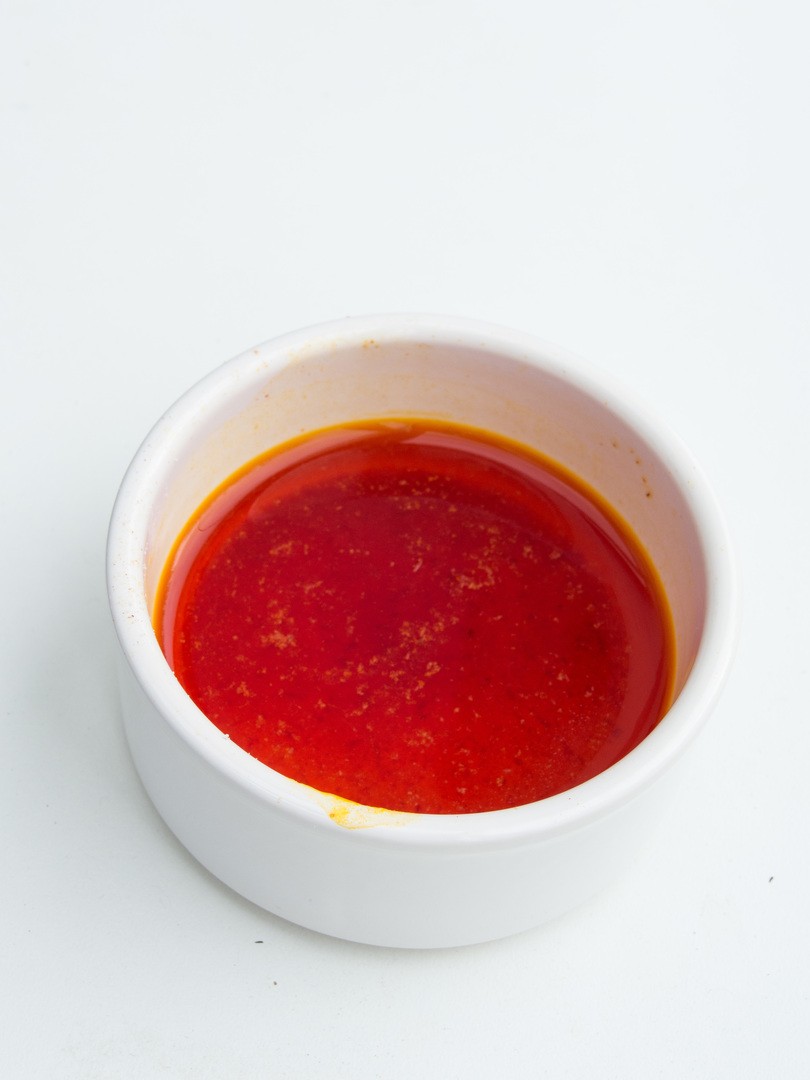
    Dry fry the saffron threads in a frying pan over a medium heat for a few seconds to toast them. In a small pestle and motar, grind the saffron with the salt until a fine powder. Put this powder in a small bowl and pour over the hot water; leave to sit.

    In a large bowl, rub the butter into the flour then add the sugar, yeast, dried fruit and candied peel. Pour in the saffron liquid and enough milk to make a soft and little bit sticky dough. Knead the dough for a good 10 minutes until it is soft, elastic and no longer sticky. Grease a large bowl with oil and place the dough in this bowl and cover with oiled cling film. Leave somewhere warm until doubled in bulk. Because this is an enriched dough, it will be slower than bread dough and could take 3-4 hours.

    Punch the dough down, knead again briefly and divide into 12 pieces. Using your hands, roll each into a ball. Place on greased baking trays, leaving about 5cm in each direction around the buns. Cover the trays with oiled cling film and leave somewhere warm until doubled again. This will take 2-3 hours.

    Preheat the oven to 200ºC/ 108ºC fan. Bake the buns for 20-25 minutes until golden brown. Remove from the oven, brush the tops with milk and sprinkle with demerara sugar; return to the oven for another 2 minutes to dry the glaze. Allow to cool completely on a wire rack.

    saffron-001


  2. Apricot and Almond Friands

    July 7, 2015 by sarah

    I have to apologise but here is another French inspired recipe. But then I shouldn’t apologise because it is such a great recipe and our recent trip to Paris inspired me to make more French dishes. It does not need to be fancy patisserie to be good. In fact, this recipe is so easy to throw together and tastes super sophisticated. If you have never tried friands before, they are a lovely light fluffy sponge with an almond taste and the fruit cooked into them is almost like the best jam possible; so fruity but also retaining the sour tang. The original recipe used plum quarters instead of apricots but as it is full summer currently, apricots are in season and plums are not. I think this recipe would also work well with a small handful of raspberries or a large strawberry – perhaps something to try next time.

    friands-003

    Apricot and Almond Friands


    Recipe from Waitrose magazine

    125g unsalted butter
    50g plain flour
    115g icing sugar
    75g ground almonds
    4 medium egg whites
    1/4 teaspoon almond extract
    6 apricots, halved and stoned

    1. Preheat the oven to 200º C/180º C fan. Grease a 12-hole muffin pan with non-stick cake spray and line the bases with circles of baking parchment – I found jam pot discs fitted perfectly so no fussy cutting out.

    2. Melt the butter. Sift the flour and icing sugar into a bowl and stir in the ground almonds.

    3. In a separate completely clean bowl, whisk the egg whites until they form soft peaks. Stir the melted butter and almond extract into the flour mixture, mixing well to combine. Using a large metal spoon, fold a quarter of the beaten egg whites into the butter/flour mixture then carefully fold in the remainder.

    4. Divide the batter among the holes in the pan. Arrange a half apricot on top and bake for 15-18 minutes until just firm and gold around the edge.

    5. Leave to cool in the tin for 5minutes then loosen the edges with a knife and carefully flip out. Cool completely on a wire rack and dust with icing sugar to serve.

    friands-002


  3. Lavender shortbread biscuits

    June 30, 2015 by sarah

    When in Paris, we walked by a massive department store and I could not help myself from going in. The food hall was like at Harrods. We spent 3 hours in there, or more accurately I dragged my husband around for 3 hours! It had an amazing array of food stuffs from all over France, naturally, but also from all round the world. I wish I could of taken more back but we managed to bring back a bag of different cheeses, saucissons and dried ham, plus some chestnut flavoured yogurts (yum!). I also found some unusual spices that I did not have in my cupboard (including wild pepper from Madagascar) and I bought some culinary lavender and a cute Eiffel tower cookie cutter. And so this recipe was inevitable. The lavender adds a slight floral hint without it tasting of your favourite Aunt’s eau de toilette!

    Lavender-001


    Use the best quality butter your can get i.e. the top shelf butter in the supermarket, probably French stuff if they have it. You will REALLY taste the butter in this recipe so it must be good and not fridgey either. Handle it very gently using implements not a food processor. Refridgerate the dough well before cooking as with any pastry and do not over cook. It must be crisp but pale – the butter and sugar will make it colour easily so watch it like a hawk and I would recommend checking every 5 minutes maximum towards the end of cooking.

    Bon appétit!

    Lavender-004

    Lavender Shortbread Biscuits


    150g unsalted butter, cut onto small pieces and soft

    75g caster sugar

    150g plain flour, ‘OO’ if you can get it

    75 rice flour

    good pinch of salt

    1 tablespoon of culinary lavender flowers, finely chopped (with a mezzaluna chopper is easiest)

    Use a wooden spoon to cream the butter and sugar together. Then use a fork to mix in the flours, lavender and salt. Bring the crumbs together into a ball and knead until it just comes together and no more, otherwise the shortbreads will be tough. Pat into a flat round and wrap well in cling film. Refridgerate for 30 minutes or more if you have the time to do so.

    Lightly flour a smooth work surface and a rolling pin. Gently roll out the dough, working from the middle out to reduce stretch on the dough. Cut out into shapes and place on baking parchment on a baking sheet. Place in the fridge for at least 30 minutes.

    Cook at 170º C or 150º C if fan oven, for 25-30 minutes, watching carefully towards the end so it stays pale. Cool on a wire wrack and dredge with caster sugar if desired. The shortbread will last for several days in an airtight container – if you can resist eating it all in one go!

    Lavender-003


  4. Scones plus jam plus cream

    June 9, 2015 by sarah

    Scones are perhaps too plain for today’s tastes but no afternoon tea is complete without them. Some (my husband) consider them a vehicle for cream and jam but a properly made scone should be a delight on its own, perhaps with some fresh butter. A slightly crisp crust outside and fluffy but not cakey or spongy interior. They need to rise well and have some colour on the top. Not as easy as it sounds; just look at my rather flat offerings. My excuse is I knocked them together in a few minutes between gardening and painting the back of the house at the weekend. Not much of an excuse but I’m sorry.

    scones-002


    There are a few trick and tips to help your scones turn out better. My main problem was that I patted the dough too thin before I realised and didn’t have the time to rework it. Do not use recipes that add egg; the scones turn out too cakey. Work the mixture as little as possible, leave large flakes of butter in the dough, pat into correct thickness (2cm) rather than using a rolling pin and do not twist the cutter when stamping out. Finally, clotted cream and homemade jam are essential.

    Ultimate Scones


    225g self-raising flour
    1/4 teaspoon salt
    1 teaspoon baking powder
    50g chilled butter, cut into cubes
    25g caster sugar
    150ml buttermilk or whole milk to which couple teaspoons of lemon juice is added

    Preheat the oven to 220 ºC/200 ºC fan. Lightly grease a baking sheet with spare butter.

    Sift the flour, salt and baking powder into a large bowl and rub in the butter but stop when there are still some large flakes. With a knife, stir in the sugar and then three quarters of the buttermilk, mixing until it comes together and using more buttermilk if necessary. It makes a fairly sticky dough.

    Flour your work surface well, tip out the dough and give a couple of brief kneads then pat to a thickness of 2 to 2.5cm (one inch). Stamp out rounds with a 5cm pastry cutter, trying not to twist the cutter (it makes the towering scones topple) and place on the baking sheet. Brush the tops with milk.

    Bake in the preheated oven for 10-12 minutes, until the tops are golden. Serve immediately but they also freeze well and can be pepped up by a few minutes in the oven.

    scones-001


  5. Madeleines – a post from Paris

    May 24, 2015 by sarah

    When this post goes live, I will be enjoying a well earned break in little olde Paris! And probably eating these little cakes which are a Parisian specialty. A little something to have with afternoon tea.

    madeleines-004


    While drooling over guide books for Paris over the past few weeks, I felt inspired to make some madeleines. Just one problem; they require a specialist tin which seems rather wasteful for something to be made once in a while. But while surfing (the net, no water round here), I came across the Lakeland sale and there was the tin I needed, half price. Of course, I had to buy other tins to make it free postage but that really is not a hardship!

    The batter for these cakes does not take long to whip together and it can sit for several hours up to overnight but madeleines MUST be eaten fresh from the oven; they really don’t keep as they dry out quickly. Who needs a greater excuse to eat them up fast? This recipe is a hibrid of Rachel Koo’s from ‘The Little Paris Kitchen’ and David Lebovitz from his website, because as usual I couldn’t decide which recipe to follow. For this first attempt, I went with simple vanilla madeleines but next time I will try being more adventurous by adding fillings and glazes.

    Apparently the way to tell a good madeleine is the size of the hump. There seems to be all sorts of magic and witchcraft (freezing the molds, freezing the mixture, no baking powder) involved in getting it to form, but forget all that and just enjoy them for what they are; a nice lump of cake!

    madeleines-005 madeleines-003

    Madeleines

    Makes 20-24 (so two trays worth)

    3 large eggs
    130g caster sugar
    175g plain flour
    1/8th teaspoon fine salt
    1 teaspoon baking powder
    finely grated zest of 1 lemon

    1 teaspoon vanilla extract
    170g butter, melted and cooled
    some milk
    extra melted butter and flour for the molds

    Prepare the molds by brushing with melted butter , dust with flour and tap off the excess. Place into the fridge or freezer.

    Beat the eggs and sugar until light and moussy. Sift over the flour, baking powder and salt and fold in with the lemon zest.Drizzle the cooled melted butter over this, folding it in as you go until it is all incorporated. Cover the bowl and sit in the fridge for at least an hour up to 12 hours.

    When ready to bake, preheat the oven to 200 ºC/ 190 ºC fan. Plop a heaped teaspoon of batter into each indentation; do not spread it out. Bake for 8-10 minutes until just set. Turn out to cool on a wire rack. Wash and dry the tin and pop it in the freezer for as long as you can bare, then repeat with the second batch. Eat as soon as possible!

    madeleines-006


  6. Carrot cake and topping

    May 20, 2015 by sarah

    This recipe is one of those which turns out to be much greater than the sum of all its parts. It is ridiculously moist, homely yet in fashion, chewy but light. You can glam it up with decoration or leave it rustic and plain. Bake in a round tin or rectangular, this cake never fails me in the bake or others in the tasting.

    Many people don’t like nuts so I use sultanas in my version which add texture and some sweetness. Feel free to change back to nuts; walnuts are traditional. It keeps well as it is an oil based cake, but the icing will only keep for a day or so at room temperature, depending on how hot it is!

    carrot cake-004

    Passion Cake

    For the cake:
    175ml vegetable oil, flavourless
    200g caster sugar
    3 eggs
    1 teaspoon vanilla essence
    100g sultanas
    200g carrots, grated coarsely
    150g plain flour
    1 teaspoon bicarbonate of soda
    1 teaspoon baking powder
    1 teaspoon each of cinnamon and mixed spice
    1/2 teaspoon salt

    For the topping:
    75g cream cheese or ricotta or quark
    50g softened butter
    1/2 teaspoon vanilla
    finely grated zest of 1 orange
    100g icing sugar

    Prepare a tin by lining the bottom with parchment paper and greasing the sides. Either a 22cm round tin or a 20 x 30cm rectangular tin, or muffin cases (about 12). Preheat the oven to 180ºC/ 160ºC fan.

    Beat the oil, sugar, eggs and vanilla in a jug.

    Put the dry ingredients into a large bowl, add the grated carrots and wet mixture. Beat well until mixed.

    Pour into the prepared tin and bake for about an hour for the large tins, half an hour for individual muffins. Allow to cool in the tin for 10minutes before turning out to cool completely on a cooling rack.

    To make the topping, put the soft butter in a bowl and beat until smooth. Add the cream cheese (which should be cold from the fridge) and vanilla and orange zest and beat until smooth. Sift over the icing sugar and beat until all incorporated. This topping is soft and cannot be piped; look at my other recipes if you need a topping that can be pipped.

    carrot cake-003


  7. Aioli or mayonnaise and Spring vegetables

    May 17, 2015 by sarah

    I feel a bit of a cheat putting this recipe up; it takes all of 10 minutes to make. If you think mayonnaise is difficult or time consuming to make, then think again, as Mr Oliver would say. And this aioli recipe is like garlic mayonnaise turned up to 10. Just the way I like it and perfect for serving with some lightly steamed vegetables, or chips, or really anything. And like mayonnaise, you can make the recipe your own; try adding cayenne pepper, fresh herbs or lemon zest and juice.

    aoli-003

     aoli-006

    Aioli

    Recipe from Jamie Oliver.

    1 garlic clove (I used smoke garlic I brought back from the Isle of Wight)
    1/2 teaspoon sea salt
    1 free-range egg yolk
    1 teaspoon Dijon mustard
    about 500ml oil - do not use all olive oil as has too strong a flavour, try half olive oil and half rape-seed oil
    pepper and lemon juice to taste

    In a pestle and mortar, grind the salt and garlic until a fine paste is made. Scrape this paste into a large bowl that is sitting on a non-slip mat. Add the mustard and egg yolk and with a large balloon whisk or hand mixer, mix well together. Then slowly add the oil. Add the oil VERY slowly to start will, drip by drip, but you can be a bit freer when most of the oil has been added.

    Season to taste with pepper and lemon juice, using the lemon juice to slacken the mixture if you need it runnier.

    This will keep for a few days, covered in the fridge.

    aoli-004


  8. Rhubarb and custard tart – recipe

    May 4, 2015 by sarah

    A couple of weeks ago, I made some individual sized custard tarts. But I had loads of pastry and filling left so I turned it into this patisserie style rhubarb and custard tart. I don’t think it would go down well in Paris (not finished well enough for a start) but I love the contrast of the silky egg interior and the tart juicy rhubarb on top. It looks so pretty with the regular rows of soft pink and green stems. One tip – measure and cut your rhubarb before it is cooked, otherwise it is too soft and will disintegrate to a mush when cut.

    custart&rhubarb-001


    You know it is Spring when you harvest your first crop of rhubarb from the garden. Rhubarb is technically a vegetable but is used most often as a fruit in cooking. Without a sweetener, rhubarb is bracingly sour. If you think about those unfolding leaves and growing stalks appearing after a long winter diet of meat and starch, rhubarb’s tartness could serve as a welcome tonic. But add some sugar and the fruit flavour is revealed in all its glory. The flavour of rhubarb is complemented by many things; vanilla, nutmeg, orange, ginger.

    custart&rhubarb-003

    Rhubarb and custard tart

    Custard tart made as here
    500-750g rhubarb
    50-100g caster sugar

    Clean the rhubarb and cut into lengths to fit on your tart, especially if making a rectangular tart like mine.

    Place the cut rhubarb into a shallow dish suitable for the oven. Sprinkle over the sugar and tightly seal with foil. Place in a preheated oven at 200 ºC/180 ºC fan for 20-25 minutes until the rhubarb is tender. Allow to cool completely before arranging on your tart. Serve immediately as the juice from the rhubarb will make the pastry soggy.

    custart&rhubarb-002


  9. Spice 10 – Nutmeg – Custard Tart

    April 28, 2015 by sarah

    Nutmeg is an unassuming spice. The brown kernel has a pleasing sweet aroma but the magic happens when it is added to dishes containing dairy products or eggs. Nutmeg has been used in European cuisine since medieval times so no wonder there is a multitude of unique recipes using it; custard tarts, bread sauce, rice pudding, mulled wine and even haggis!

    custart tart-003


    Nutmeg is the seed of a tree that indigenous to the Banda Islands in the Moluccas (or Spice Islands) of Indonesia, though now grown in the Caribbean and Kerala in India. Two spices are obtained from this tree, the other being mace which is the lacy outer wrapping to the nutmeg seed inside. Although mace and nutmeg are not identical in flavour, they are so similar that for most recipes they can be interchanged. Use mace for recipes requiring a whole form such as chutneys and pickles, and use nutmeg for when ground spice is required. It really does need to be ground fresh, as it quickly loses its power when ground; I keep a mini grater obtained from a Christmas cracker for this very purpose. As a little aside, nutmeg is supposedly a hallucinogen but you would have to eat rather a lot of it and the other side effects sound grim! Do not try at home!


    custart tart-002

    This recipe is adapted from ‘The Great British Book of Baking’ by Linda Collister.

    Custard Tart

    For the sweet shortcrust pastry:
    175g plain flour
    pinch of salt
    2 tablespoons caster sugar
    110g unsalted butter, chilled and diced
    1 medium egg yolk

    For the filling:
    400ml single cream
    200ml milk
    plenty of freshly grated nutmeg (to taste but at least half a kernel)
    3 medium eggs, plus 3 yolks
    75 caster sugar

    Make the pastry – rub the butter into the dry ingredients until makes fine crumbs. Use a round ended knife to mix in the egg yolk and some cold water until it comes together as a firm dough. Wrap in cling film and pop the the fridge for at least 30 minutes, but overnight is better.

    Roll out the pastry until thin and then use to line your tart tin; use a 22cm diameter round fluted tin with a removable base or several individual sized ones. Prick the bottoms all over with a fork. Chill in the fridge for at least 30 minutes (or freezer for 10 minutes if you are short of time). Preheat the oven to 200 ºC/180 ºC fan. Bake the pastry cases blind for 15-20 minutes. To do this, cut out a square of baking parchment a few inches larger than the tin, scrunch up the paper, flatten out and scrunch again. Flatten out the paper and lay over the pastry, fill with ceramic baking beans, dried pulses or even copper coins. Doing this cooks the base so you don’t get a soggy bottom and the baking beans stop the sides from collapsing. Remove the paper and baking beans and return to the oven for another 5-10 minutes. Take out of the oven and with a pastry brush, brush the pastry with one of the eggs (beaten) and return to the oven for 1-2 minutes. This egg layer means your pastry bottom really will not go soggy.

    Turn the oven down to 160 ºC/fan 140 ºc.

    custart tart-004


    Put the cream and milk into a pan and slowly bring to just below the boil, take off the heat and set aside for 5 minutes. Meanwhile eggs, egg yolks and sugar in a large bowl. Slowly pour over the hot cream/milk mixture, whisking constantly. Add about half of the amount of nutmeg you wish to add and transfer the mixture to a jug.

    Set you pre-cooked pastry case on a hot oven tray and place on the top shelf of the oven. Carefully pour in egg/milk mixture right to the brim, carefully slide it into the oven and close the door. Bake the tart for about 30 minutes. The middle of the tart should still have a bit of a wobble (the individual tarts took about 15 minutes). Leave to cool and serve warm or cool, with more grated nutmeg if wished. Best eaten the day it is made.

    custart tart-001


  10. Cupcakes

    April 26, 2015 by sarah

    I have shied away from putting up a recipe for cupcakes so far as they seem to have had their time in the spot-light and are now considered ‘has beens’. I think this is rather harsh as a good cupcake is a lesson in portion control; no guessing how many the cake is supposed to feed and trying to gauge slice sizes. The key though is a GOOD cupcake. Far too often have I been tempted by the bling exterior of a coffee shop or market stall cupcake, just to be sorely disappointed by the dry, tasteless, overly sweet interior with far too much sweet, tasteless icing.

    cupcakes-001

    Coffee cupcakes with coffee flavoured Swiss meringue buttercream and decorated with chocolate covered coffee beans.


    But cupcakes do not need to be like this. For cupcakes to be a joy they must be freshly baked (no more than 24 hours old or they are too dry), as they come out of the oven liberally brush the top with appropriately flavoured sugar syrup, consider filling the centre with jam or fruit curd and consider the icing to be in proportion with the cake below (Swiss meringue buttercream is luxuriant but not too sweet). My favourite cupcakes that I make are a lemon sponge, doused with lemon syrup as they come out of the oven and then filled with lemon curd and topped with lemon cream cheese topping (half cream cheese, half butter, sweetened with a little icing sugar). Decorations should be simple but appropriate and are not the entire reason for a cupcakes existence. Go on, give cupcakes a second chance.

    comic relief-001

    Selection of different cupcakes I made for charity fund raising – lemon, strawberry, chocolate, coffee and almond amaretto.

    Cupcakes


    Makes 12 of larger/muffin sized cakes

    175g soft butter or margarine
    175g caster sugar
    3 medium eggs at room temperature
    175g self-raising flour plus 1/2 teaspoon baking powder
    or 175g plain flour with 2 teaspoons of baking powder
    2 tablespoons of milk
    flavourings – 1 teaspoon vanilla extract, or
    – zest of 2 lemons, or
    – replace 25g of flour with cocoa powder, or
    – replace the milk with 4 teaspoons of instant coffee dissolved in 2 tablespoons boiling water

    Preheat the oven to 180ºC/160ºC fan. Put cupcake cases into hollows of a cupcake tin.

    Put the butter/margarine into a large bowl with the sugar and cream together until light and fluffy.

    Add all the other ingredients in one go and beat on slow speed until mixed thoroughly and a smooth, thick batter is formed. I prefer to do the last bit by hand with a silicone spatula so that all the ingredients from the sides and bottom are thoroughly mixed in and the batter is not over mixed.

    Divide the batter between the cupcake cases – should come three-quarters full.

    Bake for 18-20 minutes, turning half way through cooking. Take out the oven and allow to cool for at least 15-20 minutes in the tin before turning out; this stops the paper cases pulling away from the cake.

    Prick the tops all over with a skewer and use a pastry brush to soak in sugar syrup.

    Sugar syrup – 5 tablespoons of water plus 75g sugar – place in a small pan and heat gently until the sugar is dissolved then allow to cool. Add flavourings – a split vanilla pod or for lemon replace the water with lemon juice. Will last up to a month in a sealed container in the fridge.

    cupcakes-002