RSS Feed

June, 2014

  1. Biscotti vs Cantucci/cantuccini

    June 20, 2014 by sarah

    Biscotti really just means ‘twice baked biscuit’ in Italian, and are otherwise known as cantuccini, or ‘coffee bread’. Biscotti is now taken to loosely mean just any biscuit in Italian so really these should be called cantuccini (if small in size) or cantucci (if larger) though I am sure everyone knows them as biscotti. Originally from Prato in Italy, there are versions from other regions of Italy and even from Spain where they are called carquinyoli. Since they are very dry, they are usually served with a drink; vin santo in Italy and coffee elsewhere in the world. But don’t let that stop you enjoying them at other times. I am very partial to them dipped in ice cream or a creamy dessert like rhubarb fool.

    biscotti-6944


    I cannot believe that in some chain coffee shops they charge £1 or more for some small slice of at most 3 mouthfuls. I can make a tin full for same amount. I supose that must be by thrifty Scottish side coming through. They are also rediculously easy to make and last for ever (well, as long as you can resist eating them) as they are completely dried out.

    Recipe from Nigella Lawson ‘Feast’. Easily doubled and they last for ages so you can never have too much.

    biscotti-1533

    Shape the loaf shape (this is after the first bake)

    biscotti-1534

    Slice into 1cm slices

    biscotti-1535

    Spread out slice and bake

    biscotti-1536

    This is the slices after their first bake.

    Cantuccini

    1 large egg
    100g caster sugar
    1/2 teaspoon real vanilla extract
    few drops of almond essence (optional)
    125g plain flour
    1/2 teaspoon baking powder
    pinch salt
    75-100g nuts – natural almonds in skins, pistachios, hazelnuts, even chocolate chips
     
    Preheat oven to 180 °C/fan 160 °C. Line a tray with baking parchment.
    Whisk the egg and sugar until pale and moussily thick so leaves ribbon trails from the whisk. Beat in the vanilla and almond flavourings. Fold in the flour, salt and baking powder and when all combined mix in the nuts/chocolate. The dough will be a soft, slightly wet but soft mixture.
    Using floured hands, bring the dough to a ball and then shape into a rough loaf like shape on the lined baking tray, so roughly 25 x 5cm.
    Cook in the preheated oven for 25 minutes, remove and allow to cool for 10 minutes or so. Using a serrated bread knife, cut the log into diagonal slanting slices of about 1cm thickness to give the characteristic finger-like pieces.
    Lay the slices on the tray and cook again for another 10 minutes, turn them over and cook for another few minutes. Let them cool entirely on a rack before storing in an airtight container.
     
    biscotti-6956

  2. Meringue nests – Uses for eggs!

    June 15, 2014 by sarah

    Meringue. A word that can instill fear into the heart of even the most experienced cook. Sometimes it works and sometimes it doesn’t and usually you can never work out why. But understanding more about eggs and the chemical reaction that makes meringue can help demystify it and hopefully prevent so many failed egg dishes. Though I can knock out a batch of meringues without much thought, I still get some disasters though they always taste better than they look! A meringue is never a failure, you might just have to opt to serve Eton mess rather than neat nests. There is nothing better than sweet meringue, smooth and silky cream and tart berries.
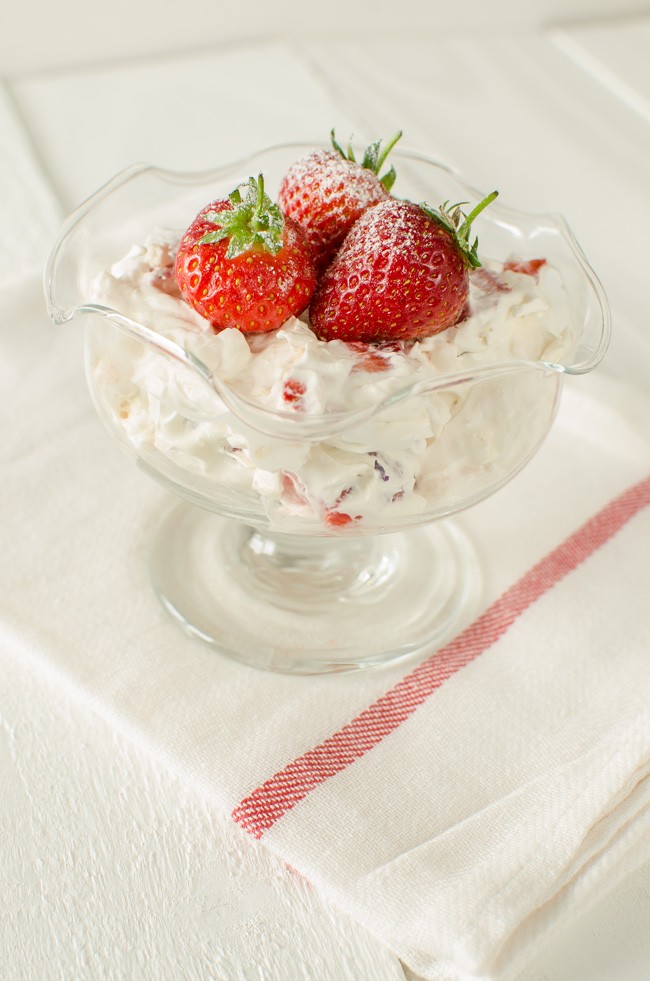
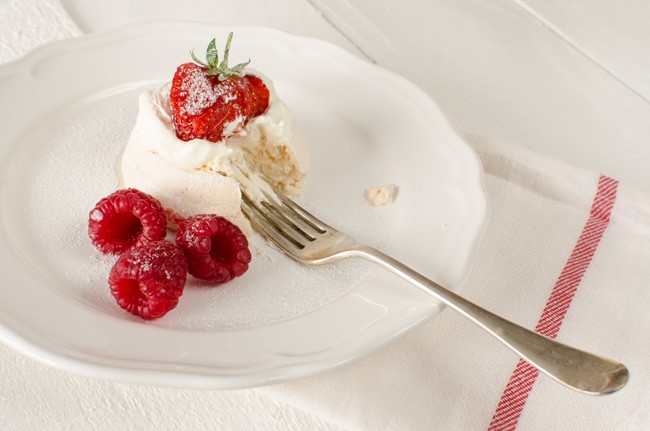
    meringues (7 of 9)

    Eton mess

    meringues (8 of 9)

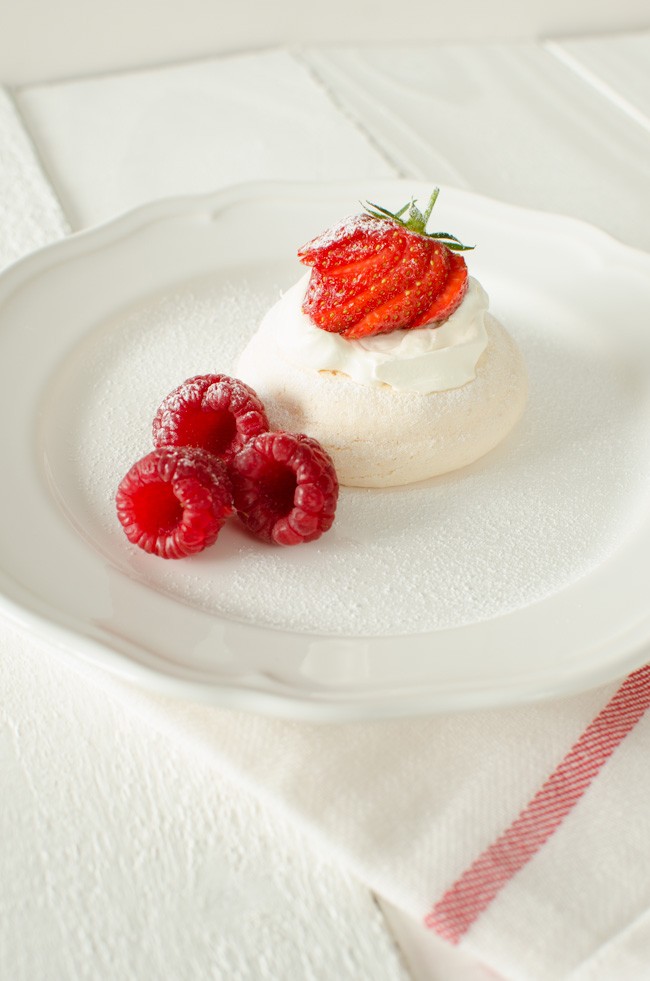
    Strawberry meringue nest

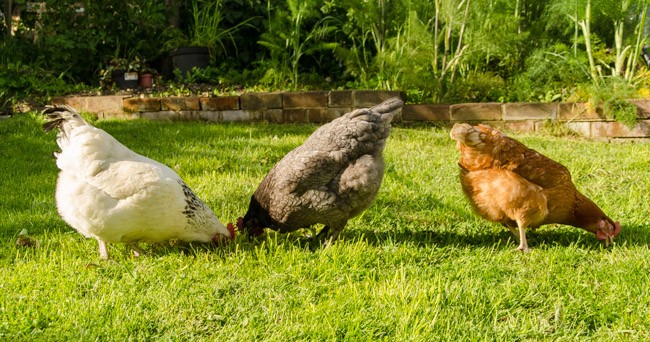
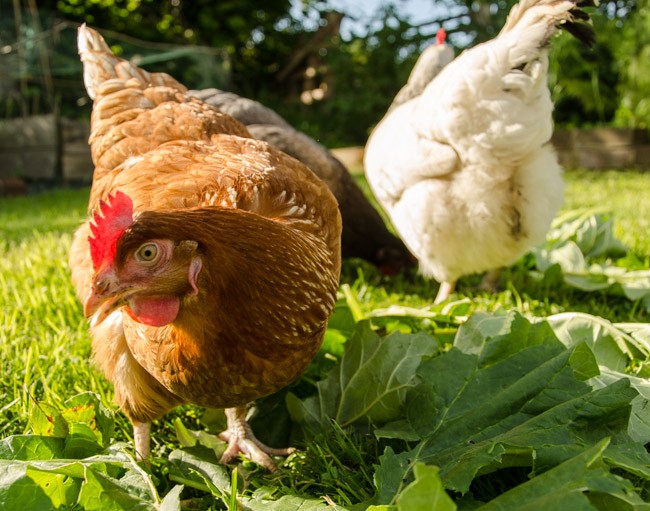
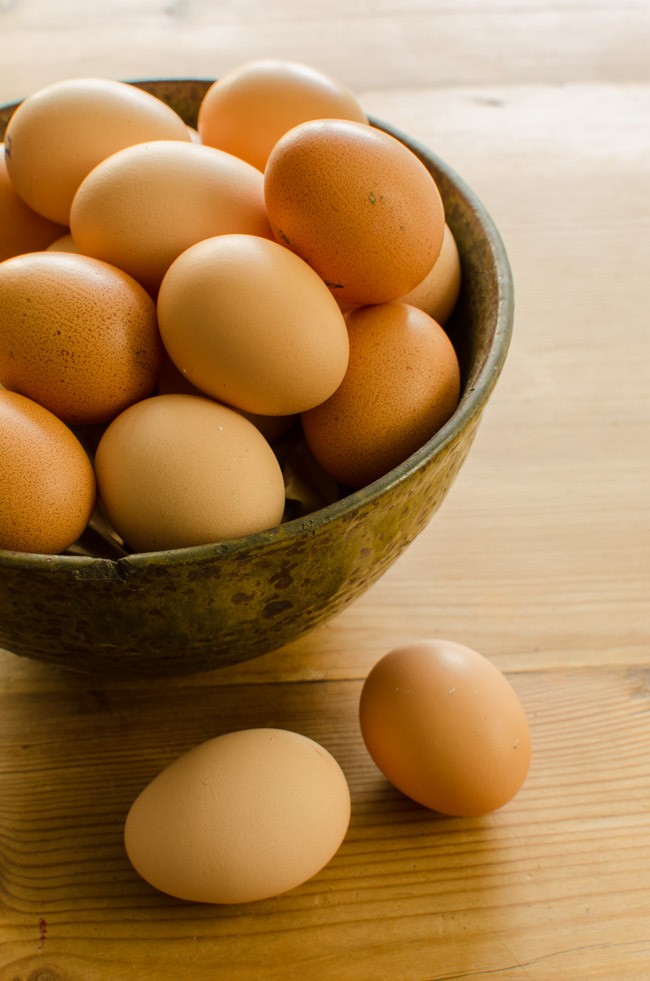
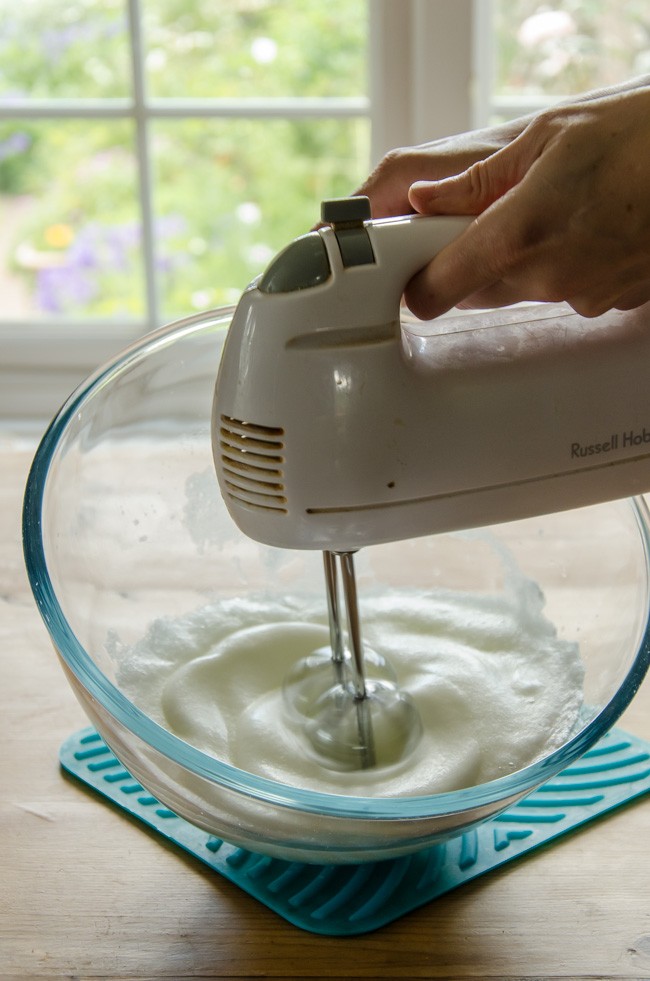
    Egg whites consist over 90% water and various proteins make up the rest. When you whisk egg whites, you are breaking down the protein structure so that the protein strands lengthen and air bubbles become entrapped within this lattice structure. When whisking egg whites it is very important to have scrupulously clean bowl and whisk. I prefer a metal or bowl as it is supposed to help the egg whites trap more air or if using a glass bowl, I clean it first with kitchen paper with a little vinegar and left to dry. It is also very important not to get a single speck of egg yolk in with the whites so it is a good idea to break the eggs individually into a small bowl before adding the whites to your larger bowl to avoid messing up the whole lot. A drop of lemon juice or a pinch of cream of tartar is often added to the egg whites at the start of beating as it is supposed to help stabilise the bubbles. This is unverified; I think I need to do more experimentation to see if it makes a noticeable difference. Very fresh eggs whisk the best as the white is firm and not runny. This is part of the reason why I got chickens of my own. Interestingly, fresh eggs make awful hard boiled eggs as they are impossible to peel! Remember that eggs you buy in the supermarket will probably be at least a week old by the time you buy them and the ‘best before date’ will be up to 5 weeks after they were laid!

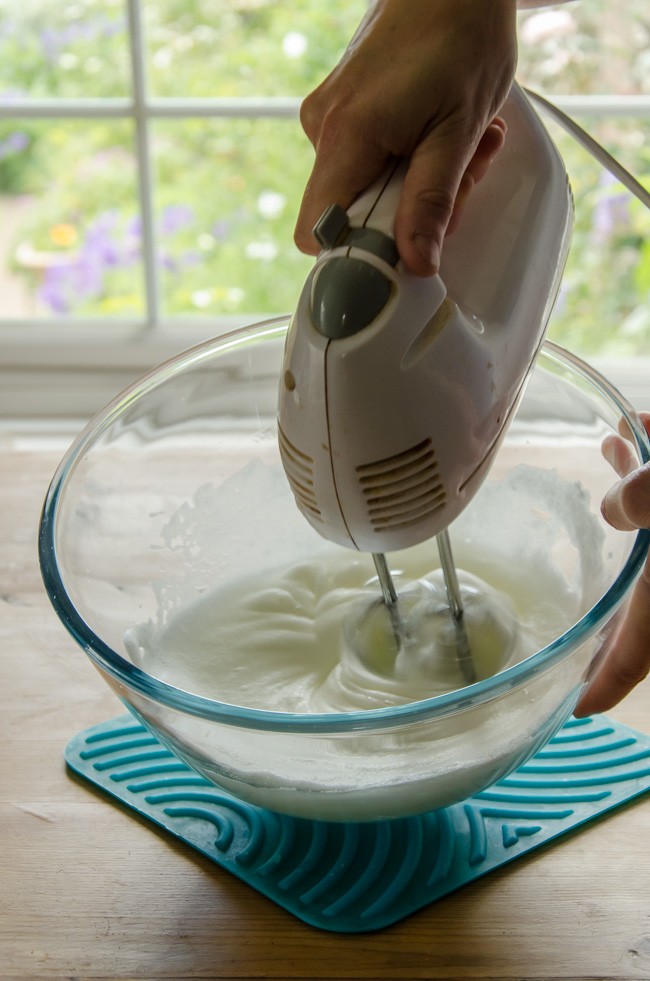
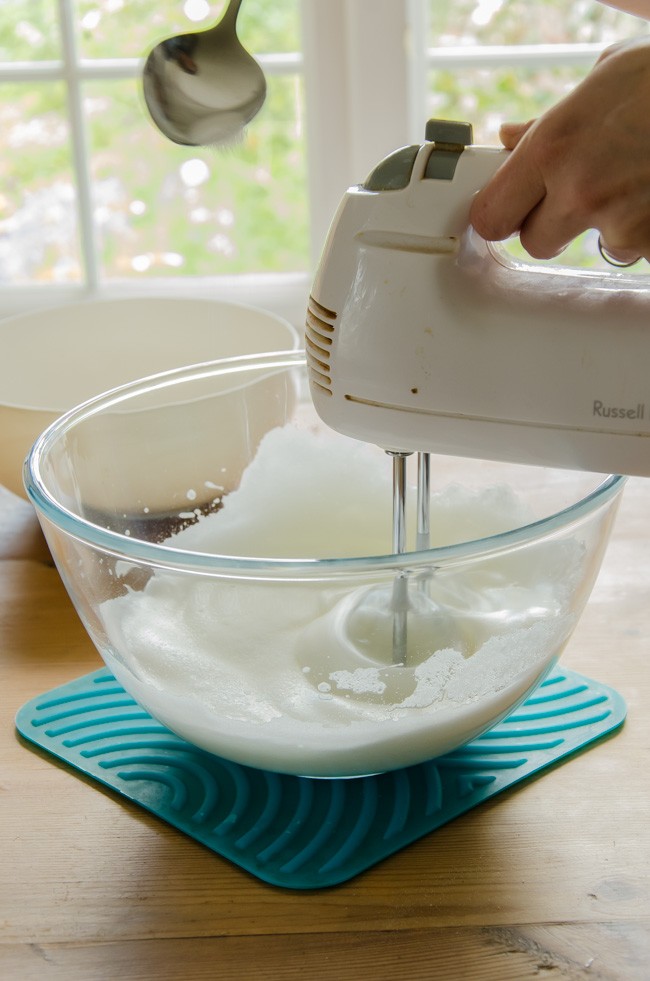
    When you start whisking eggs, start on a slow speed for a minute or so before increasing the speed. The soft peak stage, as used for souffles and mousses, occurs when you lift the whisk out of the egg whites and the peak slowly folds over into the mixture. The bottom of the bowl may feel slightly liquidy and slip around the bowl. The stiff peak stage happen fairly soon after so keep watching and testing. Egg whites beaten to this stage are used for meringues and you can tell when you have reached this stage as the peaks when you lift out the whisk are firm and do not sag. Also the whole bowl should be whisked to the same stage so at firm peak stage you should be able to turn the bowl over your head and not get a santa hat of egg whites! To prevent meringues from weeping when cooking, you must make sure the sugar is thoroughly dissolved in the egg whites and that you use very fine sugar.

    I don’t know if equipment matters too much when whisking meringues; after all, it used to be done with a hand whisk. Think of those muscles! I use a handheld machine but would love a stand machine, especially if it came with whisk attachments rather than the all purpose ones I currently have. I am not sure it would make a huge difference to my meringues, but there is only one way to tell! I do put a silicone mat under the bowl as I whisk to prevent the bowl from spinning off the counter.

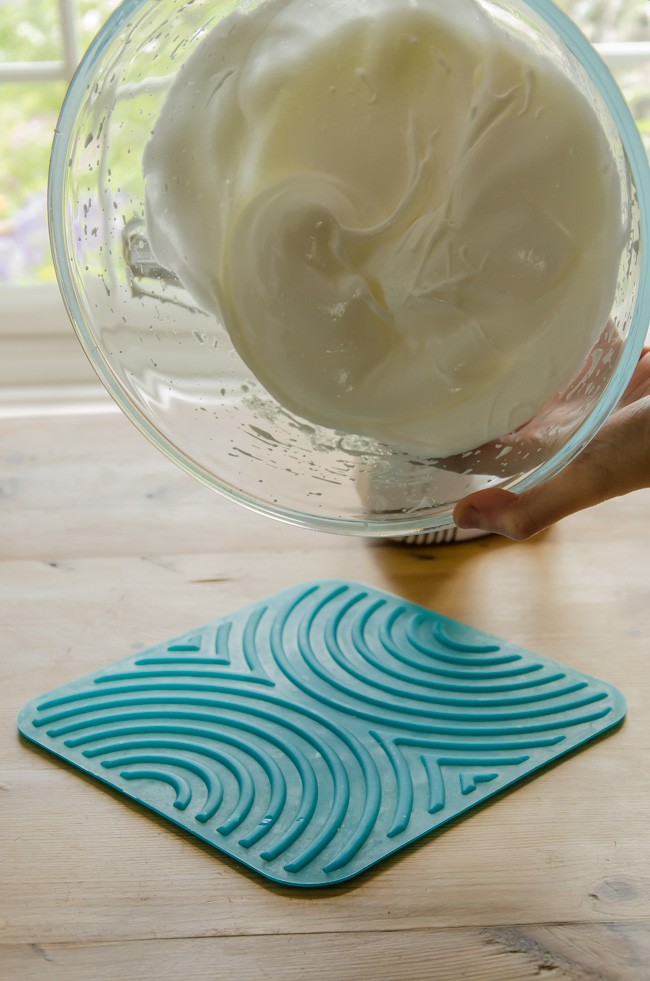
    There are three types of meringues and I will give the recipe for simple ones below. Swiss meringues are probably what we are all familiar with. The egg whites are beaten to soft peak stage, half the sugar is added and whisking continues until stiff peaks are achieved and the mixture is glossy; then the rest of the sugar is folded in. This mixture is suitable for simple piping like the nest I made for the afternoon tea or pavlova layers or toppings for pies, but it must be used quickly other it turns back to liquid. Italian meringue is made by adding hot sugar syrup to whisked egg whites and whisking until cool. This meringue is more stable and is the best choice for piping delicate items. Cooked meringue, also known as meringue cuite, is made by whisking the egg whites with the sugar in a bowl over boiling water and this is the most stable type of meringue.

    One final note on making meringues and that is you MUST use baking parchment, also known as silicone paper, to line the trays. Greaseproof paper has a wax coating that resists water so is used for wrapping and layering food and with sticky food like dough, but the coating melts in the oven so the food then sticks to it unless you pre-grease it like for a sponge cake. Baking parchment has been treated so that the non-stick properties do not disappear in the heat of the oven; essential for high sugar foods such as meringues, macaroons and even sponge cakes that you do not pre-grease the paper lining the tin such as genoese sponge.

    meringues (9 of 9)


    Simple Meringue Recipe

     
    4 large egg whites, cold from fridge – about 120-150g of egg white if mixed egg sizes
    pinch of cream of tartar
    225g caster sugar
     
    Preheat the oven to 110 ºC/ fan 100ºC and line a couple of baking trays with baking parchment/silicone paper.
    Tip the egg whites into a large bowl and whisk on slow speed until foamy and then add the cream of tartar. Continue to whisk on medium speed until soft peaks are reached and just turning to stiff ones.
    Turn the speed up and add the sugar a dessert spoonful at a time, beating for 3-4 seconds between each addition.
    Once half of the sugar has been added and the egg whites are glossy, add the rest of the sugar in one go and beat for a few seconds more until well mixed and not granular when touch between you fingers. But try to resist over beating. If you over beat, put in the fridge until cold again and try again. Theoretically you should fold in the last half of the sugar but I find it doesn’t mix in well so you get sugar bleeding in the finished meringue or to fold it in well enough the mixture becomes deflated and becomes sloppy.
    Pipe or soon the mixture on the lined baking trays – you can only manage rough shapes with this type of meringue.
    Bake for about 1 and half hours. I cook for an hour then prop the oven door open and let them cool in the oven and this leaves the meringues with a soft, chewy centre. If you like them dry all the way through then cook for the full 1 and half hours at least.
    When cool, they can be stored in an airtight container for up to 2 weeks, or frozen indefinitely.
     
    meringues (1 of 9)

    Step 1 – whisk egg whites to soft peak stage.

    meringues (2 of 9)

    Step two – make sure you move the beaters around the bowl.

    meringues (3 of 9)

    Step three – add the sugar a spoonful at a time.

    meringues (4 of 9)

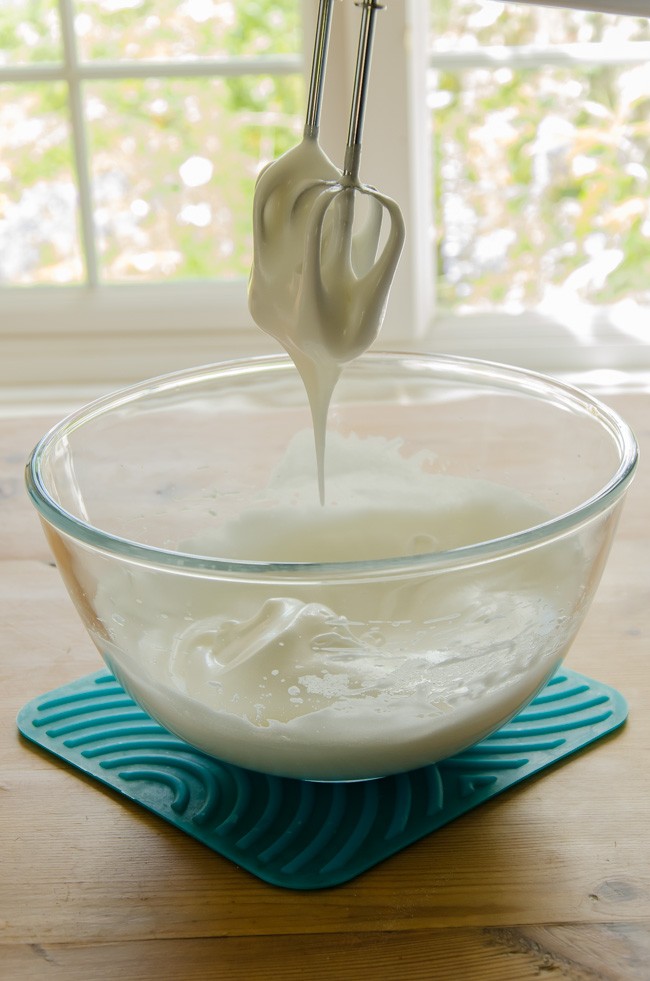
    Step four – keep beating until stiff and glossy.

    meringues (5 of 9)

    See – stiff peaks, shouldn’t slide out the bowl.

    meringues (6 of 9)

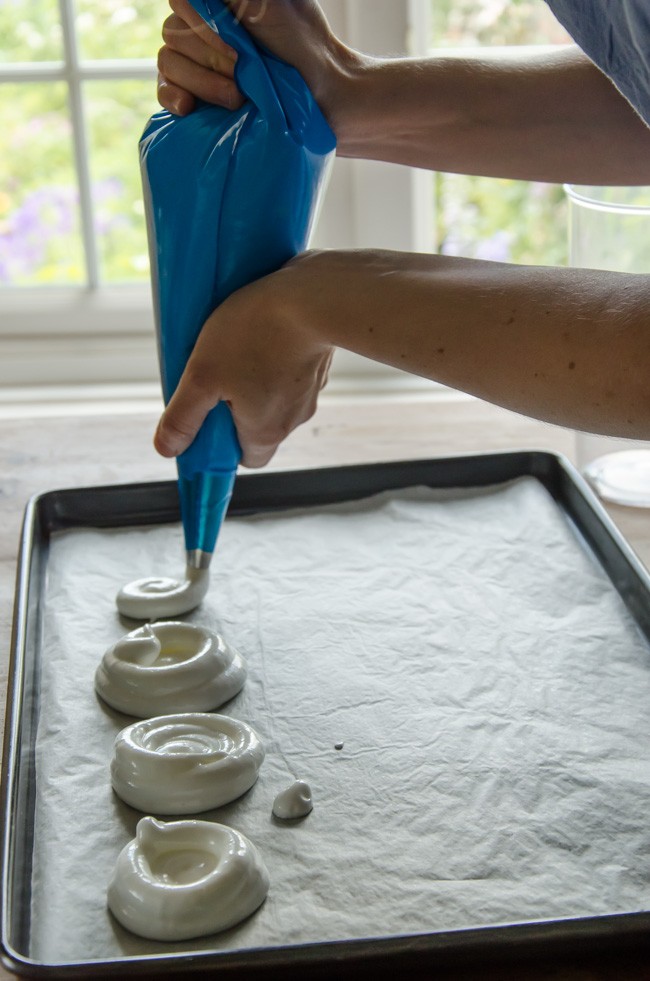
    Step five – pipe as required on to baking parchment.


  3. What to do with all those eggs? Recipe for Creme Caramel

    June 10, 2014 by sarah

    There once was three chickens
    Called Mrs Red, White and Blue,
    They laid so many eggs
    I didn’t know what to do,
    So I made some meringues,
    Ice cream and creme caramels,
    That used up lots of eggs
    And then all was well.
     
    _1SK6838

    Mrs Red, White and Blue enjoying the sun in the garden.

    _1SK6857

    Mrs Red enjoying rhubarb leaves.

    My girls are currently on full steam with the egg laying. Which means I get at least two eggs every day and three eggs most days so a potential of about 20 eggs a week. Even with selling a box or two at work, it still leaves a lot of eggs for eating! Many are eaten at breakfasts, lunches or light dinners as boiled, poached, scrambled or baked eggs with various accompaniments but this usually leaves a box or two of eggs and me wondering what to do with them. So here is my go to list for inspiration when there are eggs to use and cooking to be done. If I spy a recipe I want to use that uses yolks, I make sure I also have an egg white recipe in mind, and visa versa, though egg whites do freeze well if necessary.

    Savoury
    –          omelette
    –          Frittata/tortilla
    –          Quiche/tarts
    –          Soufflés
    –          Mayonnaise, hollandaise sauce
     
    Sweet – whole eggs
    –          Sponge cake especially Genoese sponge/swiss roll/roulade
    –          Clafoutis
    –          Choux pastry e.g. profiteroles
    –          Pancakes/crepes
    –          Cheesecake
    –          Lemon tart
    –          Bread and butter pudding
    –          Custard Tart
     
    Sweet – whites
    –          Meringue, pavlovas
    –          Angel food cake
    –          Macaroons, of various types
    –          Mousses and soufflés
     
    Sweet – yolks
    –          Lemon curd
    –          Gateau Breton
    –          Custard/creme anglais – therefore accompaniment to stewed fruit or a steamed pudding and of course, the base for making
    –          Ice cream
    –          Crème patisserie – filling for fruit tarts or a base for trifles


    _1SK6809

    Lovely bowl of fresh eggs.

    And now for the recipe – a delectable smooth and creamy favourite – creme caramel. When homemade, it is a million miles away from the insipid stuff in pots in the supermarket or even the ubiquitous pudding option in any food establishment pertaining to be remotely French. It works because the creamy coolness of the just set custard is counter balanced by a caramel that is a bit acid or tart so you must get enough colour on the caramel to get that.

    _1SK6775 _1SK6779

    Creme Caramel

     
    500g milk (whole milk ideally or fat reduced milk with splash of cream, though I have used semi-skimmed and it turns out fine)
    1 vanilla pod
    4 medium eggs
    50g sugar
     
    Caramel – 50g sugar
     
    Put the milk into a non-stick heavy based pan, split the vanilla pod and add the seeds and empty pod to the milk and bring to the boil. Remove from the heat and leave to infuse until ready to use. Heat oven to 150 C/fan 120 C.
    Make the caramel by heating the sugar with 1 tablespoon of water in a heavy bottomed pan over a medium heat. If the sugar is crystallising around the edge of the pan, wipe around the edge with a silicon pastry brush dipped in water. Continue to bubble until a deep golden colour is reached and then pour the caramel directing into the bottom of 4-5 ramekins. Watch out as hot sugar is very hot and will burn. Allow to cool then grease the insides of the ramekins with a little butter.
    In a bowl whisk the eggs and remaining sugar until combined but do not continue to whisk (adding air bubbles at this stage will put air bubbles in your creme). Strain over the infused milk and whisk in. Strain this egg and milk mixture into a jug and use to fill the moulds evenly.
    Sit the moulds in a roasting tin and pour boiling water around the outside until comes half way up ( a bain marie – lovely name, means Mary’s bath) and cook in the preheated oven for 30-40 minutes until just set (should still wobble a little). Take out of the water and allow to cool entirely and then refridgerate before unmoulding. To unmould, run you finger around the top of the custard to prise it away from the ramekin, sit the base of the ramekin in hot water for 30 seconds then up end over a plate. Serve immediately as the caramel will lose its colour.
     
    _1SK6795