RSS Feed

Posts Tagged ‘biscuits’

  1. Tahini biscuits

    February 18, 2015 by sarah

    I apologise for my absence over the past couple of weeks. I have been very busy studying for my certificate exams that were last week. But now they are out the way I should have more time for baking and blogging! It feels like such a relief to get them out the way. At the weekend I had the complete freedom of choice of what to do so I cleaned the house thoroughly on Saturday and relaxed on Sunday. Bliss!

    tahini-002


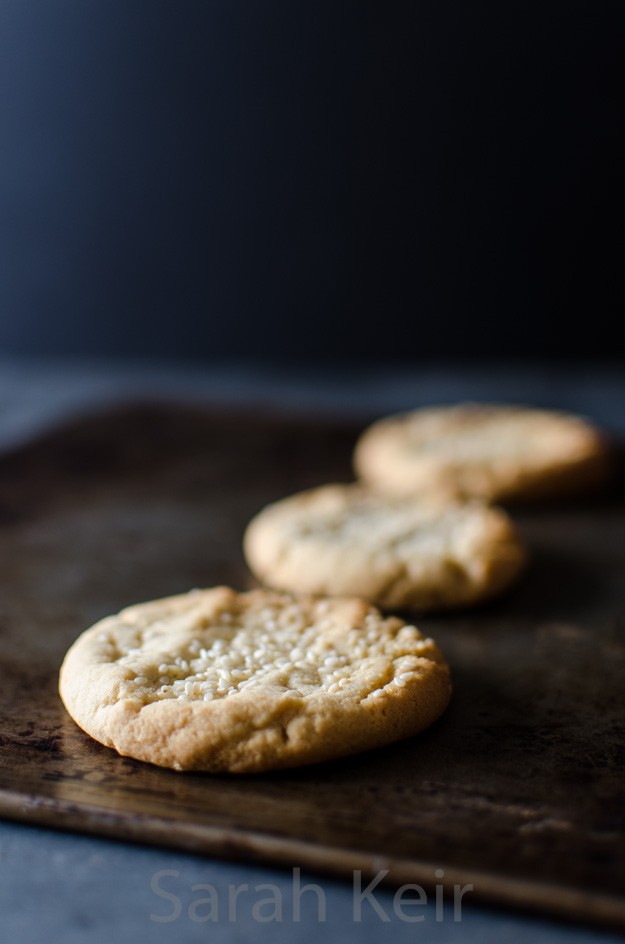
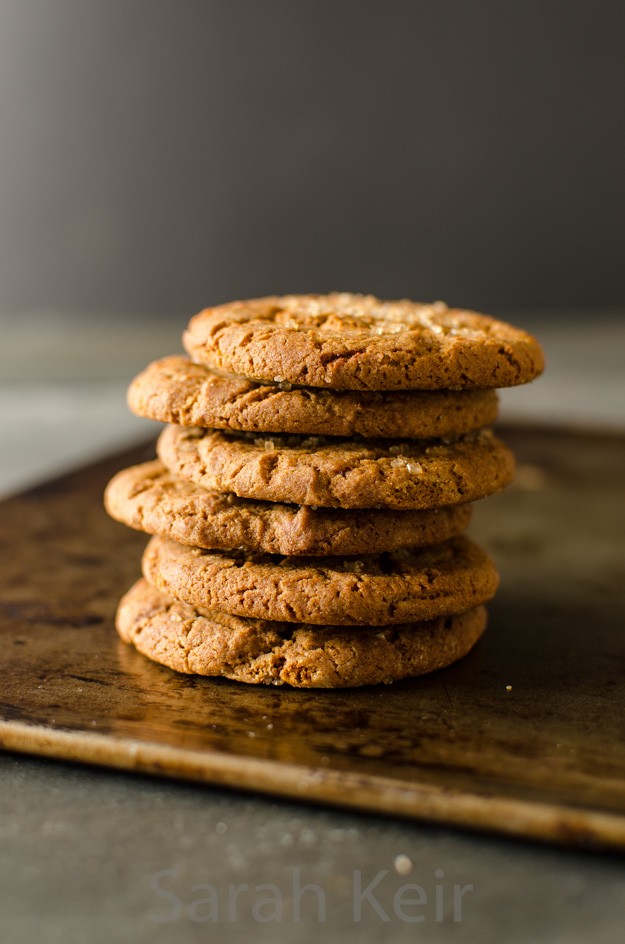
    This recipe is another beginning of the year attempt at using up cupboard bits and bobs, a side effect of my food hoarding. I can’t remember why I even had tahini in the cupboard, perhaps from a hummus recipe. But though I love hummus, I cannot currently imagine making it as the weather is so cold and the supermarket stuff is pretty good. So these biscuits came about as a way of using up the last bit of tahini in a jar. As usual, this is a combination of several recipes cobbled together but I have to admit they turned out perfectly. They are very short and crumbling with a buttery sesame seed flavour in the background that is not at all over powering but is mystical and mouthwatering. These biscuits did not last long, I can tell you; they didn’t even make it as far as my work colleagues. Darn, now I will have to buy some more tahini just to make these biscuits…
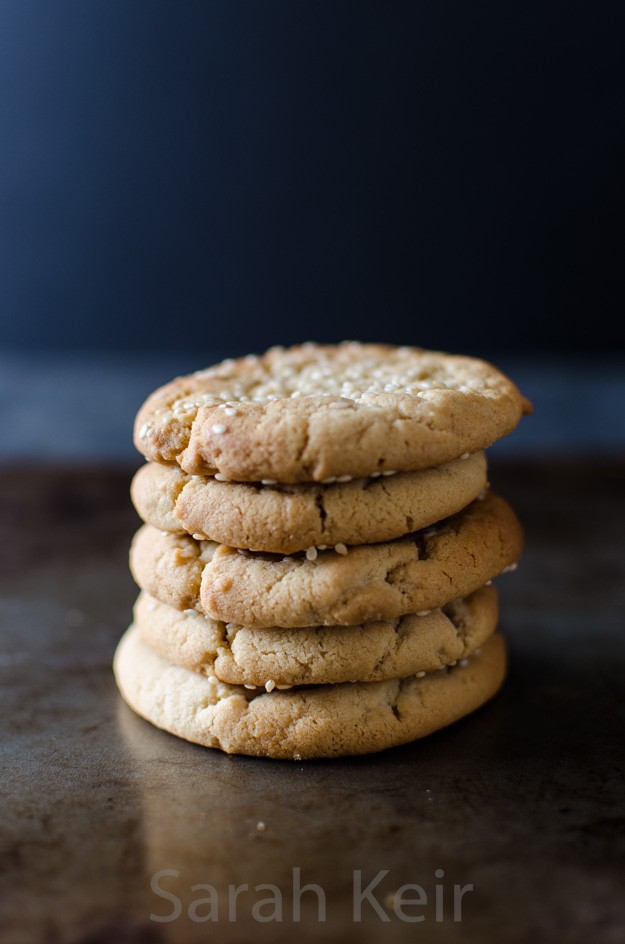
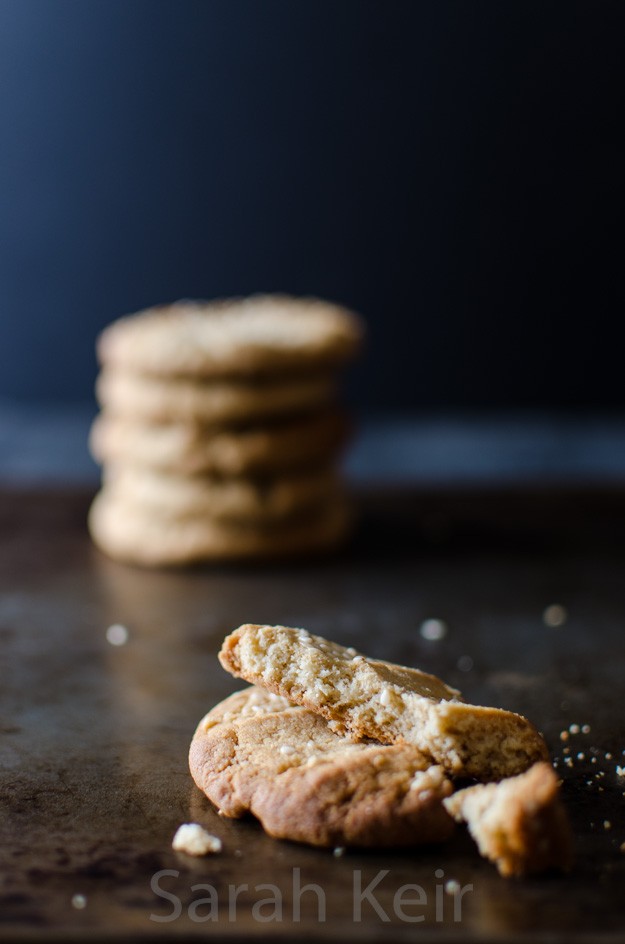
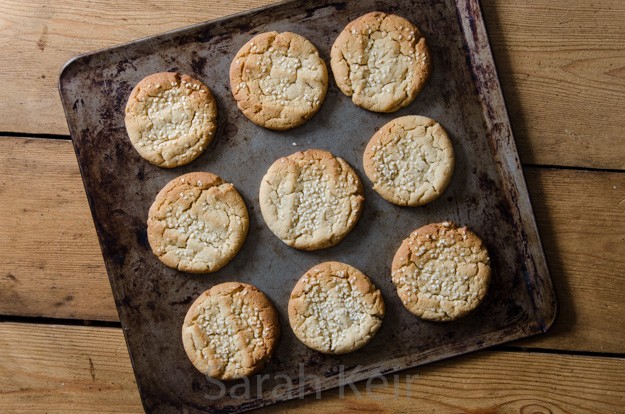
     

    tahini-003

     tahini-005

    Tahini Biscuits


    100g white caster sugar
    120g unsalted butter, soft
    175g plain flour
    1/2 teaspoon baking powder
    1/2 teaspoon fine salt
    120ml/110g tahini, well stirred
    1/2 tablespoon runny honey
    1 teaspoon vanilla extract

    sesame seeds, for sprinkling

    In a bowl, beat the butter and sugar with a wooden spoon. Add the tahini, honey and vanilla and beat in. Add the dry ingredients and bring together to a soft ball. Wrap this dough in cling film and put in the refridgerator for an hour until firm.

    Preheat the oven to 170 ºC/150 ºC fan.

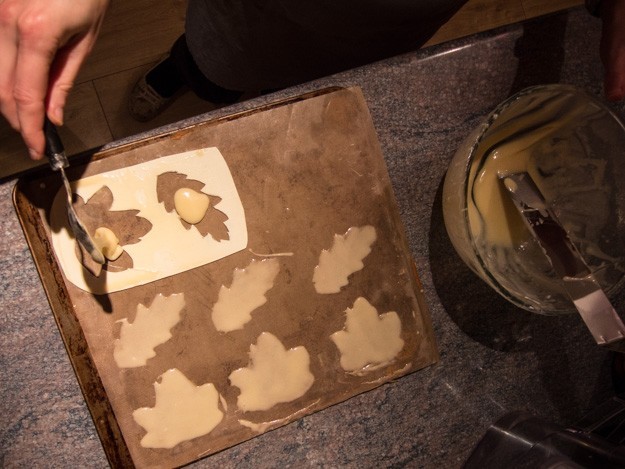
    Using clean hand, break off small lumps of dough and roll in your hands until roughly spherical. Place on a baking parchment lined baking tray, allowing 2cm/1″ between the balls, and press down gently with your fingers to flatten slightly. Once all the dough has been used up this way, sprinkle the biscuits with sesame seeds and place in the preheated oven for 12-15 minutes. Watch carefully as they brown easily. Allow to cool on the tray for 5-10 minutes before transferring to a cooling wrack to complete the cooling. Store in an airtight container and eat within a week.

     tahini-006

  2. Gingernuts – a true biscuit

    January 18, 2015 by sarah

    Gingernuts must be a uniquely British biscuit. I have not come across them anywhere else in the world (though apparently they love them in New Zealand too) and there is a dearth of recipes in blogger land. For me it is the satisfying snap and pleasing gingery warmth that makes the gingernut such a popular biscuit. It is also a top dunker for a cup of tea as it holds together well. There is no way this is an American style cookie. I am not sure why they are called ‘nuts’ rather than biscuit but that is the English language for you. There is some suggestion that is because they are as hard as nuts when freshly baked or that the small pieces of dough that are measured out are called ‘nuts’, but whatever reason they are one of my favourite biscuits.

    gingernut-004


    So here is my version. As usual it is an amalgamation of several recipes with my own tweaks. It was very easy to throw together a batch and they are so much nicer than bought biscuits. It is entirely optional if you wish to add crystallised ginger; it is not traditional to add them but I like the occassional chewy gingery nugget that they add to the experience. The gingernuts have lasted for a couple of weeks in an air tight container. If they go soft then put them on a tray in a moderately hot oven for a couple of minutes then allow to cool and they will be as good as new.

    gingernut-003

    Gingernuts

    200g unsalted butter
    240g golden syrup
    40g treacle
    400g self-raising flour
    150g golden caster sugar (white if you don’t have golden)
    3 tablespoons ground ginger (make sure not old or stale)
    1 tablespoon ground mixed spice
    1 teaspoon salt
    1 ½ tablespoon bicarbonate of soda
    Demerara sugar (optional)
    Crystallised ginger, finely chopped (optional)


    Preheat the oven to 160 ºC/140 ºC fan.

    Line a couple of large baking trays with baking parchment.

    In a small pan, put the butter, golden syrup and treacle and warm over a low heat until the butter is melted.

    Meanwhile, in a large bowl, sift together the dry ingredients, excluding the demerara sugar and crystallised ginger.

    Once the butter has melted, use a wooden spoon to mix this into the dry ingredients to form a soft glossy dough. Add the finely chopped crystallised ginger at this stage if you wish.

    Using clean hands, break off walnut sized lumps of the dough and roll into smooth balls. Place on the prepared baking trays leaving a good 7-8cm (about 2 and 1/2 inches) between each ball. Gently press each ball onto the tray but you don’t need to make it very flat – the baking process will flatten it. If you like, sprinkle a little Demerara sugar on top of each biscuit – it makes them pretty but doesn’t add to the crunch.

    Bake for 20-25 minutes, turning the trays half way through, until they have risen and deep auburn brown. Remove from the oven and transfer to cooling rack to cool completely. Store in an airtight container.

    gingernut-001 gingernut-002


  3. Tuile leaf biscuits

    December 4, 2014 by sarah

    Autumn feels the right time to make biscuits like this. With their delicate shades of cream and brown and the crisp crunchy texture, they are so like the real leaves that inspired them. I thought that tuiles would be hard to make as they are so delicate but although a fairly messy process (definitely time to get the pinnie on), they weren’t as bad as first feared. There certainly was some trial and error, especially with cooking times to get enough colour for them to be almost brown and leaf-like but also soft enough to be formed into different shapes. I think next time I may experiment with adding some coco powder to the batter in place of some of the flour, to give a darker colour without them needing so long in the oven. Also perhaps adding a little flavouring with almond or vanilla extracts.

    tuile-005


    Instead of buying expensive stencils, I cut out shapes from the thick plastic of an ice cream tub lid using a craft knife. I tried thinner plastic sheets but the tuiles were too thin to lift off the baking sheet. The choice of shape is entirely up to your imagination and biscuitry skills.A simple circle tuile could be drapped over the bottom of a cup or glass to form a bowl perfect for posh ice creams or sorbets. Fancier shapes could be used to top patisserie.

    tuile-002 tuile-003 tuile-004

    Tuile Biscuits

     
    2 medium egg whites
    70g icing sugar
    40g plain flour
    35g butter, melted
    pinch of salt
    optional – almond extract or vanilla extract
     
    Preheat the oven to 170 ºC fan. Line a flat baking sheet with a silicone baking sheet or mat.
    Beat the egg white and sugar with a whisk until combined. Sift over the flour and salt and whisk these in. Make sure the butter is only tepid and then beat that in too.
    Leave the mixture to sit for 30 minutes before using so it thickens.
    Place the stencil in the corner of the baking sheet on the silicone mat. Using a small offset spatula, spread the batter in a thin layer over the stencil, scraping off the excess. Carefully lift the stencil. Repeat to cover the baking mat.
    Bake until the tuiles are golden, only takes 5 minutes or so. Working very quickly, use a spatula to lift the tuiles off the baking sheet and drape them over a rolling pin or gently fold into an egg carton. If the tuiles get too stiff to bend then pop the tray back in the oven for 30 seconds or so.
    Repeat the process until all the batter is used. Store in an airtight container but the tuiles are best eaten within 24 hours of  making them as they go soft.
     
    tuile-006

  4. Cut-out Sugar Cookies – Baby Feet!

    June 30, 2013 by sarah

    I took a box of these baby feet cookies to the baby shower. This is my first attempt at cut-out cookies and royal icing and piped icing biscuits. Well, actually second attempt for the cookies because the first recipe, from my trusty Nigella’s ‘How To Be A Domestic Goddess’, were disappointing; not at all buttery or sweet like they should be and easily burnt. So 10pm on Thursday I made a second batch which were much more successful. This recipe is made up from various sources when I noticed I needed to add more butter and to leave out the baking powder. I have to admit to much preferring a nice slice of moist cake or a tasty cupcake to a biscuit or cookie but I may be tempted to make these from time to time, especially as they can be made in advance (supposedly keeping for up to a month).

    Butter/sugar cookies for cut out

    200g unsalted butter, soft/room temperature

    150g caster sugar

    2 tsp vanilla extract

    1 large egg

    300g plain flour, 1 tsp salt

    • Cream the butter and sugar until well mixed but not getting to light and airy stage (air will make the biscuits spread), whisk in the vanilla and then the egg.
    • Sift over the flour and salt and mix until comes together in one lump.
    • Divide the very soft and sticky dough into 2 patties, wrap in cling film and refrigerate for at least an hour.
    • Kneed just a couple of times so smooth and warm enough to work. Roll out using minimal flour (can do it between 2 sheets of parchment so no extra flour needed as the flour will change the texture of the cookies) until 1/2cm thick. Cut out desired shapes and place on greased or parchment lined baking trays, allowing a couple of centimeters between each cookie. Place trays in fridge for at least half an hour or the freezer for 10 minutes until firm.
    • Bake in preheated oven at 160 degrees fan for 12-14 minutes until just going golden around the edges, allow to cool completely on wire racks and leave at least 24h before icing.

    Royal Icing

    500g icing sugar

    3 tbsp dried egg white powder

    100-150ml warm water

    • Add 100ml warm water to the dried egg whites in a bowl and whisk until well blended. Add any liquid flavourings eg vanilla extract.
    • Sift over the icing sugar and beat until well mixed then continue beating for 10 minutes until thick. Colour at this stage.
    • Leave for 24h before uring. To pipe on to biscuits, the correct consistency is that a knife dragged through the mixture takes 10 seconds to fill in.
    • Pipe an outline then fill in. Size 2 to 5 nozzle is required, though I only had a size 10 and this worked too.

    baby (7 of 5)


  5. Italian Macaroons

    April 21, 2013 by sarah

    Unlike the fickle French macaron, these are a breeze to make and the cracks and other imperfections that plague their french counterparts are all part of the character of these. These biscuits are a chewier version of amaretti. Recipe from Christmas edition (Dec 2012) of Country Living.

    Makes 30-40 macarons

    350g caster sugar

    250g ground almonds

    40g plain flour

    4 large egg whites

    few drops almond essence and zest of 1 lemon

    Heat the oven to 180 oC. Line lots of baking sheets with parchment.

    Whisk the egg whites until soft peaks but not stiff or dry. Add the almond essence and lemon zest.

    Add a spoonful at a time the mixed dry ingredients until it forms a soft mixture and leave to sit for 10 minutes. Form teaspoons of the mixture into balls in you hand and gently press onto the baking sheets. Sprinkle with another tablespoon of sugar.

    Bake for 15 minutes until gold brown and lift of the parchment easily. Turn off the oven and leave to cool for 5 minutes before cooking on a wire rack. Store in an airtight container for up to 2 weeks.

    _1SK1766


  6. About Me

    March 17, 2013 by sarah

    085Hello friends and thank you for stopping by my wee blog! I have started this blog to get away from Facebook, to start some digital scrapbooking and see where this path leads me!

    My name is Sarah Keir and by day (and plenty of nights and weekends too) I am a  small animal veterinarian in the South-East of England. The rest of the time that I call my own I bake plenty of cakes, craft all sorts and am obsessed with vintage chic. My perfect weekend would be sunny (naturally), wearing a 1950’s dress and apron, knock together a teddy or vintage inspired brooch, make some delicious cakes and have friends round to enjoy them. The rest of the time my taste testers are my husband Mr K and my work mates who devour anything I produce. Anything that fails goes to the chickens – my lovely girls that keep me supplied with fresh eggs for my baking attempts.