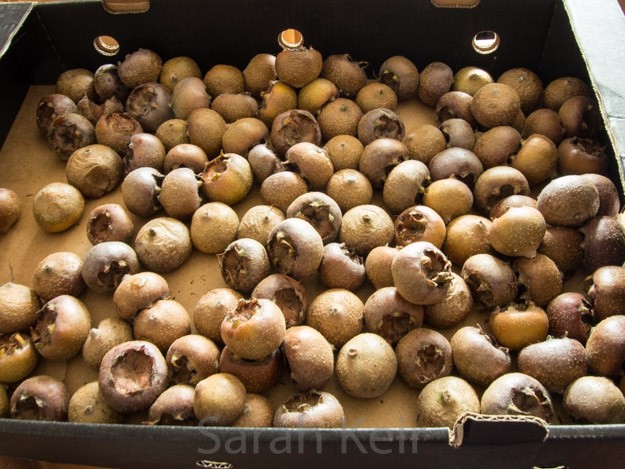
When we were on holiday in Suffolk at the end of October, we came across a medlar tree in the car park of a National Trust property. I had a vague recollection of reading about medlars and being intrigued about this very old fruit, so after asking we filled a carrier bag full. They didn’t seem promising at that stage. I bit into one and it was hard and astringent (really unripe) but after some internet research, I found that they are only edible after ‘bletting’ which really is just another word for allowing to go rotten. So when we got them home, I laid them out in a flat box and put them in the shed. And forgot about them. Until this week. When I entered the shed I could smell a ripe fruity smell, which I followed to find the box of now bletted medlars! They had changed colour from a yellow green to deep brown. Eating them fresh is probably an acquired taste because at first I wasn’t sure if they were any good but after a few days of trying them, they grew on me. The fresh is a disgusting brown colour and a grainy but completely mushy texture, but the flavour is unique; like stewed apple with a hint of rhubarb. So here are a few posts on what I made with my medlars!
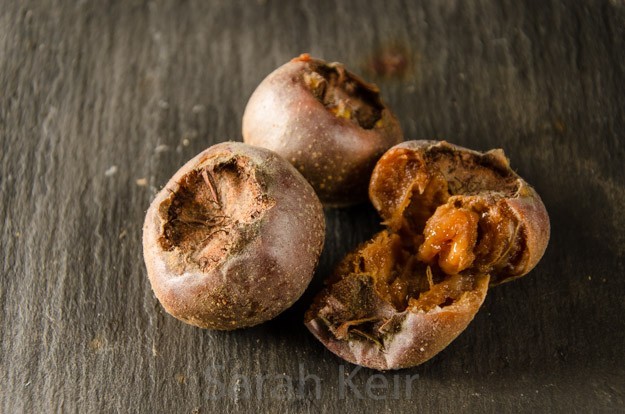
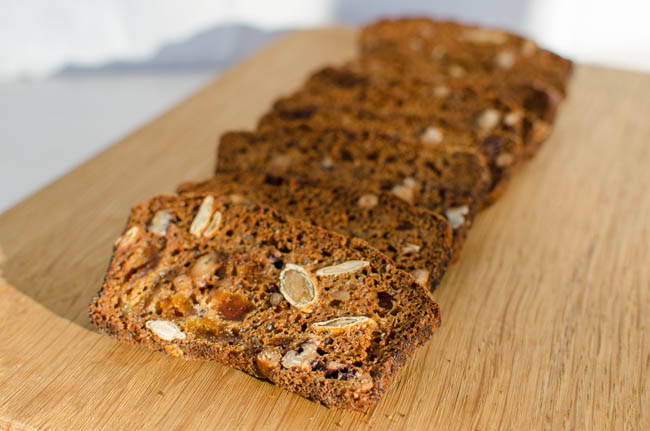
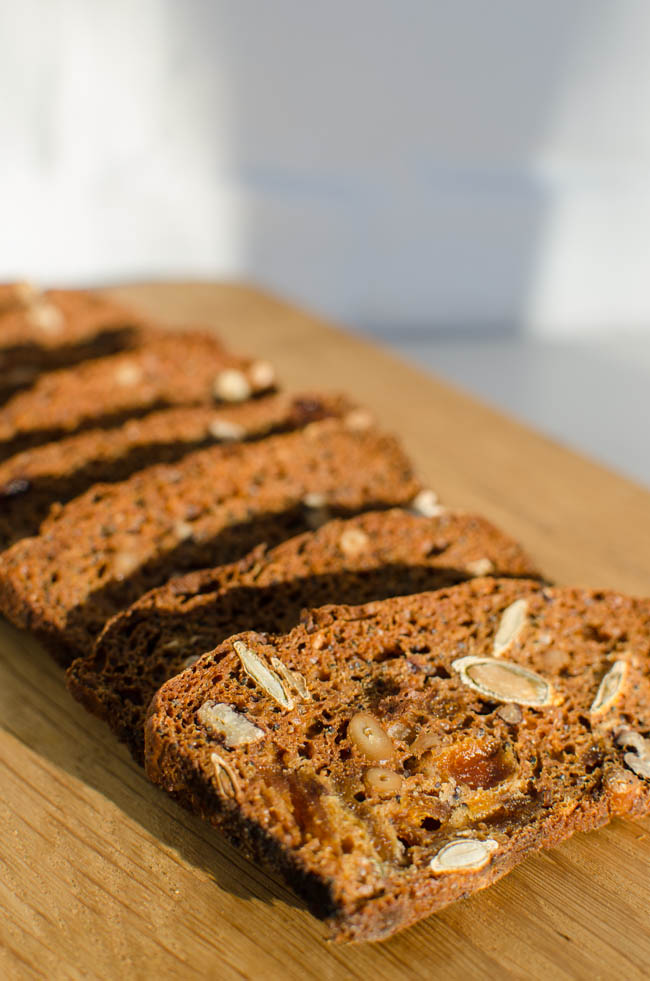
Medlars are related to roses and therefore apples. They contain about 5 large pips and a have a fairly tough skin. They were a fruit popular in medieval times and known as ‘cats (or dogs) arse’ because of their curious shaped bottoms! I have to say from a veterinary/anatomical point of view, they are not very anatomically correct. An unusual sweetmeat was made from spiced medlar cheese called chardequince, though it was made from that Cinderella of the British orchard, the medlar rather than the more popular quince. The historic food website has all manor of old food facts and trivia and you can see these chardequince. Also this kind of cheese is not a dairy cheese; it is an old-fashioned preserve made with fruit puree and sugar that is slowly simmer for a long time to reach a stiff consistency that is sliceable. Fruit cheeses are traditionally served with cheeses or meats but can also be eaten as a sweet (kind of like fruit pastilles) at the end of a meal or with nuts and port. They should last for a long time, a year at least, but I am keeping them in the spare fridge just to be safe as I don’t have an old fashioned larder (on the wish list though).
I have included both recipes here on the same page because they both start out the same. Take the bletted medlars and squish them in your hands into a large pan; if they are well bletted then this is easy. Add enough water to come half way up the fruit and simmer on a medium heat for 15-20 minutes until well and truly mushy. Use a potato masher to get the flesh out of the fruit.
Medlar Jelly
Put the cooked fruit and liquid into a jelly bag and suspend at least overnight to allow the juices to drip out. Give a little squeeze to release some more juice (I think I did it too much because the finished jelly was cloudy). Measure this juice into a pan and add the juice of a lemon and 450g granulated sugar for every pint of medlar juice. Warm slowly until the sugar is dissolved and then boil furiously until setting point is reached (it took about 10 minutes for mine). Take off the heat and allow to stand for a few minutes, skim off the scum and pot into sterilised jars while still boiling hot.
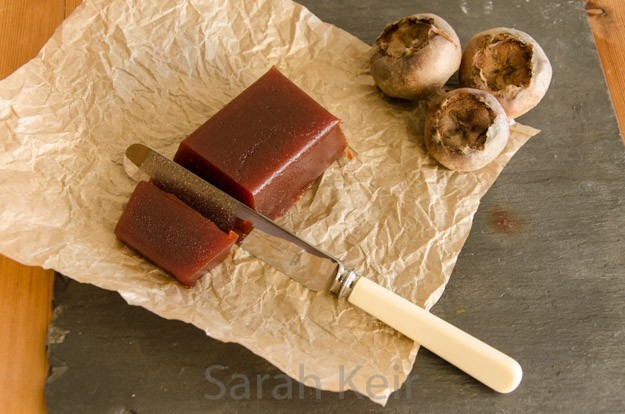
Medlar Cheese
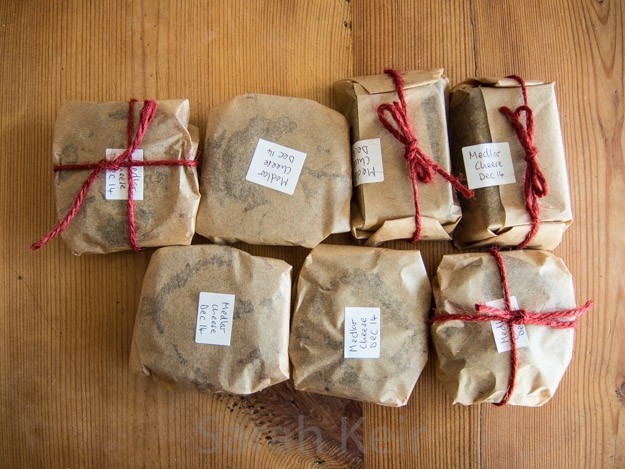
Take the stewed medlars and push the flesh though a sieve, discarding the skins and seeds. This takes ages; put some music or course work on in the back ground! Weight the puree into a heavy bottomed pan and add three quarters this weight of granulated sugar (e.g. 1kg puree will need 750g sugar) and the juice of a lemon. Heat gently, stirring frequently and constantly towards the time when the cheese is thickening. It is ready when you draw a spoon through the mixture and it stays parted for a few seconds – like the Red Sea! Prepare some moulds (muffin/cupcake pans, mini loaf tins, large loaf tins) by greasing the insides with some oil with no flavour (I used regular sunflower oil) using some kitchen paper. VERY carefully tip/spoon/pour some of the mixture into the moulds and level. Be very careful; it is like molten lava! Leave to cool overnight before turning out and wrapping in greaseproof paper. UPDATE 21/9/15 – I tried making damson cheese with this recipe but waiting long enough for the Red Sea meant the mixture was over cooked – it tasted like burnt sugar and was so hard, it would not come out of the moulds and was not cuttable! I think less cooking next time. It is also very time consuming; took over and hour and a half to get this thick.