RSS Feed

September, 2017

  1. Honey, honey, honey… and now everything is sticky!

    September 21, 2017 by sarah

    This past week we (other half and I) have been busy with the honey harvest! The bees are really my husbands hobby, but I help out when I can. We have two hives at the back of the garden, behind the chickens. They are fascinating creatures to watch and generally placid as they are too busy going about their business collecting nectar and pollen. I say ‘mainly’ placid as I got stung on the face a few weeks ago though I was strimming the weeds around the hive without any bee suit on and Jim got stung multiple times last week when he was merging two hives together and they didn’t appreciate the move (he was only wearing a half length bee suit and so he got stung on the ankles – ow!).

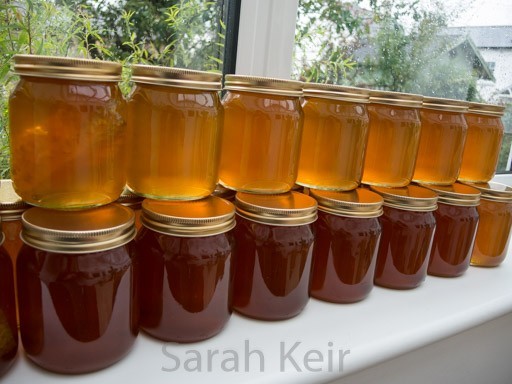
    The honey harvest! The jars on the bottom look darker as there are other jars behind them.


    But now it is time for us to get our first honey harvest. This is the third year we have had bees and only the first time we have got any honey from them. It takes a couple of years for the colony to be strong enough to harvest and the first colony died in its first winter. We had a fair amount of ‘fun’ with the bees this year, what with swarming several times. Part of the merging of hives was to get rid of a weak queen (in a humane way, she was euthanised) and then bring together to the two smaller hives so they stand a better chance of surviving the winter. Which meant we only got to harvest the other hive.

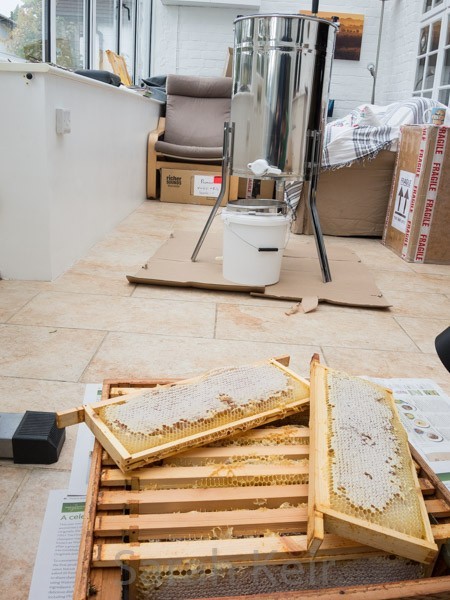
    We turned the conservatory over to honey extraction as we could keep the cat out and minimise stickiness (to a degree!).


    Keeping bees is not a cheap hobby and the cost of the honey nowhere near covers the real costs of producing it which is why real, locally produced honey is the price it is. But you can come and meet the bees if you like and at least see where they live. Very low food miles! This honey is very local, totally natural (no added sugar unlike some supermarket stuff) and is raw (supermarket stuff is pasteurised which kills off the good enzymes). I also have a couple of jars of capping for sale – these are full of natural wax, pollen and propolis so are really good for you, especially if you suffer from hayfever. I am very pleased with the harvest – 26 jars of 1lb (454g). Some of the jars also have chunks of comb in.

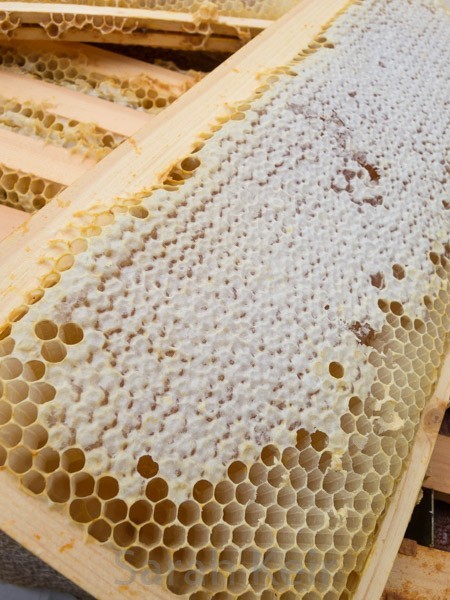
    The capped honey waiting to be extracted from the comb.


    Did you know that to produce one pound of honey, 2 million flowers need to be harvested? In its lifetime, one honey bee will only collect 1/12th of a teaspoon of honey! Wow, that is a lot of trips out and it is all very weather dependant; bees make great weather forecasters. In the middle of a summer, the hive will contain about 50,000 bees all under the care of one queen! And that 80% of our fruit, vegetable and seed production depends on the pollination of insects like bees!


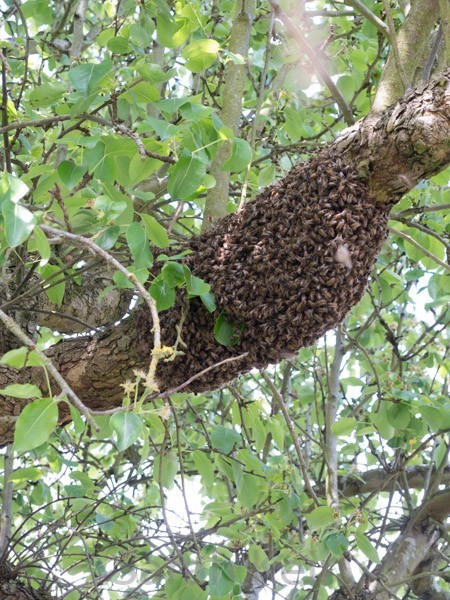
    The swarm when it was in next door’s pear tree!

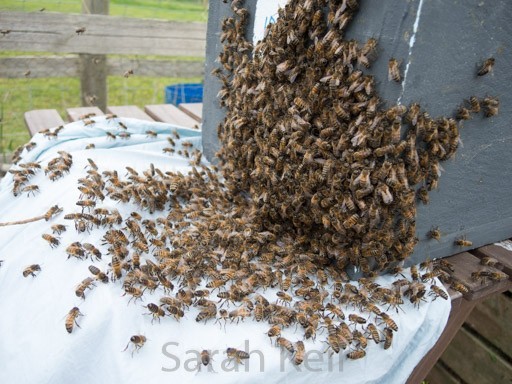
    Putting the swarm in a temporary box as the second hive hadn’t arrived yet.

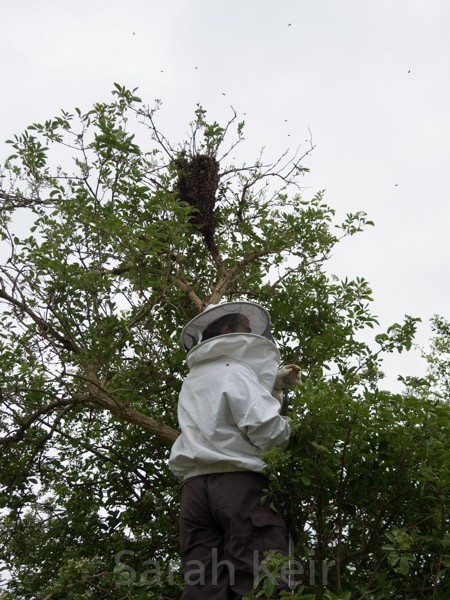
    Jim up a ladder collecting the swarm the first time.

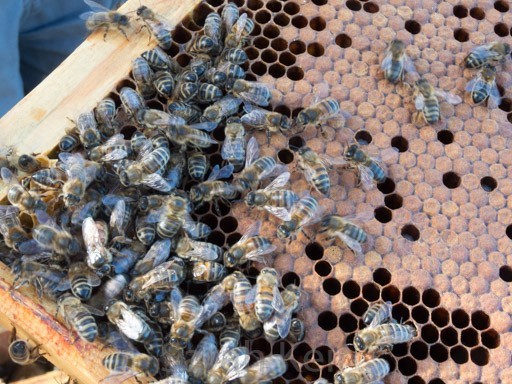
    Can you see the queen? She is marked with white.

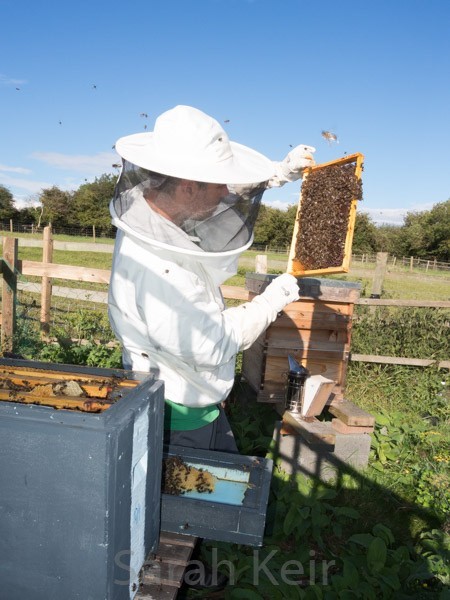
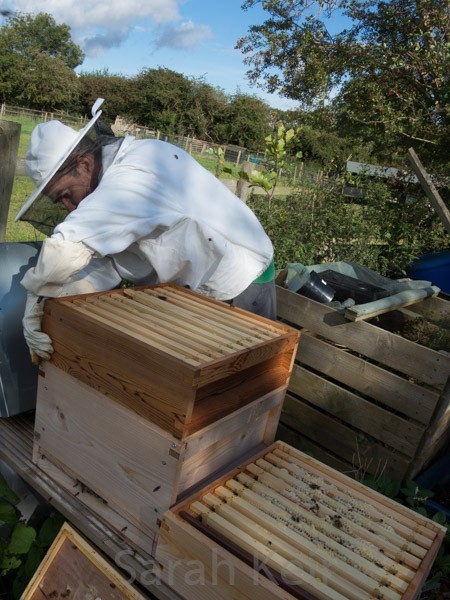
    Jim inspecting sub-hive 2!

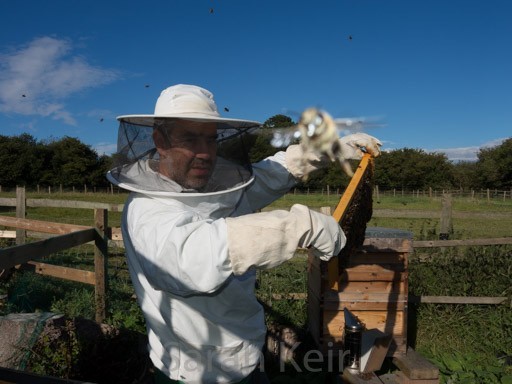
    Watch out for the camera!

    Removing the super full of honey!

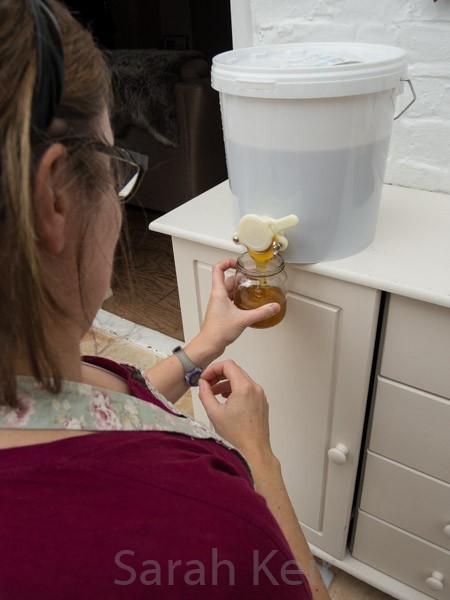
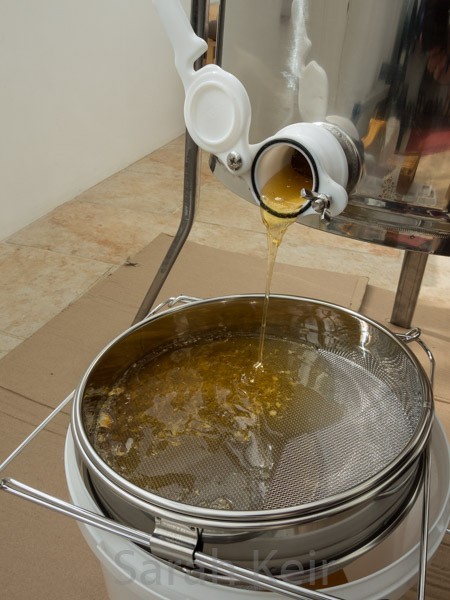
    The honey ‘tap’ is called a honey gate and it makes a nice clean job of getting sticky honey into a jar with minimal stickiness!

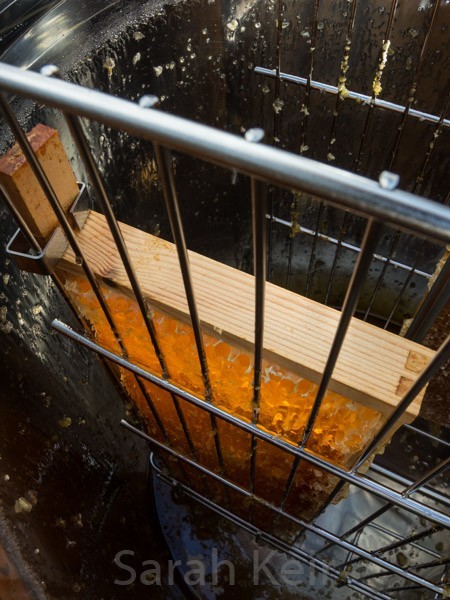
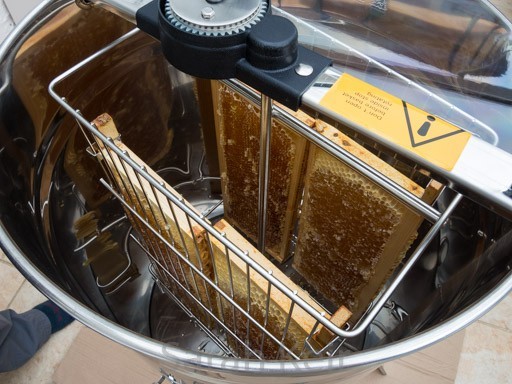
    A frame of honey in the extractor – beautiful!

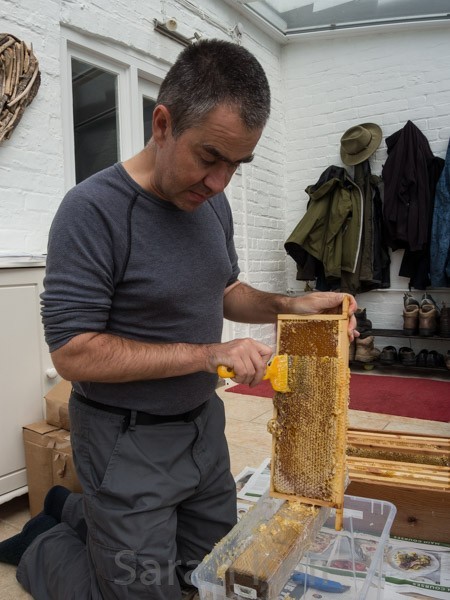
    This process is called uncapping – removing the wax caps from the cells of honey so it can be extracted.

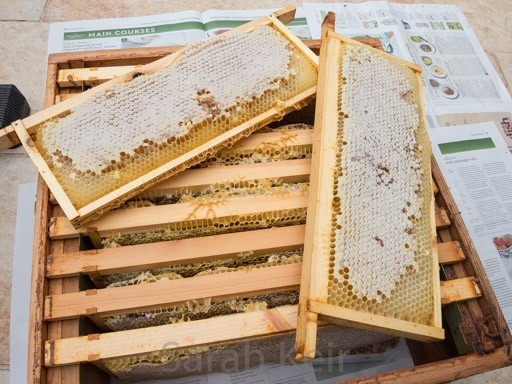
    Frames waiting to be extracted – a nearly full super.


  2. A historic baking day

    September 16, 2017 by sarah

    Today I spent a lovely day at the Chiltern Open Air Museum near Chalfont St.Giles on a historic baking day. I discovered this delightful museum quite by chance when looking online for something to do when my parents were visiting. Together we had a lovely time wandering around the rescued building from the local area and talking to the volunteers there – I was very impressed with the allotment! My Mother booked me on this baking day as a Birthday treat (still 3 months off I might add) as it looked different.


    There were only 5 of us and we spent the day in an 18th Century cottage with volunteer Jenny Templeton, preparing bread and learning how to get the oven up to temperature (over 2 hours of feeding it wood). The bread was very slow to rise as it was a cold Autumnal day and we were glad for the work out kneading the dough. I had a delicious light lunch in the tea room, including this slice of green and jasmine tea cake (unfortunately couldn’t taste green tea or jasmine but nice light sponge) and some Fentiman’s rose lemonade. In the afternoon we shaped the dough and while it was having a final rise, we made pastry and decorated jam tarts; I took along some of my lovely ‘Autumn Glut’ jam (windfall apples and pears with damsons and brambles from the hedgerows) which went down well.  Then the bread went in the prepared oven, sealed with clay to keep the heat in. We made some butter while the bread was baking; double cream beaten with a variety of authentic implements. The butter took a lot of elbow grease to make; it so much easier with a machine! During the day and at the end I had time to wander around the museum a little and get a good look in some of the buildings. Finally our bread and tarts were baked and the butter patted and wrapped and then time to go home. I lovely day playing at a different way of baking.


  3. Wedding Cake – ‘naked’

    September 3, 2017 by sarah

    Last month, I made my first ever wedding cake! It was a monster of a cake with 4 tiers in the main cake (12″, 10″, 8″ and 6″) and an extra 10″ to feed 150 people! I am immensely proud of my cake and that I didn’t get into a strop about any set backs (there weren’t many as I’d planned it like a military operation). It did, however, take a lot longer than I had anticipated, over 28 hours in total: about 8 hours planning, researching recipes, typing out shopping lists and timetables, shopping online for ingredients and sundries then about 20 hours to make and half an hour to assemble at the venue. Wow, the Thursday before the wedding was a 10 hour sponge-a-thon, juggling batter in the oven and cooling cakes out of the oven! But I also learnt a lot as this was my first stacked cake attempt so there were countless hours spent reading about how to use dowels! I also needed to try out new recipes including trying to find a vegan cake that tasted as good as regular cake. The main problem turned out to be trying to make vegan buttercream that didn’t separate when I added Amaretto liqueur! I will post these recipes over the coming weeks.

    Bottom tier of moist chocolate cake filled with chocolate Swiss meringue buttercream, next tier of lemon sponge with lemon Swiss meringue buttercream and homemade lemon curd, next up a traditional Victoria vanilla sponge with vanilla bean buttercream and raspberry jam and a vegan top tier of almond sponge with Amaretto frosting.


    I hate eating fondant with a vengeance and only slight less like working with it so my stipulation to the bride was that it was not to have anything to do with fondant. Luckily, ‘naked’ cakes are all the vogue at the moment i.e. cakes whose bare sides are completely visible. This, however, brings its own set of issues; the outside of every cake must be perfectly evenly baked and come out of the tins without pulling any crust off and drying out as there is no icing to protect it. The later problem really worried me as no-one likes dry cake and I knew the naked cake would be sitting out for many hours during the wedding on a potentially very hot August day. I can confirm that my measures lead to a moist cake that stayed moist for many day! This was due to making the cakes with butter not margarine, adding a little vegetable glycerine to act as a humufactant (buy in the baking section of the supermarket, made from vegetable oils so not that artificial), making them as close to the day as possible (maximum 48 hours previously) and soaking the sponges with flavoured syrups while stacking the layers. I also used meringue based buttercreams (except for the vegan layer) as these are more stable when conditions are not perfect. I certainly perfected my Swiss meringue buttercream making!


    I found the following websites invaluable in this project:

    • chocolate cake recipe here and lemon cake recipe here from BBC Good Food
    • brilliant YouTube video on baking and assembling a naked cake. There are also recipes on the blog which have charts so you can scale for any cake tin size. The only problem is they are in American cups rather than weight measurements which is not ideal!
    • This post by Good Housekeeping also includes instructions on assembling as well as recipes.
    • This website for lovely pictures and a cake portion guide here.

    Would I make it again – yes, but I will be charging the going rate next time!