
I first read about this method of transferring an image onto fabric a couple of years ago. I know exactly when it was because I printed out an image I wanted to transfer to some napkins I had bought and it has the date on it and had the Citra-Solv posted from the USA (more of this below). This project sat in my ‘to do at some point’ pile because frankly I had more important things to get on with than some nicely decorated napkins! But the time came to give this a try at the weekend. I wasn’t expecting much, but having done the napkins, and a T-shirt, and a tea towel, and only having to stop because of the requirement to make dinner, I can attest that it is truly addictive. And magical!
Having done the initial dabbling, as usual, my mind is spinning with endless possibilities: transfer of designs to fabric for embroidery; transfer of design for lino carving; personalised T-shirts; T-shirts for hen parties; transfer of logos onto hand-made items; quilting designs; funky tea towels…. The possibilities seem endless. And the images are permanent! I have used Modge-Podge to transfer images to fabric in the past but that was so much messier and the images much less crisp that this Citra-Solv transfer method. What ideas can you think of to use this technique on?
I have only used Citra-Solv for this technique so I cannot attest if other solvents work. I have not seen Citra-Solv for sale in the UK so I ordered it from the USA. At about £15 for a bottle, it is not pocket money but I only used a tiny amount for the projects I have done so far so it is going to last a long time. It says it is natural and safe, but something that does this to ink and plastics I would treat like DEET i.e. with care. I have only tried transferring to fabric but I have read online that you can transfer to leather, wood, and paper. The denser the weave of the fabric, the sharper the image you get but the softer images have a charm of their own. I also understand that you can transfer colour images, but as I don’t have a colour laser printer I can only do black at this time.
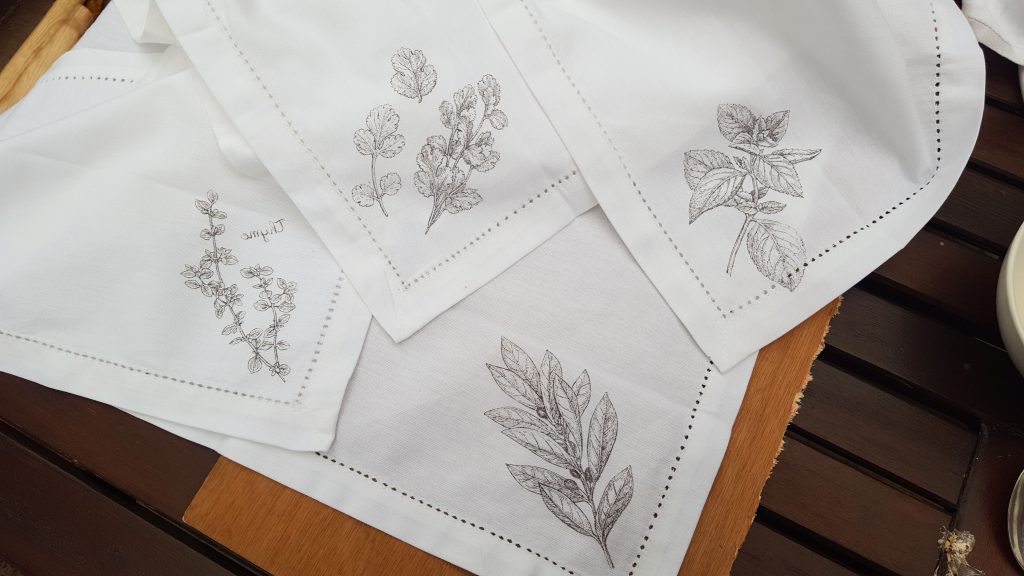
And that is the most important point. You can only use images that are printed from toner by laser or copier, it will not work with ink-jet. You also need fresh images – the one I printed off a couple of years ago didn’t work as I guess something happens to the ink over time. If you have words in your images, remember to mirror-image your picture otherwise you can’t read the wording (note the first one I tried with the backwards ‘thyme’!).
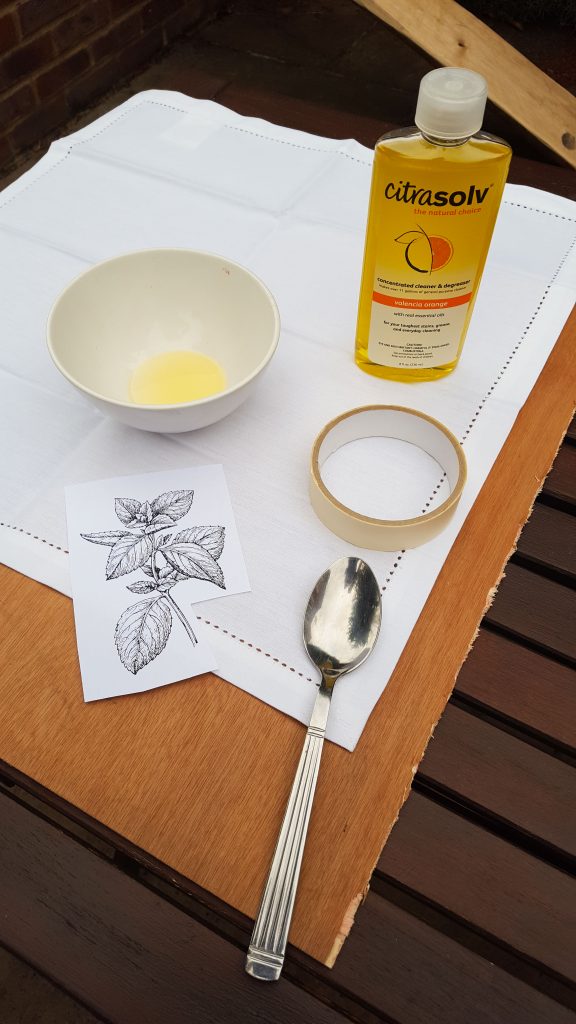
What you’ll need:
1. Citra Solv. Pour a little into a small ceramic or glass bowl.
2. Toner copy of the image you want to transfer.
3. Surface to transfer onto – some densely woven fabric to start. Place on top of a firm surface that is not painted or varnished – a spare bit of pywood worked well for me.
4. Masking tape to hold the image in position while transferring.
5. Paper towel or soft clothfor applying solvent.
6. Spoon for burnishing.
Step 1: Make a toner copy of the image you want to transfer.
Cut the image out, with enough margin around it for taping onto your surface.
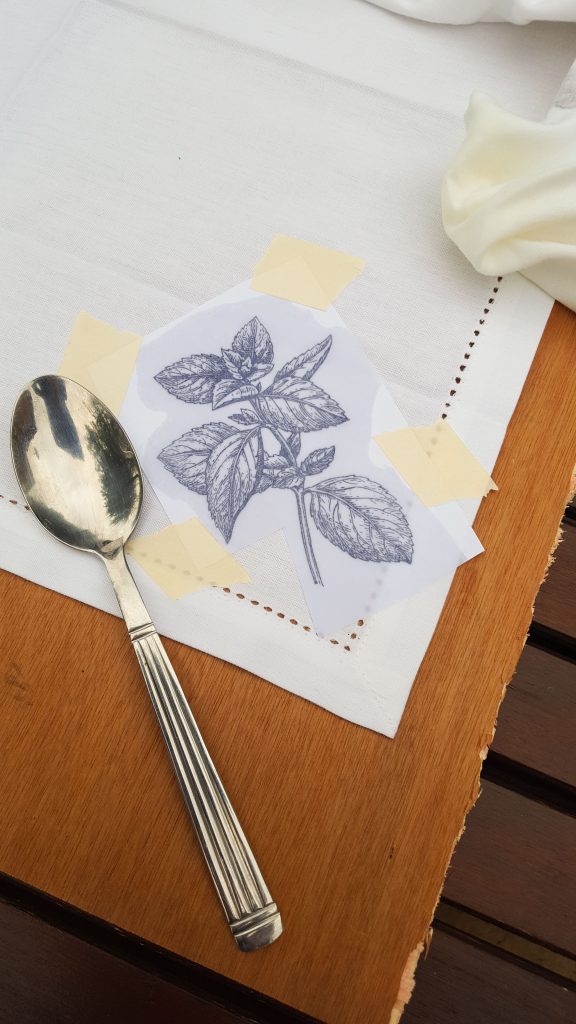
Step 2: Tape the image face down onto your surface.
Place the fabric onto the backing board, or if doing a T-shirt put the board inside the T-shirt. Iron it first if it has creases or wrinkles. Place your image face down onto the fabric where you want it to be and use some bits of masking tape to stick it in place.
Step 3: Rub Citra-Solv onto the back of the paper using a paper towel.
Make sure the paper towel is not too wet with the solvent, and rub quickly – just enough until the paper becomes transparent and the image shows through.
Step 4: Use the back of a spoon to burnish the image.
Press firmly, using a circular motion and making sure to burnish the whole area of the image. Stabilize the paper with your other hand so it doesn’t shift.
Step 5: Lift the paper to check that the image is fully transferred.
The tape keeps it in place while you lift. If you see any areas that aren’t crisp and clear, lay the paper down and burnish those specific areas again, until you have the whole image nicely transferred.
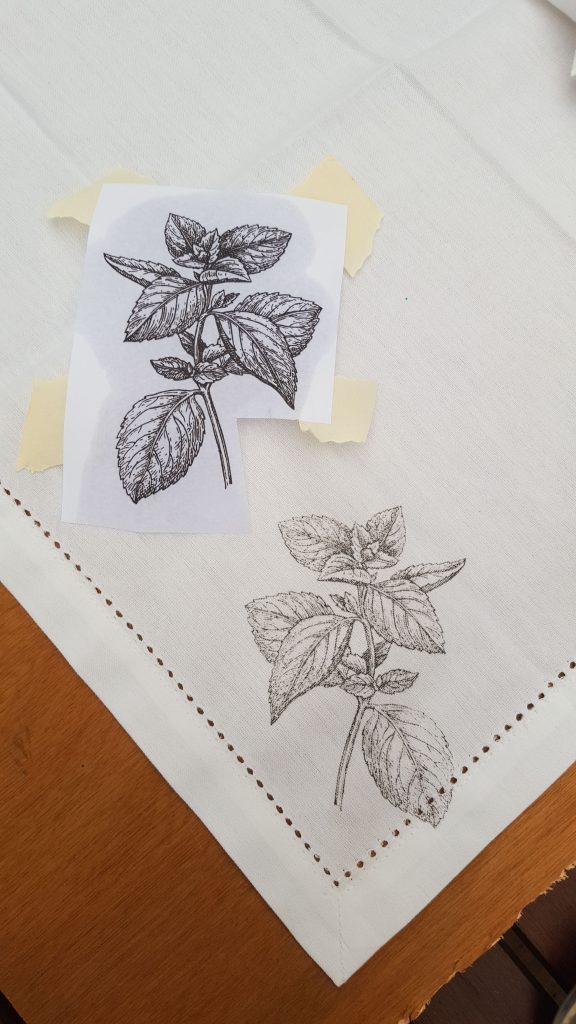
Step 6: Remove the paper and there it is! Image transferred!
The remaining Citra-Solv with evaporate. Some people have advocated ironing the image to set the transfer so this is what I did. But the transferred image is permanent i.e. the fabric can go into the washing machine (on cool and no bleaching agents). Just don’t be tempted to clean it in Citra-Solv otherwise your image will disappear!
What uses can you see yourself using this for? Please post comments below.