RSS Feed
  1. Sticky gingerbread

    October 2, 2016 by sarah

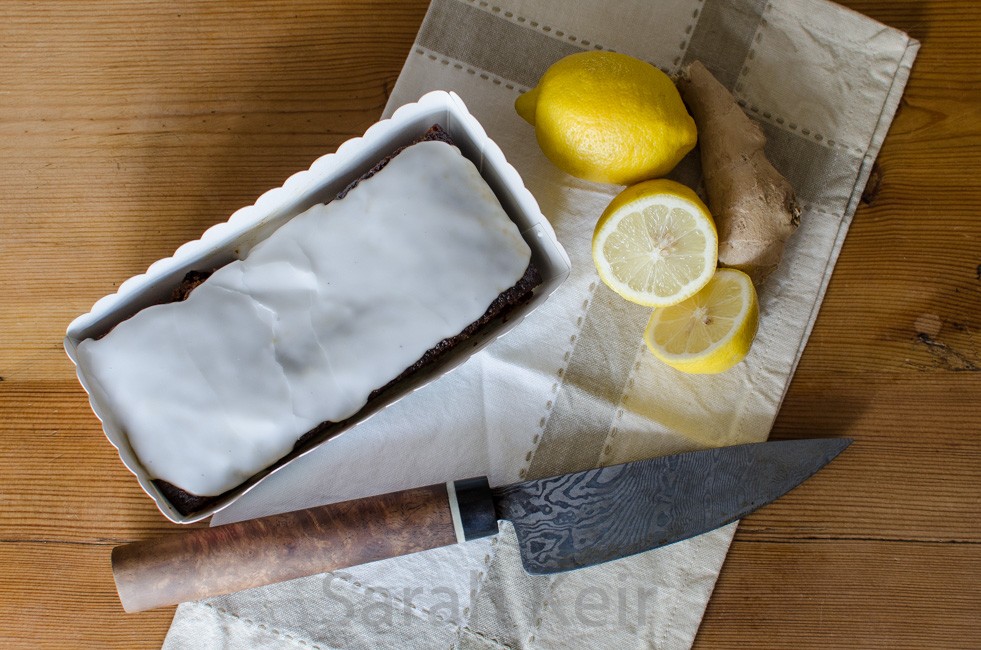
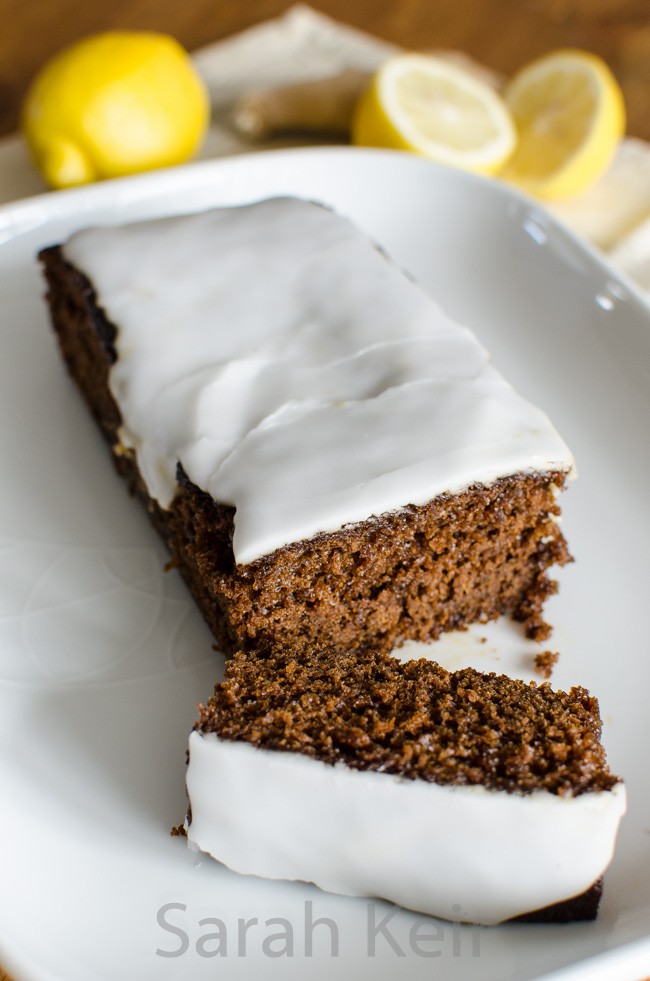
    Autumn is definitely here: the nights are drawing in such that I squeeze in some outdoor activity after coming home from work; the evenings are becoming cool enough to think about lighting a fire or turning on the heating; the leaves are yellowing and starting to drop; the apple harvest has started with three demi-johns of cider bubbling away. It makes me glad that I live somewhere the seasons are defined and changing. Sticky gingerbread is a cake that reminds me of autumn; the dark colour contrasting with the snow white icing and the spiciness that is surprising yet moreish. Go on, welcome in the autumn and make my sticky gingerbread!

    gingerbread-2


    This recipe is an amalgamation of several recipes as I have tried countless times over the years and none where quite right, until this one.

    Sticky gingerbread

    150g unsalted butter
    150g dark muscovado sugar
    175g golden syrup
    175g black treacle
    thumb size knob of fresh ginger, finely grated
    2 teaspoons ground ginger
    1 teaspoon ground cinnamon
    1/4 teaspoon ground cloves
    250ml milk
    3 medium eggs
    2 teaspoon bicarbonate of soda
    300g plain flour

    For the icing
    200g icing sugar
    2 tablespoons of fresh lemon juice

    Line a roasting tin of about 30x20cm with baking parchment. Preheat the oven to 170°C/150°C fan.

    In a medium sized saucepan, melt the butter with the sugar, golden syrup and treacle until combined but do not boil. In a jug beat the eggs into the milk. In a large bowl sift the flour with the dry spices and in a small bowl dissolve the bicarbonate of soda in a couple of tablespoons of warm water.

    Pour the liquid ingredients (melted butter/sugar pan, milk/egg jug and dissolved bicarb) over the flour and beat until well mixed; it will make a very wet batter. I normally need to use a whisk to beat out the lumps of flour. Pour the batter into the prepared tin and place in the preheated oven; bake for 30-45 minutes until risen and a squewer comes out clean but the cake is still sticky and moist. Do NOT over bake. Allow to cool completely in the tin.

    Prepare the icing by sifting the icing sugar into a bowl and whisking in the lemon juice until a very thick icing forms. Pour this over the gingerbread and encourage it to spread out to cover the top with a palette knife.

    This cake keeps for up to a week in a sealed container.

    gingerbread


  2. Scotland 2016

    September 15, 2016 by sarah

    At the end of August and into September, Jim and I took a trip up North in his Lotus. The weather was amazing for most of the time except one day on Skye. The open, well maintained roads with light traffic were a joy to drive in the Lotus. We had some interesting staying in B&Bs and ate far too much food. At the end of our tour we finished in Dunblane to meet up with the family and meet our new niece and nephew for the first time.


  3. 2016 Wigginton Show

    September 10, 2016 by sarah

    Writing this is hard as today is a day of complete contrasts. Today was the day I put my companion of nearly 15 years to sleep after she had a stroke (vestibular incident for the medically minded). With her additional health problems she just couldn’t cope with one more thing and was distressed. But we had a couple of hours on the sofa together and then she went to sleep in my arms. It really couldn’t of been more peaceful and I hope someone can do that for me if I get to that stage.

    Megan


    The complete contrast is that  the local show was also today; the Wigginton Gardner’s Association annual show. I wasn’t around to enter last year so felt I’d better give it a good bash this year. And I did very well – lots of firsts and placings and three best in shows and 2 cups won. Just need to improve my flower arranging skills for next time! My silver heart bracelet got best in show handicrafts, my carrot cake (see my recipe here) got best in show domestic and my damson wine got best in show wine. I won the Lady Hadden Challenge Cup for the person with the most points in domestic classes and the George Hill Memorial Trophy  for the best wine. I need to wait a few weeks to get the cups as they are getting engraved. I am pleased to say that entries had increased and it was a healthier show.


  4. Ice cream cookie sandwiches

    August 4, 2016 by sarah

    It feels like summer has finally arrived; the schools are off so my commute to work takes half the time, the weather is warm enough to consider putting on a skirt or a dress (needs to be above 20°C for cold blooded me!), the lawns are looking a little yellow/brown, I can eat a meal outside (at least some of the time), my straw hat sits by the front door for walks in the evenings. And of course, ice cream. Not that I am against eating ice cream at any other time of the year, but in the summer the luxurious iciness seems perfectly, sublimely fitting. Almost  magical, probably from reminiscences of a ‘rose-tinted’ childhood!

    sandwich


    I was inspired to make this recipe by the ‘delicious’ magazine that fell through the letter box at the weekend – this was the front cover. Though this recipe has several parts, it did not seem onerous to make. I have to admit to actually making the yogurt to go in the recipe, but only because I had excess milk in the house; please don’t bother. The ice cream recipes are supposed to be ‘non-churn’ but the raspberry ice cream was so hard that even after one hour out of the freezer, I needed to use a knife to get it out of the tub!! So I have amended the recipe so that it should not set as hard as concrete. Similarly, do not feel obliged to make ice cream at all; you can buy decent gelato at any supermarket (I admit to having a particular fondness for the cheap mint choc-chip – probably something to do with the Viennettas of the 80’s!).

    sandwich-2

    IceCream Cookie Sandwiches

    Makes 10-12 cookies; they will keep in an airtight tin for a few days. The recipes make far too much ice cream for the cookies but it will keep in the freezer for a month.

    FOR THE COOKIES
    100g unsalted butter, soft
    100g caster sugar
    100g demerara sugar, plus extra to sprinkle
    1 medium free-range egg
    1 tsp vanilla paste
    165g plain flour
    1/2 tsp bicarbonate of soda
    1/4 tsp fine salt

    1. Heat the oven to 200°C/180°C fan and grease 2 large baking sheets with flavourless oil. Mix the butter and both sugars with a stand or hand-held mixer until pale and fluffy. Slowly add the egg and vanilla, then beat in the dry ingredients.

    2. Spoon the mixture on the prepared trays; half a dessert spoon was about right. Scatter with extra demerara sugar. Bake for about 8 minutes until golden around the edges and cracking in the middle. Remove the sheets from the oven and allow the cookies to cool for 10 minutes before removing with a spatula to a cooling rack to cool completely.

    FOR THE SALTED CARAMEL ICE CREAM
    397g can Carnation caramel (I used home made salted caramel sauce as I had it left over from making chocolates)
    350ml double cream
    200ml full-fat greek yogurt
    A large pinch sea salt flakes (if not using salted caramel!)

    In a stand mixer with the paddle attachment, beat until aerated and thick. Transfer to a freezerproof container with a lid and freeze overnight until completely firm.

    FOR THE RASPBERRY ICE CREAM
    350g tub frozen raspberries, thawed then pushed through a sieve (discard the seeds)
    100g icing sugar stirred into the raspberry puree
    400ml double cream
    100ml full-fat greek yogurt
    2 tablespoons of vodka or gin or invert sugar syrup

    In a stand mixer with the paddle attachment, beat all the ingredients until aerated and thick. Ideally churn using an ice cream machine otherwise transfer to a freezerproof container with a lid and freeze overnight until completely firm.

    FOR THE MINT CHOC CHIP ICE CREAM
    350ml double cream
    397g can condensed milk
    1/4-1/2 capful of peppermint extract
    50g dark chocolate, finely chopped
    +/- green food colouring

    In a stand mixer with the paddle attachment, beat all the ingredients until aerated and thick. Add the chocolate chips. Transfer to a freezerproof container with a lid and freeze overnight until completely firm.

    To make the ice cream cookie sandwiches, take the ice cream out of the freezer at least 10 minutes before needed (sometimes they need much longer). Use a spoon to scoop out flattish scoops of ice cream; place onto the bottom side of a cookie and top with a second cookie. Eat immediately or put on a tray and freeze again for up to 24 hours.

    sandwich-3


  5. Photos from Svalbard

    July 31, 2016 by sarah

    After a couple of weeks I have finally finished my photos from Svalbard. I was a bit of a mammoth operation, getting over 5500 photos down to 2000 – don’t worry, I’ve got it to about 150 photos for this gallery! Please enjoy looking at them. We are having a few printed in special ways so we can finally put some of our own art work on the walls rather than complaining ‘we can do that, and better’!!!

    This is the first time I have used a gallery within WordPress – please let me know what you think. If you’d like to view the pictures full page, click on one and then you can use the right and left buttons on your keyboard to scroll forward and back. I haven’t worked out how to make it do an automatic slideshow yet!


  6. A lovely evening of live music

    July 24, 2016 by sarah

    Last night we spent a lovely summers evening listening to the ‘Budapest Cafe Orchestra’ in a local village hall. It really was an eclectic mix of toe tapping and hand clapping music!

    music music-2 music-3 music-4


  7. Lets go fly!

    June 21, 2016 by sarah

    Jim treated me to a lovely day flying as it was my day off today. We flew to Duxford, where the Imperial War Museum is based and landed behind a catalina, where we spent a couple of hours looking around and had lunch (ribs!). Then flew off over the Suffolk countryside, a quick fly-by of Hamish on his boat and then back home just in time before the airfield closed. Wow, I’m tired and Jim must be even more but what a lovely day out!

    DSCN6051 DSCN6058 DSCN6059 DSCN6062 DSCN6063 DSCN6065 DSCN6067 DSCN6070 DSCN6072 DSCN6073 DSCN6076 DSCN6086 DSCN6088


  8. More jewellery making!

    June 5, 2016 by sarah

    I spent another enjoyable day making jewellery, this time using something called ‘silver clay’. It is silver held within a binding compound which allows you to mold, sculpt and generally mess around with it as it handles like a clay. But when fired (which can be done with a blow torch for small pieces), you are left with something which is 99% pure silver! Isn’t that brilliant!  It is much easier to pick up than traditional silver smithing techniques and I can see many applications of this to play with but I don’t think it would replace traditional techniques: it is complementary. And probably a dangerous habit considering the cost!

    feather


    I have a small amount of clay left so I am thinking of making some small charms, perhaps even a honey bee!


  9. Marshmallows

    May 31, 2016 by sarah

    I have to admit now, before we go any further, I do not like marshmallows. Except the seriously caramilised (burnt) type on the end of a stick and something to do with a camp fire – those I can take in small doses. But a raw bouncy, squidgy marshmallow just does not do it for me. They tend to be insipid in taste, overwhelmingly sugary and have the texture of a gymnastics mat. I even bought some expensive hand-made ones from La Pâtisserie de Rêves the last time I was in London – they were disgusting AND expensive! Not very promising for a weekend treat, I hear you cry! Well after having made them, my way, I may be converted… just a little. And they look very pretty!

    marshmallow-2


    Feel free to use whatever freeze dried fruit you can find. Most supermarkets sell some now but I get mine online from Healthy Supplies as they have a fabulous selection at good prices. I have been disappointed with the flavour of freeze-dried fruit in chocolate ganaches – it tastes kind of ‘green’ and not at all like the fruit it is supposed to. So these marshmallows are a good use of the freeze-dried fruit as the flavour is actually intensified in them.

    marshmallow-4

    Raspberry Marshmallows

    Makes lots (about 30 portions), takes about 30 minutes.

    Handful of freeze-dried raspberries
    3 tablespoons of freeze-dried raspberry powder
    2 tablespoons icing sugar
    2 tablespoons cornflour
    8 gelatine leaves
    450g granulated sugar
    1 tablespoon glucose syrup
    3 large egg whites (about 120g)

    – Line the base a sides of a large roasting tin (about 20x30cm, but it doesn’t matter too much) with non-stick baking parchment.
    – In a small bowl, mix one tablespoon of the raspberry powder with the icing sugar and corn flour. Sieve half of this mixture into the base of the lined tin so it is evenly covered.
    – In another small bowl, sit the gelatine leaves in COLD water.
    – In a heavy based pan on a medium heat, heat the granulated sugar, glucose syrup and 150ml water, stirring until it is all dissolved. Bring this sugar syrup to the boil, do not stir any more and continue to boil until it reaches 116°C.
    – While the sugar is doing it thing, in a stand mixer, whisk the egg whites until they form soft peaks.
    – Once the sugar syrup reaches the correct temperature, take it off the heat and leave it to sit for a couple of minutes.
    – Remove the gelatine leaves from the water, squeeze out as much water as possible and pat dry with kitchen paper. Add the gelatine to the sugar and stir until melted.
    – With the mixer on slow, trickle the sugar syrup over the beaten egg whites (try to miss the whisk otherwise it gets messy). Once it is all added, turn the mixer up to high and beat until the marshmallow is thick, light and cool to touch.
    – Add the rest of the raspberry power and whole raspberries.
    – Pour this into the prepared tin, tapping it flat, and leave to set overnight.
    – Cover a chopping board with non-stick parchment and sieve over the remaining powdered raspberry/icing sugar/cornflour mix. Turn the tray of marshmallow out on to this and cut into desired sizes, rolling in the dust as you go along.

    marshmallow-5 marshmallow-3 marshmallow


  10. A jewellery making weekend

    May 17, 2016 by sarah

    I was wondering at the weekend, while on a silver jewellery course, do I need another craft or hobby? The answer should probably be no but I can’t stop making things! I find it fascinating finding out about new crafts to do and make, especially if they have an ancient basis. I have long wanted to do some jewellery making; I dabbled in beading to make my jewellery for my wedding. But I wanted to learn how to do it properly. So I spent this past weekend on a silver jewellery making course with Stephen O’Keeffe at Missenden Abbey. I can highly recommend this course and the sketching with water colours I did last year; in fact, probably any of their courses would be great fun to do and I circled at least half a dozen in the brochure. The sad thing is I have just received an email saying that they are closing down and this is the last year they are running courses. Very sad, but then they are not advertising properly or to the right people.

    jewellery


    This is the silver bracelet that I spent most of the weekend making. Can you believe it is made only from silver wire? To make this the wire had to be soldered into rings, linking them together as I went along, and then they were shaped on molds (different sized bolts) – this was the most delicate bit and I snapped a couple of the hearts when trying to get a nice sharp shape. Finally I made the toggle catch – it looks like a ships anchor! Actually the mini heart earrings I made to go with it are even harder to make and fiddly – I nearly melted them while joining on the backs!

    jewellery-2


    Our first project was a ring which is actually surprisingly easy to make but with my thin fingers, the ring had not been hammered to proper thickness and pattern all the way round before it was already too big. So the kink was put in which actually means it sits better on my finger. I don’t think I could be a hand model though!

    jewellery-6 jewellery-7