RSS Feed

Posts Tagged ‘others’

  1. Homemade Coffee Liqueur

    October 29, 2014 by sarah

    A disaster occurred the Keir household last month – I let the drinks cabinet run out of Kahlua! I should explain this idiosyncrasy A white Russian is my husbands favourite drink for winding down, and although we don’t drink that much (no really, despite all the homemade wine), his little weekend cocktail keeps him happy. I think it is partially due to feeling more like ‘The Dude’ a.k.a. Jeff Bridges in ‘The Big Lebowski’, though personally I think the cat would be a better Jeff Bridge dude double.

    Although this recipe is not a quick fix for absent Kahlua, it was easier than battling through the supermarket AND it is infinitely customisable – more sugar/less sugar/more vanilla etc, no problem. Just use this ‘recipe’ as a guide and experiment in liqueur making. Non-perfect concoctions are still drinkable and can still be modified if found lacking.

    coffee-001

    Homemade Coffee Liqueur

    2 handfuls roasted coffee beans, crushed or roughly ground
    100g soft brown sugar
    250ml good quality vodka
    250ml rum
    1 vanilla bean
     
    In a large jar with a well fitting lid and wide top. I used an IKEA Korken jar which has a flip up lid with rubber seal (like a Kilner jar but much cheaper).
    Place all the ingredients into the jar and shake. Shake the jar daily for a week, weekly for a month then leave to steep for a month or two more. I recommend tasting it before getting to this stage to check the sugar levels etc. When deemed ready, or required, strain the liquid through a fine muslin or clean/new pair of tights into a clean bottle with a stopper.
    Enjoy!
     
    coffee-002

  2. Asian-Style Damson Sauce

    October 22, 2014 by sarah

    While clearing out the freezer to make space for this autumn’s harvest, I came across a couple of bags of stewed damsons from last year’s gut. While racking my brain for some more unusual damson recipes, I did a Google search and found this recipe on Love and Olive Oil. The recipe was in typical American inaccurate slash annoying cup measurements and lacked any spices so I measured and added some spices and this is what I came up with. I am totally smitten with deep plumy red colour. It tastes like a cross between a fruity HP sauce (mmmmm, my favourite chip sauce) and a less spiced chutney. Apart from chips, I will be trying it with grilled dark meats and especially venison steaks. I need a trip to the supermarket then. Again.

    asian plum sauce-001 asian plum sauce-004

    Asian-Style Damson Sauce

    Makes 4 small jars.
    1kg damsons
    1 small onion or half a large one, finely chopped
    2 cloves garlic, finely chopped
    1″ fresh ginger, peeled and finely grated
    200g soft brown sugar
    125ml cider vinegar
    1 teaspoon salt
    tied into muslin – 3 star anise, 1/2 teaspoon black peppercorns, 3 dried hot chilies or 1/2 teaspoon chili flakes, 1/2 teaspoon schezuan pepper, 1/2 teaspoon fennel seeds
     
    Place the damsons in a large saucepan and add 100ml water. Cook for 15-20 minutes until very soft. Allow to cool a little then, wearing rubber gloves, pick out the stones. Alternatively, press the stewed damsons through a sieve and discard the stones.
    In the large pan with the de-stoned damsons, add the rest of the ingredients and bring to the boil. 
    Simmer gently for about an hour, stirring frequently so the bottom doesn’t catch, until the sauce is thick and syrupy. It is not like a chutney so do not expect to be able to draw a line through it.
    Sterilise some small jars with vinegar proof lids. Using a funnel, fill the warm sterilised jars to within half a centimeter of the top of the jar and tighten the lids. Leave to cool entirely before labelling. Store for a couple of months before using and once a jar is open, store in the fridge and use within a month.
     
    asian plum sauce-003

  3. Fruits of autumn – Spiced Damson Chutney

    September 27, 2014 by sarah

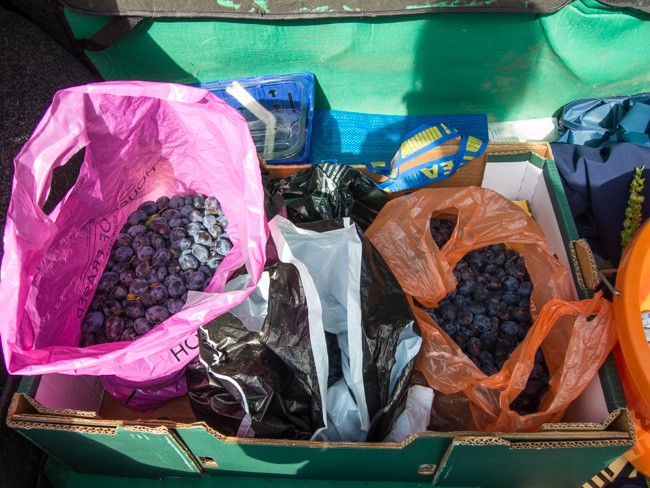
    For the past few years our annual autumn pilgrimage has been to a National Trust property south of London, in which car park contains several large and very productive damson trees. Every year we have visited the damsons have been left to rot and fall off so we don’t at all feel guilty filling a couple of carrier bags worth; call it membership benefits. The first year we found this secret source was quite by chance and we most definitely are going to keep it secret. This year I saw tiny trays of damsons in sale in Tesco for a horrendous sum. But I do wish there was somewhere closer to pick or acquire them.

    damson-003

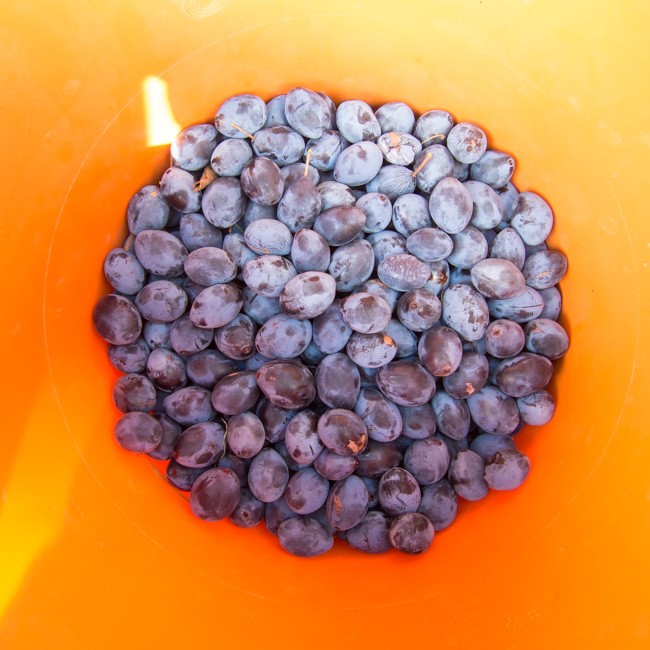
    Damsons are a subspecies of plums; the fruits are smaller than typical plums with a tart sourness that when cooked makes the most delicious rich fruity flavour with a tang. One or two types can be eaten raw, including the ones we liberated which I think are ‘Merryweather’. Damsons were once widely grown, including in nearby Buckinghamshire, until falling out of favour post Second World War. Did you know that they were used to dye cloth and straw for hats and were used to produce the khaki green of uniforms in the First World War?

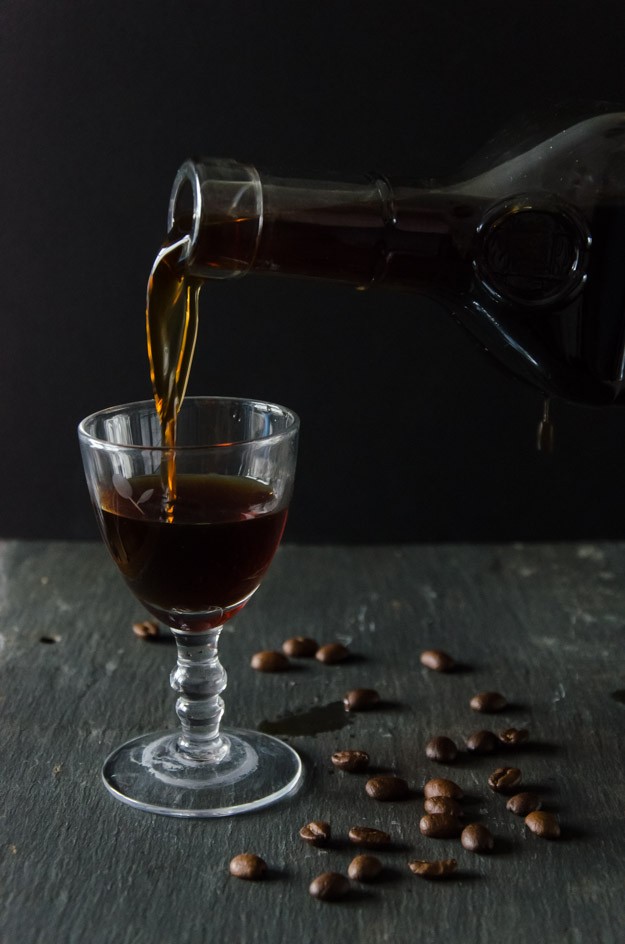
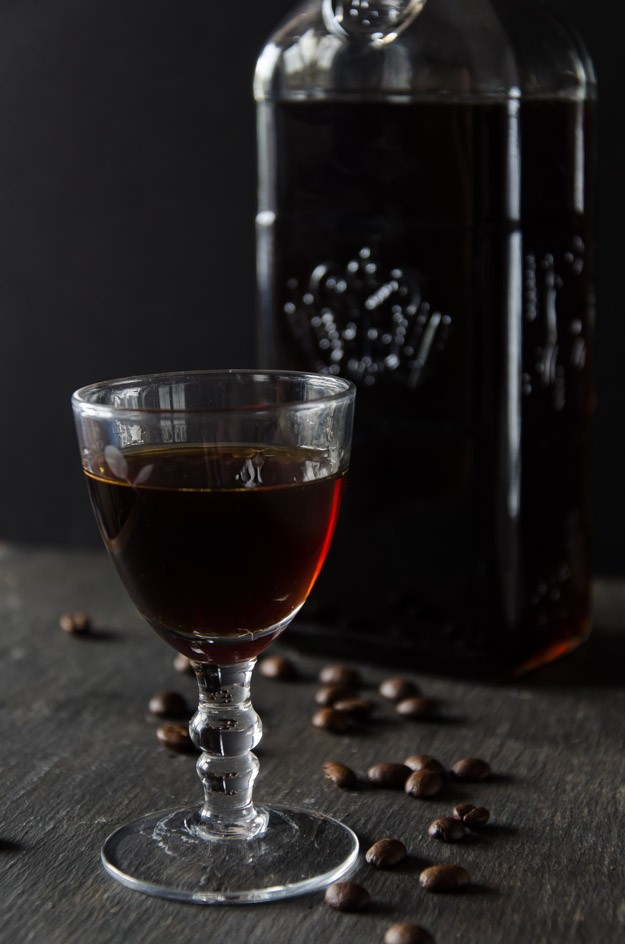
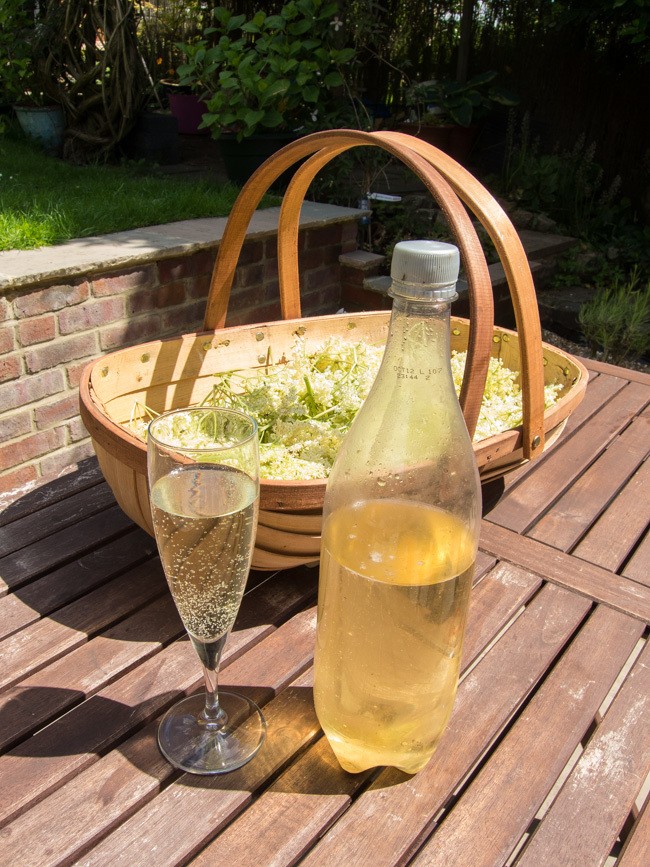
    We use our damsons to make the most delicious wine, jam and jelly. Because the fruit is high in pectin and acid, it sets very easily to make a delicious jam or jelly without additional pectin or lemon juice. The only pain is stoning them which is fiddly because the fruit clings to the stone so by far the easiest way, whatever recipe you are using, is to stew them first, mash with a potato masher, don rubber gloves and go fishing for the stones. Tedious but well worth it. The damson wine we made last year was the most successful of the homemade wines we have ever made and won me first place and a trophy at the local show. There are two fresh demi-johns on the go as I type this, bubbling away in the corner. There are numerous other ways of using this glut of fruit; damson ice-cream, damson crumble, damson gin, damson cheese, damson sauce (particularly good with gammon and game, like cranberry relish).

    damson-004

    This recipe is courtesy of the queen of cooking, Delia Smith.

    Spiced Damson Chutney

    1.5kg damsons
    2 heaped teaspoons ground ginger
    2 cinnamon sticks
    25g allspice berries
    1 tablespoon cloves
    2 star anise
    1.2 litres vinegar – cider or white wine vinegar have the best flavour
    450g cooking apples, peeled and cored
    3 onions, peeled
    3 cloves of garlic, peeled and crushed
    450g seedless raisins
    900g sugar – mixture of at least half soft brown and granulated sugar
    2 tablespoons salt
     
    Stew the damsons gently with 250ml of the vinegar until very soft. Leave to cool then, wearing rubber gloves, fish out all the stones.
    Put the stewed stoned damsons into a large preserving pan. Finely chop the apples and onions (using a food processor is perfect) and add to the pan.
    Tie the spices together in muslin with string, drop the spice bag into the pan and tie the other end of the string to handle of the pan.
    Add all the other ingredients and stir well.
    Bring to the boil and reduce the heat down so the pot gently simmers away for 3 to 4 hours. You need to stir fairly often and almost continuously for the last couple of hours because like all chutneys it tends to stick to the bottom of the pan – you don’t want burnt chutney.
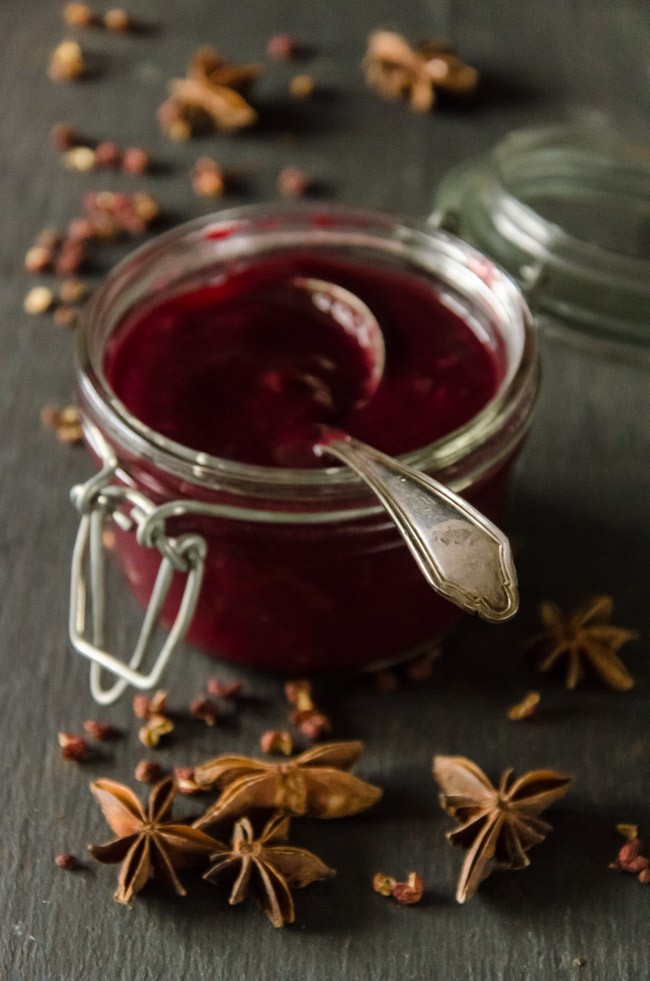
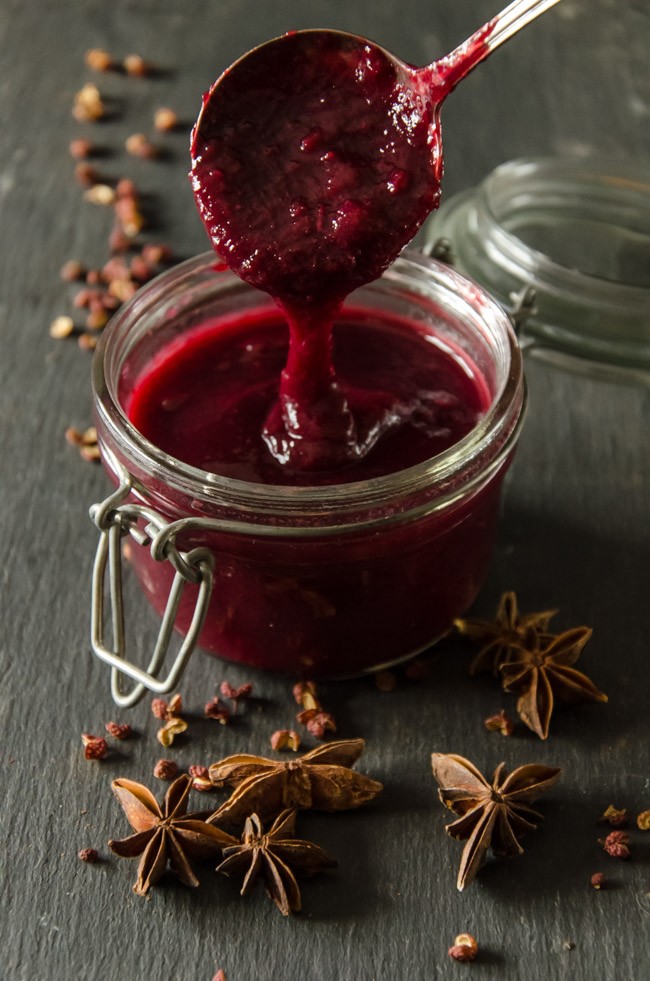
    You will know the chutney is ready for potting when a channel drawn across the top stays in place for 5 seconds or so and does not fill with liquid (the vinegar).
    While it is still warm, pot into hot sterilised jars , filling to within 10 milimetres of the top. Cover with a waxed disc and seal with a vinegar-proof lid.
    Leave to cool entirely before labelling. This chutney needs to mature for at least 3 months before eating.
     
    damson-001

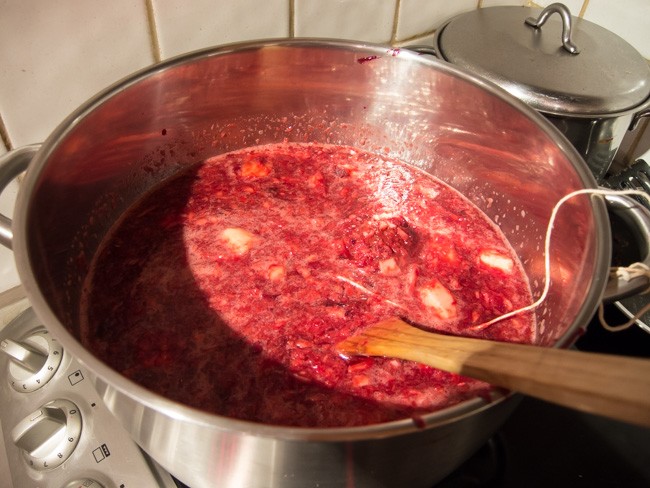
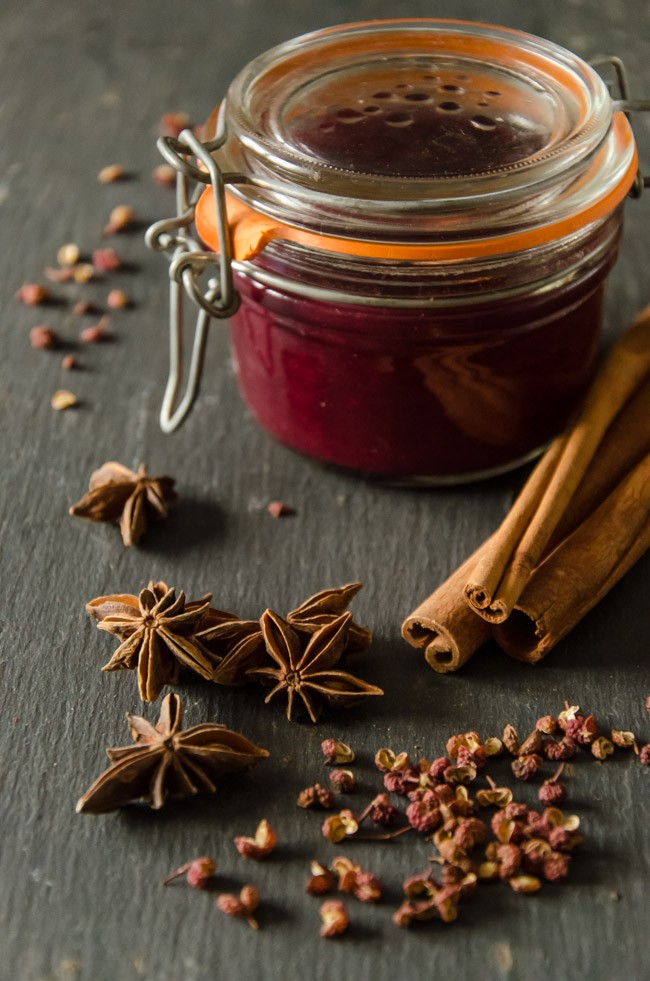
    The start of cooking.

    damson-002

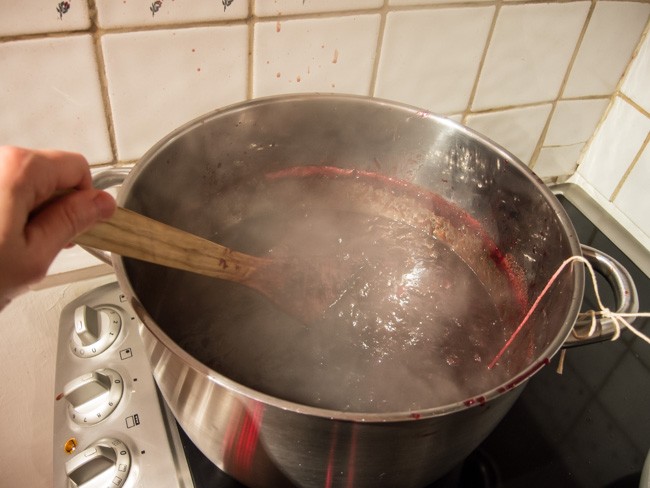
    Trying to show you when the chutney is ready for potting but the steam kept getting in the way!


  4. Stuffed Courgette Flowers

    August 17, 2014 by sarah

    Nothing says high summer more than a glut of courgettes from the garden. A few days before we went away for our break in Dorset a few weeks ago, I made this recipe to try and stem the flow of courgettes that would turn into marrows while we were away. It worked and we had a delicious dinner out of it too. Doubly good!

    courgette-1776

    Stuffed Courgette Flowers

    8-10 courgette flowers, ideally with little courgettes attached but the flowers still fresh
    1-2L sunflower oil for frying
    200g tub ricotta cheese
    4 tablespoons freshly grated Parmesan
    1 tbsp finely chopped chives and same of mint
    zest of half a lemon
    4 tbsp plain flour
    1 tbsp corn flour
    1/2 tsp baking powder
    1/2 tsp salt
     
    courgette-1769
     
    Prepare the flowers by opening them up carefully and shaking out any bugs, but do not wash them.
    Mix the cheeses, herbs and lemon zest in a bowl. Taste and season – will probably need some salt and quite a bit of pepper.
    Fill the flowers with the mixture, being careful not to split them and twist the tips of the petals together to seal.
    Make the batter by putting the flours, baking powder and salt into a bowl and whisking to remove lumps. Then whisk in enough ice cold water until consistency of single cream i.e. pretty thin.
    Heat the oil in a deep sided pan until it reaches 180 ºC on a thermometer.
    Quickly dip a stuffed courgette flower into the batter, allow the worst of drips to come off and then carefully drop into the hot oil.
    Only cook a few at a time so the pan is not over crowded. They need a couple of minutes on both sides until golden and crisp.
    Drain on kitchen paper while cooking the rest.
    Serve immediately with a fresh salad and a cold glass of vino!
     
    courgette-1771

  5. Elderflower champagne and cordial

    May 31, 2014 by sarah

    Late May into mid-June, depending on the weather that year, is elderflower time. And that is a very important time for me because it means it is time to make my own home brewed alcoholic beverage that is elderflower champagne. To me it marks the start of summer as they only flower when there has been enough sunshine. I have just finished the last bottle of last years brew and the date on it was July as last spring was awful. It is a delight to see the hedges filled with frilly lace caps of the elderflower heads and I start planning how many litres of the stuff I will make and if I have enough sugar and the lemons… The best time to pick the flowers is late morning on a dry, sunny day. You need a few hours of sun on the flowers to bring out the aroma but not too much otherwise they turn musky, almost a cat-pee smell, and I can’t image that is nice to drink. The best flowers are the ones that are still creamy coloured and not all the individual flowers have opened on the head; avoid the bright white or slightly brown heads as these are past their best. It is best to collect the flowers with scissors into a basket so that any insects drop off the flowers on the way home with your precious load. Use the flowers as soon as you have picked them. Remember not to pick all of the flowers as you want to be able to return in the autumn for the fruits!

    DSCN1500

    Last of last years champagne with the flowers picked for this year’s brew!


    A few care warnings about this brew. I have no idea how alcoholic it is. In fact, it seems to vary from batch to batch as to its leg wobbliness effects. It is very much like cider in its effects; its doesn’t taste alcoholic and goes down easy and you don’t realise it has any effect until you stand up! Also, and this is VERY important, the brew is highly explosive, especially for the first few weeks as the pressure builds up. For this reason I reuse plastic pop bottle because if they do go bang you don’t get shards of glass everywhere and with a screw cap you can gently release the pressure as necessary. For the first couple of weeks I keep the bottles in the kitchen and feel the bottles daily for the tenseness of the plastic and I tend to release the pressure daily for a week then every second day for another couple of weeks until noticing that they are not completely taught when ready to be released. They perhaps get one more release before being stored somewhere cool and dark.

    I also make several litres of elderflower cordial which is a wonderfully fragrant ingredient for flavouring ice creams, panna cottas, other creamy desserts such as cheesecakes and the perfect pairing with gooseberries (which annoyingly come a few weeks later so the cordial is a great way to store the flavour until the gooseberries are ready for their turn). I also love the cordial diluted down with ice cold sparkling water; a refreshing summer spritzer. I have seen recipes for deep-fried elderflowers or fritters and I am dying to try them, if only I get long enough off work to pick some more flowers!

    This year I have also made a variation on the champagne theme as my parents brought me a huge bag of rhubarb from Scotland. So there are also 3 bottles of rhubarb champagne to try in a few weeks. It is a pretty pink colour. Anyone for a glass?


    Elderflower Champagne

    1 kg granulated sugar
    juice and zest of 4 lemons (organic, wax-less)
    2 tablespoons white wine vinegar
    about 30 elderflower heads – shake to dislodge insects before adding
    a teaspoon of wine yeast or a few pinches of baking yeast
     
    Boil 4 litres of water in a pan.
    In a large clean bucket, tip the sugar and then the hot/almost boiling water over the top. Use a clean spoon and stir until the sugar has dissolved. Add another 2 litres of water to the bucket.
    Allow this to cool to tepid/luke warm before adding the lemon juice, vinegar and elderflowers. Stir in the yeast.
    Cover with a lid or clean tea towel and stir daily.
    After 5-7 days when the brew is bubbling away well, strain the brew through a sieve lined with muslin and decant into sterilised bottles (I sterilise mine with Milton tablets and rinse out with a little boiled water so as not to taint the taste).
    Do the pressure releasing as described above and wait at least a few weeks before drinking; it is best served very cold and open the bottle very slowly so the yeast that collects in the bottom does not rise. It will keep in a cool, dry place for up to a year.
     
    DSCN1504

    The champagne bucket!

    Elderflower Cordial

     
    1 kg granulated sugar
     zest of 2 lemons which then sliced roughly
    25g citric acid (available in Wilkinsons)
    30 plus elderflower heads – more is easily acceptable
     
    Boil 1.5 litres of water. In a large clean bucket or bowl, tip the sugar and then pour the boiling water over; stir until the sugar has dissolved.
    Leave to cool and then add the other ingredients. Stir at least once daily for 5 days. Strain through a sieve lined with muslin and decant into sterilised bottles.
    This will keep in the fridge for a few weeks or in the freezer indefinitely. Remember if freezing, leave a little space at the top of the bottle for expansion.
     

    Rhubarb Champagne

     
    2kg rhubarb, roughly chopped
    2 lemons roughly chopped
    2 tablespoons of white wine vinegar
    1.5kg granulated sugar
    1 teaspoon wine yeast or few pinches of baking yeast
     
    Boil 4 litres of water.

    In a large clean bucket, tip the sugar and then the hot/almost boiling water over the top. Use a clean spoon and stir until the sugar has dissolved. Add another 2 litres of water to the bucket. Add the rhubarb now (unlike the elderflower champagne).
    Allow this to cool to tepid/luke warm before adding the lemons, vinegar and yeast.
    Cover with a lid or clean tea towel and stir daily.
    After 5-7 days when the brew is bubbling away well, scoop out the rhubarb with a slotted spoon and strain the brew through a sieve lined with muslin and decant into sterilised bottles (I sterilise mine with Milton tablets and rinse out with a little boiled water so as not to taint the taste).
    Do the pressure releasing as described above and wait at least a few weeks before drinking; it is best served very cold.
     
    DSCN1494

    Rhubarb champagne freshly bottled.


  6. All the greens of Spring

    May 14, 2014 by sarah

    Having just come back from foreign climes, where the environment is much more arid than home, means I am fully reveling in the luscious greenness that is May in England. No dusty or faded colours paint the landscape green here. It is as if everything has been slapped with the freshest glossiest paint of every green shade imaginable. The frothy lace of cow slips fills the gap between hedge and path and hawthorn blossoms drip from every branch above and delicately fragrances the air. It seems I am not the only one rejoicing in the fullness of Spring; every little bird is singing at the top of his little voice as he flits from bush to bush busying himself with household chores. And the cows are chasing us along the footpath, though as I turn to confront them the breaks are applied so suddenly as to make the ground thunder under their hooves. What joys!


    spring (7 of 7) spring (6 of 7)


    We are incredibly lucky to be living near one of the best bluebell woodlands in the country at Ashridge Estate. My heart was beating with anticipated excitement as we drove through the prettiest little village of Aldbury to get to Ashridge. And then it gave a little skip as we turned a corner on the path and there was the most amazing surreal blue sea spread out below the fresh young green of the tall beech trees. There was a fantastic display this year and yet every year it surprises me at how blue it all is. In another week or two it will be just a memory again.

    spring (2 of 7)

    While at Ashridge, we picked some wild garlic leaves as I always had in the back of mind that there must be something of use in them seeing as how they smell so strongly as you brush past on the footpath. And boy, I was not disappointed; raw the crisp leaves are crunchier than spinach with a green taste and pungent aroma of garlic; cooked, the softness is comparable to spinach and the garlic is tempered to a light scent. I ate handfuls straight from the carrier bag; I had leaves folded into a soft egg omelet. I was still left with half a carrier bag and yet wanting to preserve their uniqueness for longer than the leaves would last even in the fridge. And then I remembered a dish that John Wright from River Cottage cooked us when we went on the River Cottage hedgerow course a few years ago; wild garlic pesto. Of course, John made his with pig nuts which we spent many happy hours digging out of their water meadow but in real life only a sadist would want to waste time digging up a tiny pea sized bulb of a plant to make a dish. (Sadly, I have been known to go to such lengths) So I made mine with walnuts brought back from Iran, and I have to say I do not think the recipe suffered for the change. Indeed, if the feeling takes you then please make fresh gnocchi for the second recipe but also do not feel guilty using good quality ready made gnocchi; I don’t.

    spring (9 of 3) spring (8 of 3)

    Wild Garlic Pesto

    60g young wild garlic leaves (please look this up in a book to be sure what you are picking)
    1 small garlic clove (if you don’t think the leaves are garlicky enough!)
    50g nuts – pine nuts are traditional but walnuts, hazelnuts or almonds would work
    60g parmesan cheese finely grated
    zest of half a lemon
    150-200ml light olive oil or rapeseed oil (do not use virgin olive oil, you will not taste it)
     
    In a small food processor, blitz the garlic leaves and garlic clove with a good glug of the oil.When chopped down, add the nuts and blitz again until the nuts are fine. Add the cheese, lemon zest and a good pinch of sea salt and blitz again to mix. Add the remaining oil in small lots until the desired consistency is reached. Store in a sterilised jar with more oil over the top. Keep in the fridge and use within 2 weeks.
     
    spring (10 of 3)

    Gnocchi Primivera

    A 300g packet of fresh gnocchi (do not use the long-life vacuum packed packets in the pasta isle)
    2 tablespoons of fresh wild garlic pesto
    100g English asparagus
    a good shaving of fresh parmesan
     
    Cook the gnocchi according to the packet – using just dump them in boiling water and they are ready when they float. Steam the asparagus. Drain, reserving a little of the boiling water.
    Put the gnocchi back in the pan with the asparagus which you have chopped into short batons and stir through the pesto.
    Serve up and liberally sprinkle over large shavings of parmesan.
    Put the gnocchi

  7. Appletini Time

    May 9, 2014 by sarah

    It is Friday evening and that means cocktail time! Only kidding, but it is a good way to start the weekend. This recipe is deliciously fruity and a bit sour, my favourite combination in a cocktail.

    apple martini (4 of 5)

    Apple Martini

     
    Combine 2oz vodka and 1oz green apple snapps in a cocktail shaker and fill with ice. Shake until well chilled. Pour into a cocktail glass and top up with fresh apple juice. My personal preference is about 50% alcohol to 50% apple juice and some more ice. Garnish with green apple slices.
     
    apple martini (3 of 5)
     

  8. Salted Caramel Popcorn

    April 12, 2014 by sarah

    It is Saturday night and to me that means movie night. These days it is most often an ‘at home’ movie on DVD rather than a cinema experience. Apart from a special trip to The Rex, I don’t like going to the odious Odeon or the cynical Cineworld; over priced tickets for a standard chair, sticky carpets covered in popcorn, noisy customers, and no bar! Not nearly as pleasant as our own sofa, glass of wine in hand and a bowl of this delicious popcorn. I guess this is why our DVD collection would rival that of a well stocked rental shop!

    By the way, if you haven’t been to The Rex, you really MUST!

    popcorn (1 of 2)

    Salted Caramel Popcorn

    100g butter
    100g soft brown sugar
    2 tablespoons golden syrup
    1-2 teaspoons sea salt, depending on taste
     
    Make a batch of popcorn, either old fashioned in a pan or a bag of plain microwave popcorn.
    Oil a large baking tray and tip over the popcorn, discarding any unpopped kernels. Preheat the oven to fan 160 ºC.
    Melt the butter, sugar and syrup in a small pan, stir until melted and then boil for 4 minutes.
    Pour this sauce over the popcorn and toss with 2 spoons (it will be VERY hot and cause burns) until the popcorn is coated or the sauce goes stiff.
    Pu the tossed popcorn in the preheated oven for 5 minutes. Take out and toss again, sprinkle over the salt and cook for another 5 minutes. Repeat again if the popcorn isn’t evenly coated.
    Leave to cool for 10 minutes before attempting to eat – otherwise you WILL burn your mouth!
     
    popcorn (2 of 2)

  9. Beetroot, Kale and Walnut Salad

    March 8, 2014 by sarah

    Winter is a tough time for salads; the seasonal ingredients are limited to brassicas and root vegetables and then the weather leaves you wanting nothing but stodgy comfort food. But I craved a salad this week and when I found a beautiful bunch of beetroot in the supermarket I knew I had the makings of a satisfying winter salad. My heart did a little leap for joy.

    _1SK4841


    If your experience of beetroot so far has been pickled beets from a jar or even the vacuum packed ones then you need to try cooking your own. The difference is like the difference between canned and fresh tuna; incomparable. And there really isn’t much hassle in their preparation and I actually quite like the ‘I’ve just murdered someone’ hands (or you could wear rubber gloves). I wonder if that could be a Halloween freak night event; preparing raw beets!

    Beetroot, kale and and walnut salad

    enough for 4 people as side salad or 2-3 as main event
     
    bunch of raw beetroots, about 500g
    1 tablespoon of olive oil
    1 teaspoon of cumin seeds
    bag of prepared kale, about 350g
    handful of walnuts, about 50g
    150g goats cheese – I used ewes milk Wensleydale as it was on offer
    lemon vinaigrette – juice of half a lemon, a splash of white wine vinegar, same volume of olive or virgin rapeseed oil, large pinch of salt
     
    Preheat the over to 200 °C (fan) and line a baking tray with foil. Clean the beetroots and trim off the tops and roots; cut into chunky wedges. Put on the foil lined baking tray and drizzle over the olive oil and cumin seeds; toss until well covered. Cook for 30-40 minutes until tender and slightly caramelised around the edges. While the oven is on and hot toast the walnuts for 5 minutes. All both to cool.
    Blanch the kale in boiling water for a minute, drain and dunk into cold water to stop the cooking. You then need to fully dry the kale; either put in a salad spinner, pat dry with clean tea towels or wrap in a clean tea towel and whizz around your head like a lasso (you may want to do this outside, and don’t let go).
    Make up the vinaigrette by whisking the ingredients together.
    Make up the salad by layering the kale on the bottom, followed by the beetroot, crumble over the cheese, toss over the walnuts and drizzle over the dressing. Enjoy!
     
    _1SK4932 _1SK4924
     

  10. Breakfast Pancakes

    March 2, 2014 by sarah

    Shrove Tuesday, alternatively known as ‘Pancake Day’ these days, is coming up this week so it is time to share a pancake recipe with you. These are not the pancakes of my youth and memories though I am still fond of the tart lemon and sweet sugar drenched crepe type and the excitement of trying to flip them! These pancakes are more of a macho breakfast type and indeed are the type to be found in American diners (or so I gather). They are similar to Scottish drop scones so I guess that is where they originated.

    This recipe is an adaption from the February edition of Waitrose Kitchen magazine. (Dangerous shopping there, but that is another story for another time). I bought buttermilk in readiness for making pancakes but I also made a second batch with an alternative to buttermilk and couldn’t tell the difference. If you don’t have buttermilk then either 1. add a couple of tablespoons of natural low fat yogurt to 250ml milk, or 2. add a good squeeze of lemon juice to 250ml milk (semi-skimmed or full fat) and leave to sit for 10 minutes before using. Some recipes also add a tablespoon or two of melted butter and this would enrich the batter but I try that for my recipe.

    I love the bursts of hot, sweet fruitiness from the blueberries but feel free to add other fruits; I am guessing that raspberries and chopped strawberries would go very well. If you do not add any fruit then try adding half a teaspoon of vanilla extract to flavour the mixture. How you serve these is entirely up to personal preference; my favourite is maple syrup and I finished off the last of the bottle today as I have been using most of it to top my morning porridge. Enjoy your lazy weekend mornings and have a proper breakfast!

    _1SK4879


    Breakfast Pancakes

    150g plain flour
    2 tablespoons of caster sugar
    1 teaspoon of baking powder
    1/4 teaspoon of bicarbonate of soda
    pinch of salt
    250ml buttermilk
    2 medium eggs
    handful of blueberries
    butter for frying the pancakes
     
    Mix together the dry ingredients in a medium sized mixing bowl. In a separate bowl or cup, break the eggs and whisk to break up the yolks. Pour the eggs and buttermilk over the dry ingredients and briefly mix with a whisk or fork but do not over mix – if should still be a little lumpy. Stir in the blueberries
    Heat a heavy based frying pan or cast-iron griddle until smoking hot then turn down to low. Add a knob of butter and spread around the pan. Blob in spoonfuls of the batter, leaving a good distance between they as the spread quite a bit. Leave to cook on the first side for 3-4 minutes until bubbles appear on the surface, then flip and cook on the other side for another 2-3 minutes. 
    The batter doesn’t keep so cook it all but the pancakes are easily warmed the next day in a low oven, microwave or even the toaster.
    _1SK4891